In this lesson, you will use the Symmetry modifier to create a corner cabinet.
Set up the lesson:
- Continue working on your scene from the previous lesson or
 open
kitcab_4.max.
open
kitcab_4.max.
Create a corner cabinet:
- In the viewport, make sure you are in Perspective view.
-
 Region-select all the cabinets in the scene, except for the 24 inch cabinet with the double doors.
 - Right-click and choose Display
 Hide Selection, so only the 24-inch cabinet is visible.
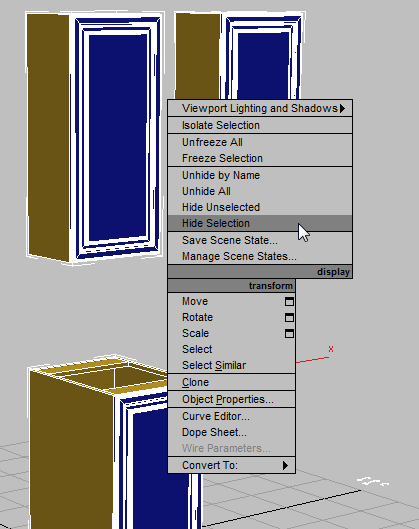
 Select the cabinet and Shift+drag the object on its X axis to the right.
 - In the Clone Options dialog Object group, choose Copy, and in the Name field, type LoCab_Corner, then click OK.
- Select, then hide the first 24-inch cabinet as you hid the others in step 3.
- Select the cloned cabinet.
- On the status bar, click
 (Absolute Mode Transform Type-In) to change to Offset transform mode.
(If you continued working from the previous lesson, Offset mode is already active.)
- Go to the
 Hierarchy panel and in the Adjust Pivot rollout Move/Rotate/Scale group, click Affect Object Only.
 This lets you move the object but not its pivot. In the next step, you will move the object so that its pivot point is at the cabinet’s back right corner.
- In the X transform field, type –12.0, then turn off Affect Object Only.

- On the ribbon Polygon Modeling panel, click Modify Mode, then activate
 (Element).
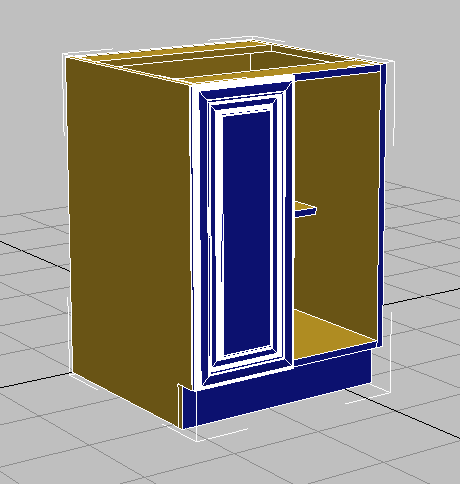
 - In the viewport, select the right-hand cabinet door, then press Delete.
A corner cabinet is typically 36 inches wide, so next you will expand the width of the cabinet.
Widen the cabinet and add the Symmetry modifier:
- In the viewport, switch to Top view, then
 zoom in on the cabinet.
 - On the ribbon Polygon Modeling panel, activate
 (Vertex).
 - Region-select all the vertices on the left side of the cabinet, including the entire door.
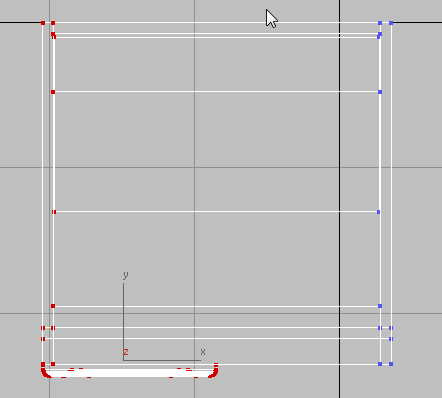
Top view of cabinet with all left vertices selected
- Activate
 (Select And Move).
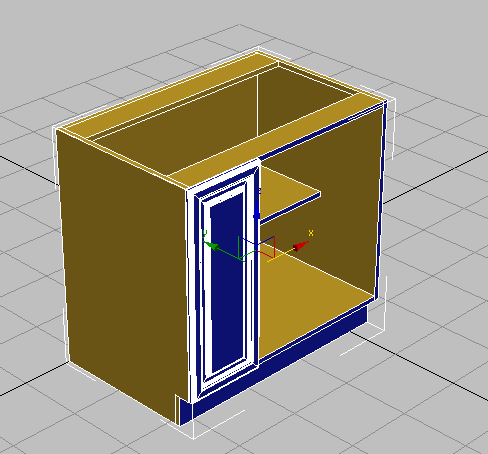
 - On the status bar, make sure the transform mode is Offset, then set the X transform field to –12.0.

Top view of cabinet after resizing
- On the ribbon Polygon Modeling panel, click
 (Vertex) again to exit the Vertex sub-object level.
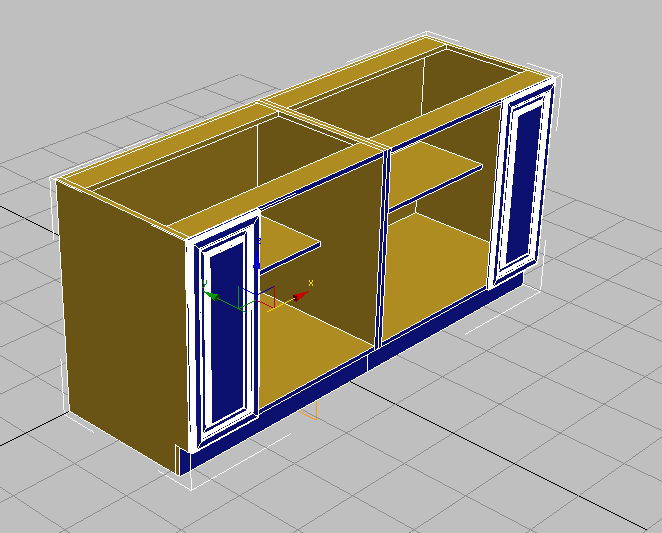
 - Use the ViewCube to return to the Home (Perspective) view. Change the view to Shaded + Edged Faces.
- Go to the
 Modify panel. On the Modifier List, choose Symmetry.
 The modifier gizmo displays in the viewport, oriented in the direction of the cabinet’s pivot point.
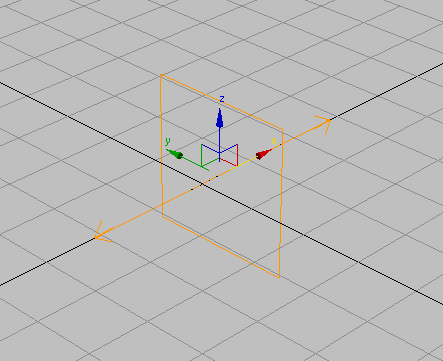
Symmetry gizmo displayed
- In the Parameters rollout Mirror Axis group, turn on Flip.
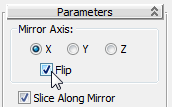
3ds Max flips the cabinet about its X axis.
- In the modifier stack,
 expand the Symmetry modifier, and click to highlight Mirror.
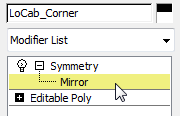
- On the main toolbar, turn on
 (Angle Snap Toggle), then activate
  (Select And Rotate).
 -
 Rotate the mirrored portion of the cabinet on its Z axis, and stop when you reach –45 degrees.
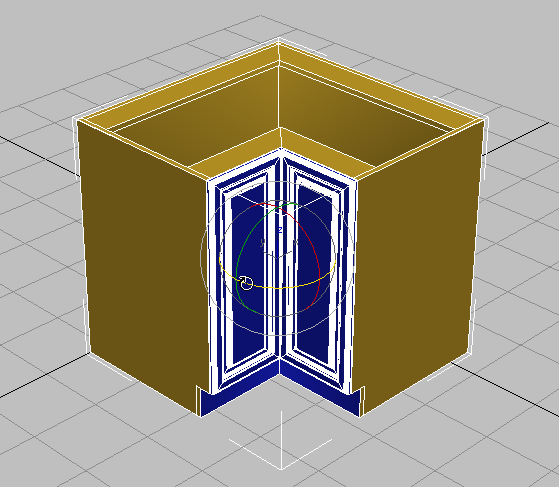
Save your work:
- Save your scene as my_kitcab_5.max.
To see how cabinets modeled using the ribbon can look in a completed scene,
open
kitchen_sample.max.
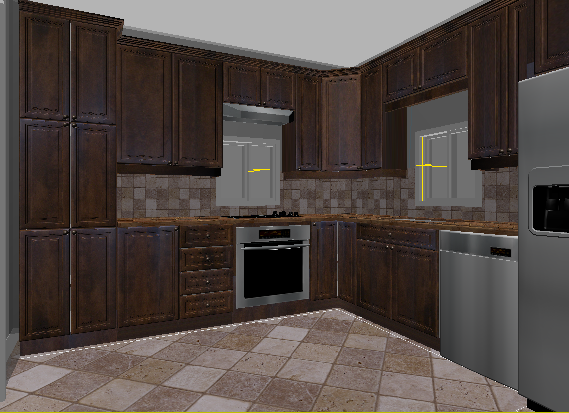
Kitchen cabinets in a completed scene, with shading
Summary
Throughout this tutorial, you used a number of modeling tools on the Graphite Modeling Tools ribbon to create a set of kitchen cabinets. While these tools are also available from the Command panel, the ribbon gives you faster access, in context, as you need them.
This tutorial only scratched the surface of the many ways in which the ribbon can be used for editing mesh and polygonal objects. For a full description of the ribbon tools, consult the 3ds Max help.