This lesson introduces the Populate tool, which provides an easy way to people a scene with animated characters.
The Populate tool adds pedestrians and standing or sitting idlers to a scene.
In this tutorial, you will learn how to:
- Add "flows" where characters can walk.
- Adjust the density of a flow.
- Add seats for sitting characters.
- Add an "idle area" where characters can linger and converse.
Skill level: Intermediate
Time to complete: 1/2 hour
Preparation for This Tutorial
- If you have not already downloaded the tutorial files (MAX scenes and other assets), download them now and unzip them into a project folder called \Autodesk 3ds Max 2016 tutorials. See Where to Find Tutorial Files.
- On the Quick Access toolbar, click
 (Project Folder) and set your current project to Autodesk 3ds Max 2016 Tutorials.
Set up the scene:
- On the Quick Access toolbar, click
 (Open File).
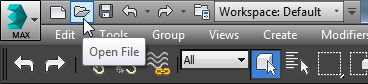
- In the \scenes\animation\populate folder, highlight
retail_district.max,
then click Open. Note: If a dialog asks whether you want to use the scene’s Gamma And LUT settings, accept the scene Gamma settings, and click OK. If a dialog asks whether to use the scene’s units, accept the scene units, and click OK.
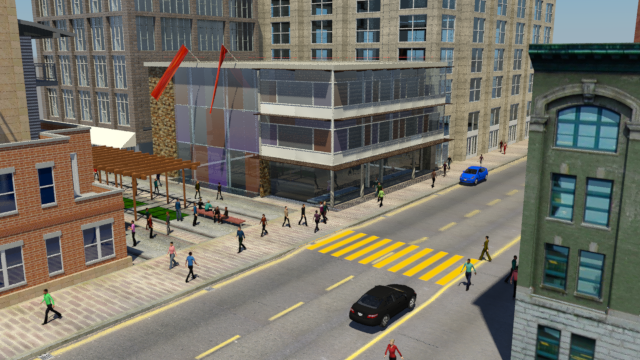
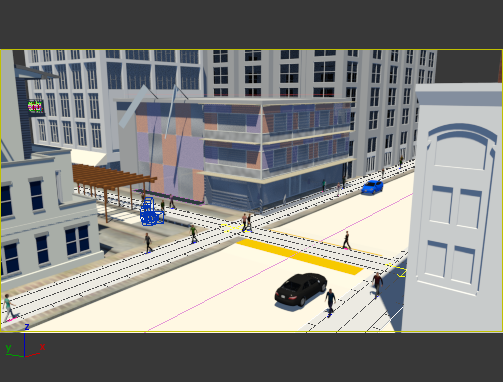
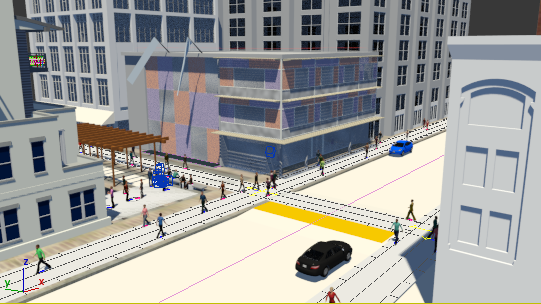
Rendering of the initial scene
The scene is an urban area with a street, sidewalks, and a pedestrian walkway.
Add a pedestrian flow for the far sidewalk:
- If the Ribbon is not currently displayed, then on the main toolbar click
 (Graphite Modeling Tools) to open it.
 Also, if the Ribbon is in a minimized state, click the
 expand/collapse icon until you can see all of the Ribbon.
 - Click the Populate tab.

The Ribbon's Populate tab contains a variety of controls for the Populate tool. Additional controls appear on the Modify panel.
- Activate the Top viewport and then click
 (Maximize Viewport Toggle) or press Alt+W to maximize the viewport.
 - On the Ribbon tab
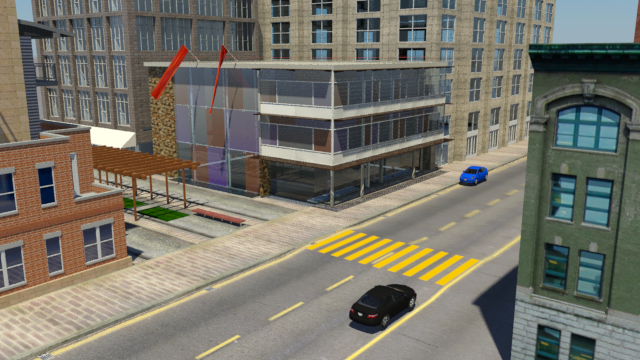
 Define Flows panel, click
  (Create Flow) to turn it on.
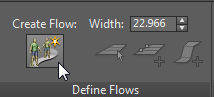
- Also on the Define Flows panel, change the Width of the flow to 12.
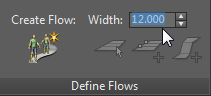
The scene is measured in feet, so the flow will be 12 feet wide.
- In the Top viewport, click once at the left end of the sidewalk to start the flow. Drag to the right, then press Shift and click again at the right end of the sidewalk to create a straight flow that parallels the street. Right-click to end flow creation.
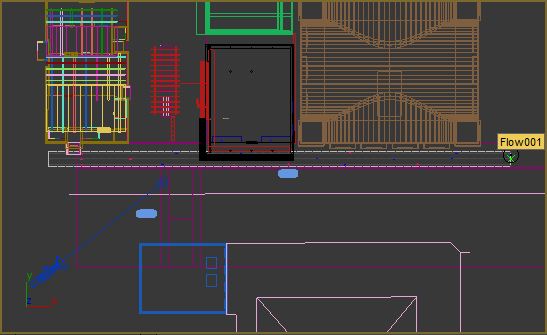
Pedestrian flow that parallels the far sidewalk
Note: Although we don't use the technique in this tutorial, when you create flows you can create multiple segments by dragging the mouse again after each click. Right-click when you are done.
Add a flow for the crosswalk and walkway:
- On the Define Flows panel, change the value of Width to 11.
Foot traffic on the pedestrian walkway will be a little narrower than on the main sidewalk.
- Make sure
 (Create Flow) is still on.
 - In the Top viewport, click just in front of the building whose wireframe color is blue, then drag upward, press Shift, and click again near the top of the walkway to create another straight flow that intersects the first one. Right-click to end flow creation.
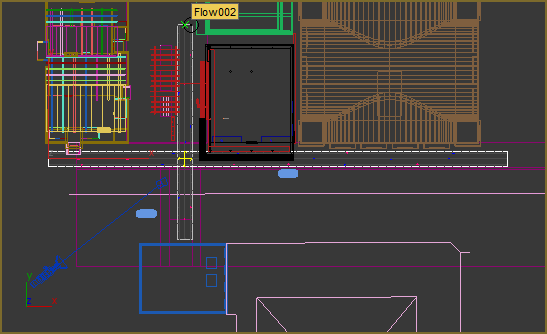
A second flow for the crosswalk and walkway intersects the first.
Notice how Populate displays four-way arrows where the flows cross each other.
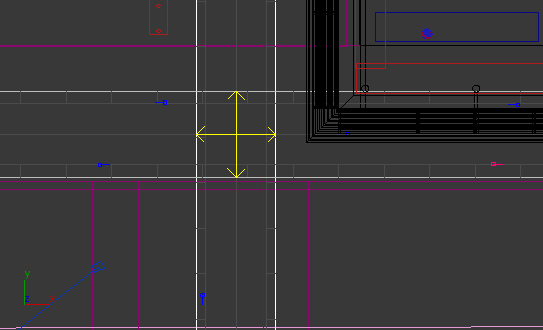
It is important to make sure these arrows appear: If you don't see them, it means the flows did not intersect correctly. When the intersection is incorrect, pedestrians on one flow might walk through pedestrians on the other!
The angle between intersecting flows can be between 45 and 135 degrees. Pedestrians that encounter the intersection sometimes change direction and turn left or right instead of continuing ahead.
Add a flow for the near sidewalk:
- Make sure (Create Flow) is still on.
- On the Define Flows panel, change the value of Width back to 12.
- Click in the Top viewport to create a flow along the near sidewalk. Make sure that arrows appear where it intersects with the crosswalk/walkway flow. If the new flow is too close to the starting point of the previous one, Populate won't generate the intersection correctly.
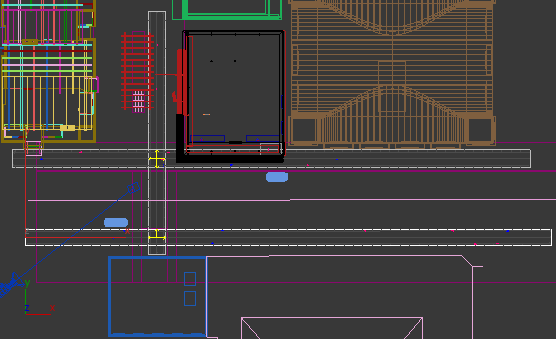
Flow for the near sidewalk intersects the flow from the crosswalk.
In this case, the intersection shows only three arrows, because the crosswalk/walkway intersection is near the end of the crosswalk flow.

- Click (Create Flow) again to turn it off.
- Click (Maximize Viewport Toggle) to see all four viewports again.
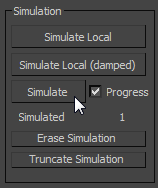
Create the Populate simulation:
- On the Populate tab Simulate panel, click
 .
. 
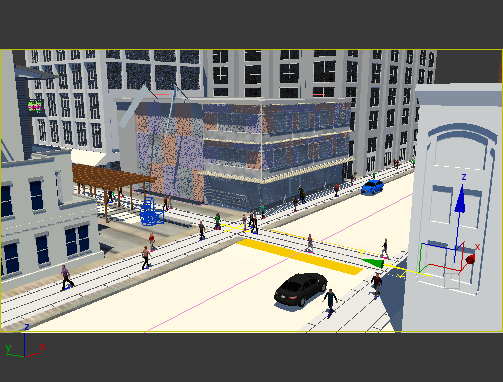
After some calculation time, Populate places animated characters in the placeholder locations. While it creates the simulation, a progress bar appears in the status line area at the bottom of the 3ds Max window.

When the calculation is complete, the sidewalks, crosswalks, and walkway have people walking along them
You can scrub the time slider or click
 (Play) to watch the animation. The image in the shaded Camera001 view might degrade quickly, though, because there is now a lot of geometry in the scene. Note: The Populate tab Display panel has various display options, from Stick Figures for rapid preview to Textured Skin. You can also switch characters to High Resolution Skin for close-up renderings. This tutorial uses the default low-resolution Textured Skin, which is adequate for long views such as the Camera001 view.
Populate's simulation feature is a global control that applies to all flows in the scene. Placeholders for characters are present from the start: You can see them as small red and blue icons on the flows you created, and if you scrub the time slider, you can see that the placeholders are already animated. The "tail" on each placeholder icon shows the direction in which the character is facing. Red characters are women and blue characters are men.
Increase the density of the foot traffic:
- Select Flow001, the first flow you created, along the far sidewalk. Tip: It is hard to select flows by clicking in the shaded Camera001 view. Use the Top view, or select the flow by name.
- In the
 Modify panel Flow rollout People group, drag the Density slider to the right to increase the density of the crowds on the sidewalk.
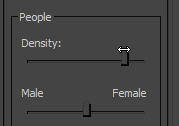
As you can see, this rollout lets you adjust other aspects of the animation, such as the balance between men and women.
- Select Flow002, the flow across the crosswalk, and increase its Density as well.
Leave Flow003, on the near sidewalk, as it was. Not much of that flow is visible to the camera, anyway.
- Click again.
This time, the status bar indicates that Populate is creating more pedestrians than it did the first time. When the calculations are done, the scene has more of the look of a city at midday.
Add some seated people to the scene:
- Activate the Top viewport, and Maximize it.
- Use
 (Zoom Region) to zoom in on the area of the bench that is between the covered arbor and the street.
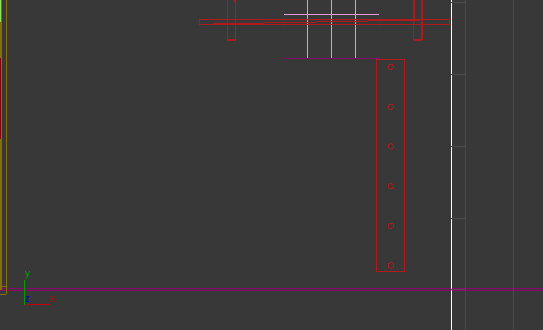
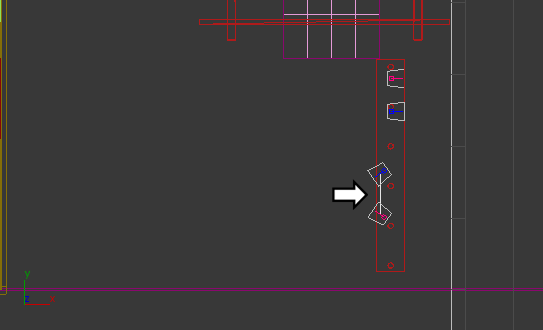
- On the Populate tab Define Idle Areas panel, click Create Seat to activate it.
- Click the top of the bench four times to create four seats.
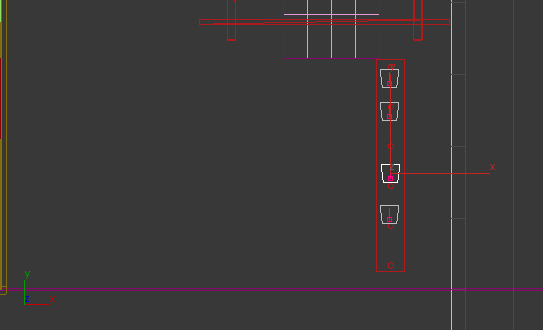
Like pedestrian flows, seats are helper objects that do not render.
By default, the seats face up along the viewport's Y axis (the wider side of the seat geometry is the front of the seat). This does not match the bench geometry.
- On the main toolbar, activate
 (Select and Rotate). Rotate the seats so they face either left or right. You also might want to
  move the seats so their leading edge aligns with the edge of the bench.
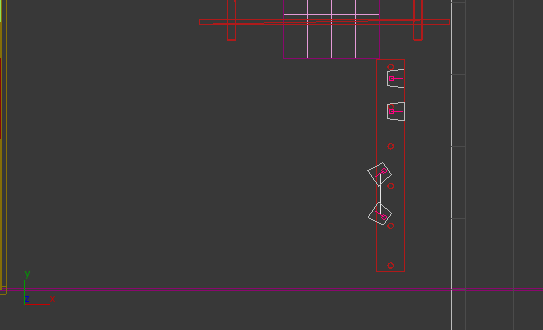
- The sex of the sitter is generated randomly. If at first all sitters have the same sex, then for variety select at least one of the seats and on the Modify panel Seats rollout, change the Gender setting.
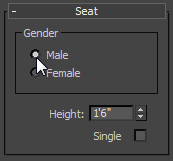
When seated people face each other, as the two lower seats are placed in the example, then by default the characters interact with each other. Wireframe viewports indicate this by displaying a line between the seats that interact.
You can make an interacting seated character behave as if alone by turning on the Single checkbox on the Seat rollout.
- Click (Maximize Viewport Toggle) to see all four viewports again.
- Click .
- Activate the Camera001 view.
In this long shot, the seated characters are hard to see.
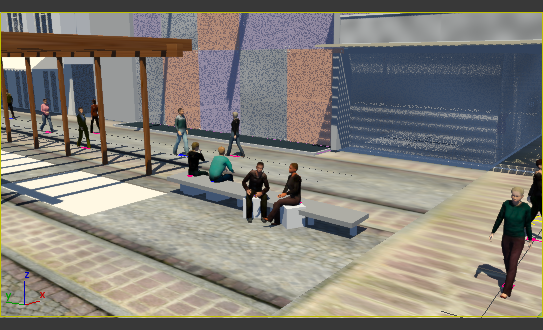
- Click the Point-Of-View (POV) viewport label menu (the middle label), and choose Cameras Camera002.
In the Camera002 medium shot the new seated figures show up well.
Not everybody is in a hurry to go somewhere. Along with pedestrians, the Populate tool lets you add characters who are sitting or standing.
Add standing idlers:
- Activate the Top viewport and maximize it again.
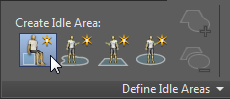
- On the Populate tab Define Idle Areas panel, click
 (Create Rectangle Idle Area) to activate it.
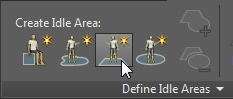
- In the Top viewport,
 zoom out a bit, then drag to specify a rectangular idle area at the end of the walkway, apart from the pedestrian flows (and not overlapping the people on the bench).
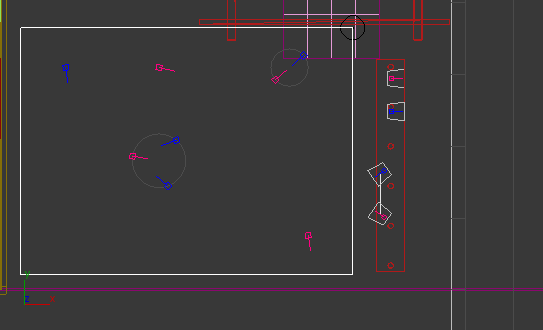
Within the viewport display of the idle area, the circles show conversations between two or three characters. Characters not on the edge of a circle are solitary.
The Idle Area rollout has even more adjustments than the Flow rollout, but the default values are fine for this simulation.
- Right-click to end Idle Area creation.
- Minimize the Top view once more.
- Activate the Camera002 viewport, and use the POV viewport label menu to change back to the Camera001 view.
- Click .
Now the corner of the walkway contains characters conversing or spending time by themselves. Characters in an idle area are animated too, but they do not travel.
Increase the length of the animation:
- On the Populate tab Simulate panel, change the value of Number Of Frames to 720. This will generate a 30-second animation.

- Click .
Simulate resimulates the Populate animation, and also increases the number of frames in the scene to 720.
- Activate the Camera001 view and click (Play).
Now there is a greater chance of seeing pedestrians turn corners. There is also a greater chance of the viewport display degrading, because of memory use.
At 300 frames, the current animation is too short to show many—if any—pedestrians turning corners at the intersections of the flows. Increasing the length of the animation increases the chance of this happening.
(Optional) Increase the length of the flag animation:
- Select flag01.
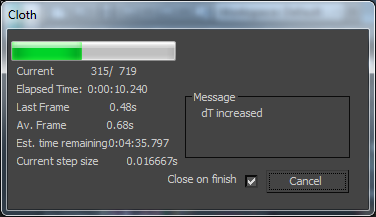
- in the Modify panel Object rollout Simulation group, click Simulate.
3ds Max displays a progress dialog while it extends the Cloth simulation.
- Repeat these steps for flag02.
The motion of the flags still winds down, as the only force acting on them is gravity. But the motion does continue beyond frame 300.
You might notice a glitch in using Populate Simulate to extend the animation length: The flags above the walkway cease to move at the original animation length of 300 frames. You can correct this as follows:
Save your work:
- Save the scene as my_population.max.
You can look at retail_district_populated.max to see a completed version of this scene.
The full animation takes a long time to render. You can play this movie to see a version of the Populate simulation:
Summary
Populate provides a quick and easy way to add animated characters to a scene. Characters can increase the warmth and realism of architectural models.
The features of Populate covered in this tutorial include:
- Adding Flow objects that define where pedestrians walk.
- Creating flows that intersect, allowing pedestrians to turn right or left, or just continue in the same direction (unless the flow is T-shaped and the character has to turn).
- Adjusting the Density value to increase the number of pedestrians.
- Creating seated idlers.
- Creating an Idle Area with standing characters that remain in the same place.
Some features of Populate that this introduction does not cover are:
- Creating flows that change direction, with multiple segments.
- Adding runners to a flow.
- Adding a ramp to a flow.
- Editing idle areas.
- Using Regenerate Selected to update the appearance of some characters.
- Using High Resolution Skin for close-up renderings.
You might want to experiment on your own.