![]()
-
Track View > Editing Keys in Curve Editor > In the Controller window, highlight the tracks to reduce. > Keys Toolbar >
 (Simplify Curve)
Animating with inverse kinematics, or creating any complex animation, can result in many keys, which can make editing the animation difficult. In the case of applied inverse kinematics, 3ds Max generates a key on nearly every frame. Often, the same animation can be produced with fewer keys. Having fewer keys in a track makes it easier to change your animation.
Simplify Curve analyzes the pattern of keys in a block of time and creates a new pattern of fewer keys that produces nearly the same animation. You can specify how closely the new animation matches the original.
Procedures
To reduce keys:
-
 Select an animated object.
 - Right-click the object and choose Curve Editor or Dope Sheet from the quad menu.
- In the Track View
 Hierarchy list, highlight the tracks whose keys you want to reduce. Simplify Curve works only on highlighted tracks.
 - Optionally, in the Key window, specify a time range within which to reduce keys, as follows: Highlight a key at either end of the range to reduce, or drag a selection rectangle around the keys you want to reduce. Alternatively, in Dope Sheet mode, highlight specific tracks and then use Select Time to designate a block of time within which to reduce keys. If no keys are highlighted in a highlighted track, Simplify Curve works on all keys in that track.
You can use any of the above methods to specify different ranges for different highlighted tracks.
- From the Curves menu, choose Simplify Curve.
3ds Max opens the Simplify Curve dialog. This dialog has a single Threshold parameter.
Raising the Threshold setting results in fewer keys after simplification. The higher its value, the greater the reduction.
- Click OK to reduce the keys.
Observe the results. If you are left with too few keys, press Ctrl+Z to undo, then lower the threshold and reduce the keys again. If too many keys remain, increase the threshold and reduce keys again.
Tip: It can take experimentation to find the right Threshold value for your particular animation.
Interface
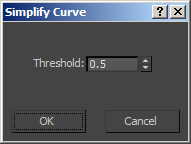
- Simplify Curve
-
Opens the Simplify Curve dialog.
- Threshold
-
Sets a threshold value. Higher values result in fewer keys.
- OK
-
Accepts the Threshold setting and reduces keys as follows:
- Only highlighted tracks are simplified.
- If any of a track's keys are highlighted, simplification is performed only within the indicated range (that is, between the leftmost and rightmost highlighted key for each track). If no key is highlighted, simplification is performed on all keys in the track.