You can build your physically based shader using the ShaderFX editor window and the available ShaderFX nodes.
To start, first create a Standard Base node from the ShaderFX right-click menu or the Node Browser.
To create a preset shader graph:
- To create a new custom preset, choose Custom from the Parent Material drop-down list of the Standard Base node's Properties panel.

When creating your shading network, you can save the graph as a preset and reuse it next time you create a new Stingray Standard Base node. This allows you to avoid repeatedly creating identical shader graphs that would lower the performance of your game.
To edit your shader graph:
- Create and connect nodes as you would for any ShaderFX network. Right-click in the work area of the ShaderFX editor and select Add from the marking menu, then choose from among the available nodes. Alternatively, you can drag and drop nodes from the Node Browser.
Note: Although you can create your Stingray PBS shader network via the ShaderFX editor similarly to how you can create your ShaderFX shader network, you cannot save a .sfx file from the former and use it in the latter or vice versa. Although the ShaderFX editor interfaces are similar, the set of available nodes is different and therefore not interchangeable.
To create a float value in the shading network:
- Create an Input
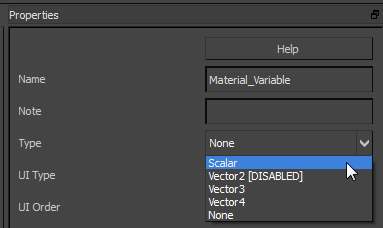
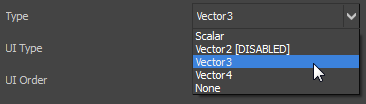
 Material Variable node, then choose Scalar or Vector 3 or Vector 4 from the Type drop-down list on the Properties panel.
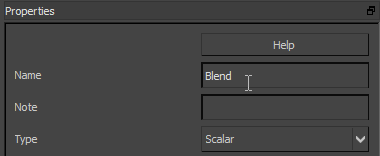
- Give the Material Variable node a meaningful name; for example,
Blend.
Naming your Stingray nodes makes it easier to find them on the Material Editor
Parameters rollout.
- Wire the new node to an appropriate location in the shader graph.
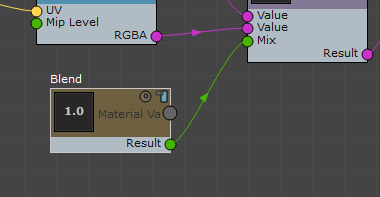
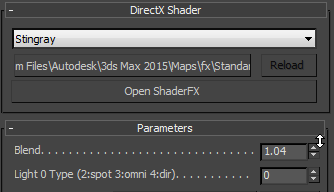
The Stingray Parameters rollout does not update until a new node is correctly wired.
- Minimize the ShaderFX editor. On the Stingray Parameters rollout, use the new control to set the value.
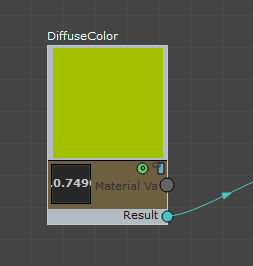
To create a color value in the shading network:
- Create an Input Material Variable node, then choose Vector 3 or Vector 4 from the Type drop-down list on the Properties panel.
 Note: You can connect any combinations of float1–4; that is, you can connect a float3 port to a float4 port, for instance.
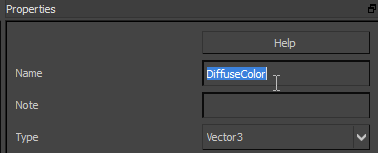
 - Give the Material Variable node a meaningful name; for example,
DiffuseColor.
Naming your Stingray nodes makes it easier to find them on the Material Editor
Parameters rollout.
- Wire the new node to an appropriate location in the shader graph.
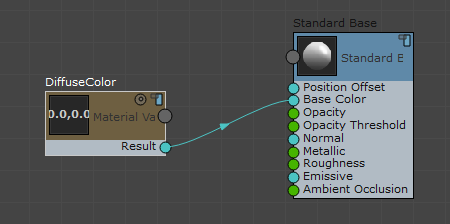
The Stingray Parameters rollout does not update until a new node is correctly wired.
- Minimize the ShaderFX editor. On the Stingray Parameters rollout, use the new control to choose the color.

In the ShaderFX editor, the node's preview swatch now shows the new color.
To create a texture map:
- To create a texture map, create a Sampling Sample Texture node.
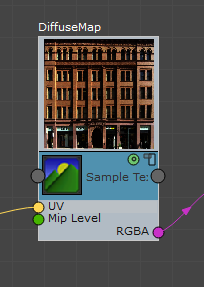
- Give the Sample Texture node a meaningful name; for example,
DiffuseMap.
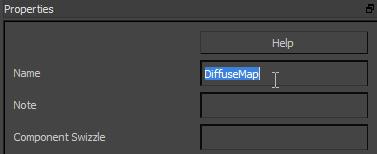
Naming your Stingray nodes makes it easier to find them on the Material Editor
Parameters rollout.
- Create a UV node (for example, Vertex Inputs Texcoord0) and wire it to the UV input of the Sample Texture node.
If you don't provide the Sample Texture node with coordinates, the ShaderFX editor flags an error when you try to wire the Sample Texture to another node's input.
- Wire the new Sample Texture node to an appropriate location in the shader graph.
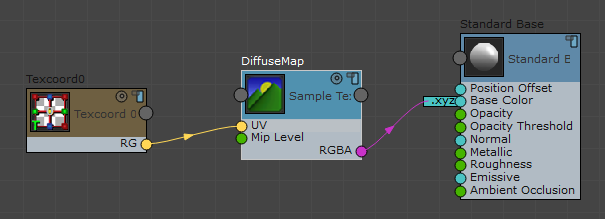
The Stingray Parameters rollout does not update until a new node is correctly wired.
- Minimize the ShaderFX editor. On the Stingray Parameters rollout, use the new control to choose the map.
In the ShaderFX editor, the node's preview swatch now shows the new texture map.