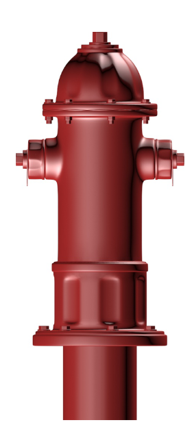
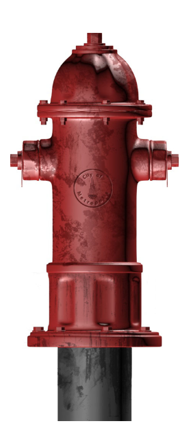
Use the Blended Box Map to simplify the process of blended projected texture maps, allowing you to easily customize the maps and output.


The Blended Box map allows you to project maps onto objects in a much simpler way than the traditional method requiring complex UV mapping. It is ideal for situations where you want to apply a box map across one or more objects to map them from all sides, such as applying details like dirt and grime.
Working similarly to box mapping, Blended Box map projects images from three 90° directions. You can project 1, 3, or 6 different maps for every side of the projection box. A key difference between the two mapping types is blending. Traditional box or cube mapping would create hard seams between the different UV projections, where Blended Box mapping gives you the ability to blend between the maps for a more seamless result.
Interface
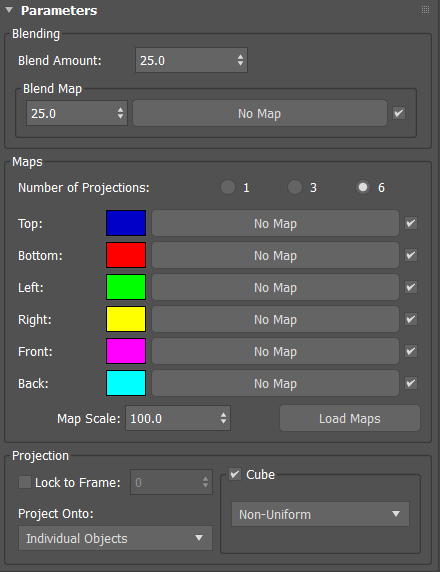
Parameters rollout

Blending group
- Blend Amount
- Percentage amount of blend between each projection. Default=25.
- Blend Map
- Percentage amount the blend map is spread onto the object(s).
Note: High amounts may cause bleeding.
Maps group
- Number of Projections
- Options include 1, 3, or 6 map projections.
- 1 projects a single map on the top, bottom, left, right, front and back sides.
- 3 projects one map on the top and bottom, one on the left and right, and another on the front and back sides.
- 6 projects one map on the top, one on the bottom, one on the left, one on the right, one on the front, and another on the back side.
- Map Scale
- Percentage scaling applied to all maps.
- Load Maps
- Loads multiple similarly named maps simultaneously when you select only one. Maps will be assigned to the appropriate side, as long as their names correspond to the channel. For example: checker_left.jpg, checker_front.jpg, etc.
Projection group
- Lock to Frame
- Select the check box to lock the projection onto the object at the frame number you specify. Prevents the projection from skewing when the object is animated with transforms such as Move, Rotate or Scale.
Lock to Frame allows you to get cleaner projections on built models.
Note: Does not work with deformations. - Project Onto
- Select what objects the maps are projected on. Options include:
- Individual Objects
- Each object has its own mapping projection.
- Multiple Objects at Once
- Treats multiple objects as though they were one object. You can control the mapping placement by creating and transforming a dummy object "projection box" in the scene.
- Auto
- Projects onto multiple objects at once and automatically fits the projection size, based on a bounding box you create.
- Cube
- Forces the projection to be cubic, preventing texture stretching when using a square map (725x725, 1024x1024, etc.). Options include:
- Non-Uniform
- Each object is mapped using projection sizes you define using gizmos (one gizmo per object).
- Uniform-Picked
- All objects are mapped using the same projection size based on the selected object.
- Uniform-Size
- All objects are mapped using a projection size you define using a gizmo (one gizmo for all objects).
- Uniform-Largest
- All objects are mapped using a projection size based on the largest object with the applied material.
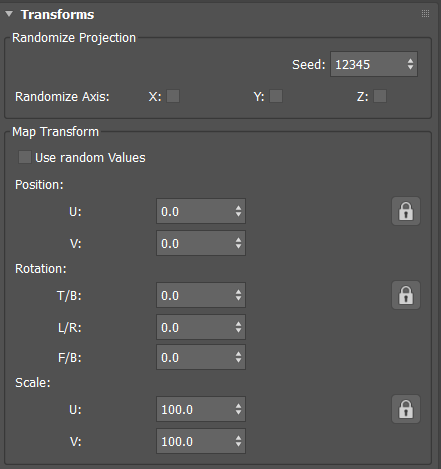
Transforms rollout

Randomize Projection group
- Seed
- Sets the randomization value.
- Randomize Axis
- Sets which axis the projection is randomized upon. Options include X, Y, and Z.
Map Transform group
- Use random values
- Applies random values to the transforms, based on the Seed setting.
- Position
- Shifts the projection position along the U and V axes.
- The Lock button locks the V position offset to match the U position.
- Rotation
- Sets the degree you rotate the projection for the top and bottom (T/B), left and right (L/R), and front and back (F/B).
- The Lock button locks all rotation offsets to match the top and bottom offset.
- Scale
- Increases/decreases the projection size by U and V axes.
- The Lock button locks the V scale to match the U scale.
Render Projection Templates rollout

Renders all sides of the projection into individual images to make it easier to paint texture maps onto individual images using a 3rd party program.
- Save
- Opens the Render Projection Templates dialog, where you specify a file name, type and location. The tool appends the appropriate suffix automatically (_top, _left, etc.).
- Resolution Maximum Value
- Sets the largest possible map resolution.
- Render
- Renders the images.