A set of similar types of objects as well as random objects of a model can be organized in named groups. By organizing elements into groups, you can control the visibility of several objects and reduce the visual complexity of a model.
To group several objects , create an empty group and then select the elements that will be part of the group. If deleting objects or removing them from a group leaves the group empty, the group remains defined.
All created groups are listed in the Project Explorer, in the Groups panel of the Structures tab. Groups can be created only when the groups panel is unlocked.
Best practice
Avoid creating large groups of objects.
Name groups
Choose group names carefully. Use names derived from the type of contained group elements to make it easier to manipulate groups of elements.
Groups are listed on the Structures tab of the Project Explorer and can be organized in folders. The groups are sorted alphabetically in their folder.
Remove groups
You can remove groups at any time by deleting the group from the Project Explorer. When a group is deleted, it is disconnected from all the objects assigned to it. The contained elements are not deleted.
Groups can only be deleted when:
- They are checked-out
- All the objects assigned are partially checked-out
Create a group
- In the
Project Explorer
, click
 (Create new group).
 - In the group properties dialog box, enter the group name.
- Click OK.
- The group name appears in the Group list of the Project Explorer. The created group is empty.
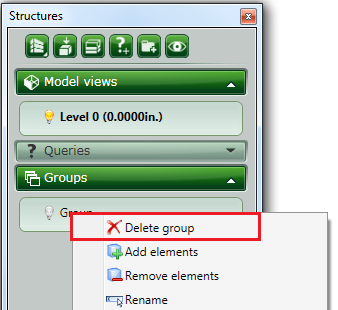
Delete a group
- In the Project Explorer , right-click the group to delete.
- Select Delete group from the context menu.
- The group is deleted.
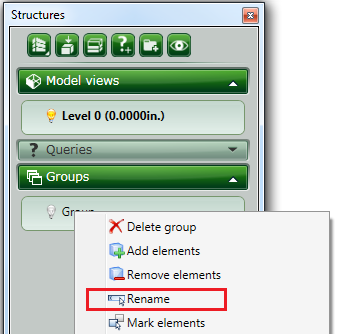
Rename a group
- Right-click the group to rename.
- Select Rename from the context menu.
- Type the new name and press Enter.
- The group is renamed.