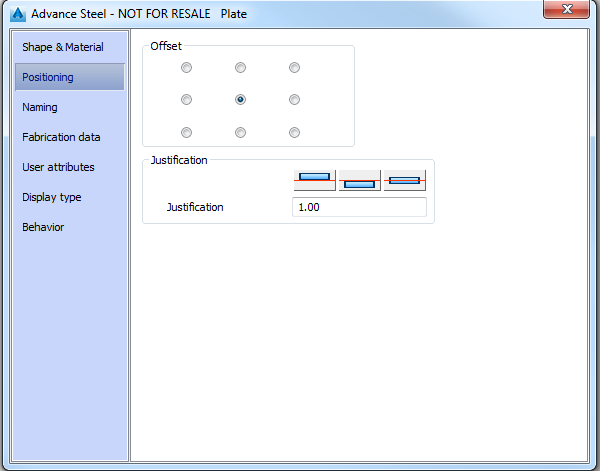
On this tab of the properties dialog box, you can select the reference point for the plate size and the reference for the plate thickness.

Offset
Defines the plate reference point (e.g., center, center right, center left, bottom center, bottom right, or bottom left). The assigned reference point corresponds to the insertion point. When changing the plate size on the Shape & Material tab, the position of the reference point does not change. For example, if the reference point is in the center, the plate changes from the center when the length or width is modified.
Justification
Defines the reference for the thickness direction. Using the three buttons, you can change the thickness from the bottom, center, or top of the plate. For example, when selecting a justification of 0.5 (the default), half of the plate thickness projects in the positive Z direction and the other half into the negative Z direction.