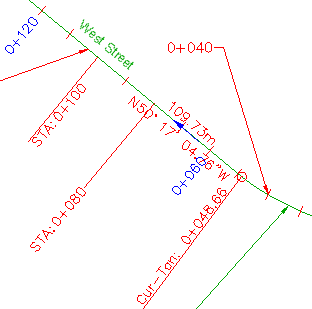
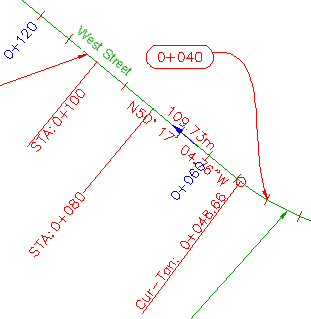
In this exercise, you will modify a label style so that a label will display differently when it is dragged from its original location.
Every label style has two default formats: one for when the label is initially created in its normal layout location, and another that is applied when you drag the label away from its normal layout location. The controls for editing the dragged state of a label style are similar to those used for the layout state.
This exercise continues from Exercise 3: Controlling Label Appearance Using Layers.
Drag a label from its original location
- Zoom in so that you can see the 0+040 station label on the West Street alignment. Click the label to select it and all the other major station labels.
- Click the grip and drag it away from the alignment.
The label is now in its dragged state. The text and leader line are red because the dragged state of the label style is set to ByLayer. Keep this label in view so you can see the effects of format changes as you make them.

Major station label 0+040 in dragged state
This exercise uses Labels-5b.dwg with the modifications you made in the previous exercise.
Change the dragged state of the label
- In Toolspace, on the Settings tab, expand Alignment
 Label Styles
 Station
 Major Station. Right-click
Perpendicular With Tick
. Click Edit.
 - In the Label Style Composer dialog box, click the Dragged State tab.
In both the Leader and Dragged State Components categories, notice that the Color, Linetype, and Lineweight properties are all either ByLayer or ByBlock. These settings indicate that when a label is in dragged state, it inherits these properties from either the layer on which the label resides or the block that contains it.
Tip:Because the Preview pane does not show the dragged state of the label, position the Label Style Composer so that you can see a dragged-state label in the drawing. Each time you change a label property, you can click Apply to see the effects.
- In the Dragged State Components area, change the Display value to As Composed. Click Apply.
The label returns to the original layout property settings, and all other style controls in this area are disabled. This type of dragged-state format is easy to apply, but is not suitable for all label types. In particular, note that the leader line does not adapt well to all possible dragged locations.
- Change the Display value back to Stacked Text. Click Apply.
If your label has multiple lines of text, the Stacked Text setting keeps them all stacked horizontally in a compact block. You can see this in action by dragging one of the curve labels from its layout location.
- Change each of the following property values. Click Apply after each change to see their effects.
- Leader Type: Spline Leader
- Border Visibility: True
- Border Type: Rounded Rectangular
- Border and Leader Gap: 2.0mm
- Leader Attachment: Top Of Top Line
- After you have applied all the changes that you want to see in the dragged state, click OK.

Modified dragged state: major station label 0+040
Note:To return a dragged label to its original layout format, click the
 grip.
grip.
To continue this tutorial, go to Exercise 5: Changing an Objectís Label Style.