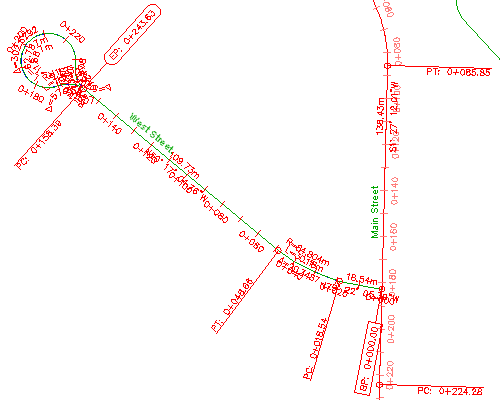
In this exercise, you will add labels to specific areas on an alignment after it has been created and automatically labeled.
This exercise continues from Exercise 1: Adding Labels in Groups.
Label multiple alignment segments
- Click tab
 panel
panel  menu
menu 

 .
. - In the Add Labels dialog box, specify the following parameters:
- Feature: Alignment
- Label Type: Multiple Segment
- In the three label style fields, accept the default styles.
You can choose specific styles for each of the Line, Curve, and Spiral label styles. This alignment does not contain any spirals, so the Spiral Label Style setting is ignored.
- Click Add.
- On the left-hand side of the site, click the West Street alignment, which you created in Exercise 1: Adding Labels in Groups.
The Multiple Segment label command places a label at the middle of each line and curve. This method can be convenient, but sometimes a few of the labels overlap other features of the drawing. In Exercise 3: Moving Individual Labels, you will move some of these labels.
This exercise uses Labels-2a.dwg with the modifications you made in the previous exercise.
Label single alignment segments
- In the Add Labels dialog box, specify the following parameters:
- Feature: Alignment
- Label Type: Single Segment
- Line Label Style: Line Label Style
 Alignment Name
Note:Notice that you can use either a General Line Label Style or Alignment Line Label Style. General Line and Curve label styles can be applied to lines and curves that are part of an Alignment or Parcel object.
- Click Add.
You are now ready to choose a specific location for a label on the alignment. Unlike multiple segment labels, single segment labels are placed exactly where you click.
- On the West Street alignment, click near station 0+120 to place a line segment label. Be sure to click the line segment, and not the station label.
Because you clicked a line segment, the label style specified in the Line Label Style list in the Add Labels dialog box was used. If you had clicked a curve, the label style specified in the Curve Label Style list would have been used.
- On the Main Street alignment, which is the long alignment in the middle of the site, click a location between stations 0+140 and 0+160.
- On the East Street alignment, which is the alignment with the cul-de-sac on the right-hand side of the site, click a location between stations 0+200 and 0+220.
- In the Add Labels dialog box, in the Line Label Style list, select Line Label Style
 Bearing Over Distance
. Click Add.
 - On the Main Street alignment, click a location between stations 0+100 and 0+120. A new label displaying bearing and distance information is created.
Examine label settings for other objects
- In the Add Labels dialog box, in the Feature list, select Parcel.
This selection changes the label type and style selections that are available. The Add Labels dialog box works in the same manner for all of the feature types shown in the Feature list. When you annotate objects in AutoCAD Civil 3D, you can switch the type of object you are labeling, as well as the label type and style of the various elements, as needed.
Pay attention to the command line as you annotate objects. Some label types, such as span, slope, grade, and depth, annotate a range of data between two points. For example, if you want to label a grade or depth between two points, you must specify those points in the drawing.
- In the Add Labels dialog box, click Close.

Alignment with manually inserted segment labels
To continue this tutorial, go to Exercise 3: Selecting and Moving Labels.