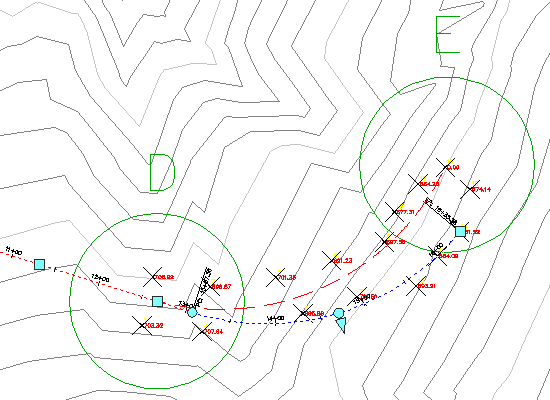
In this exercise, you will add two floating curve entities to a simple alignment. First, you will add a best fit floating curve that follows the most likely path through a series of points. Then, you will add a floating reverse curve with spirals.
The initial drawing shows a simple alignment consisting of three tangents with curves. In the next few steps, you will add two floating curves to the end of the alignment.
This exercise continues from Exercise 3: Adding Free Curves and Spirals to an Alignment.
Add a floating curve by best fit to the alignment
- Pan and zoom until you can see circles D and E on the surface.
- On the Home tab
 Layers panel, in the Layer Control list, in the C-POINTS row, click
  to turn on the C-POINTS layer.
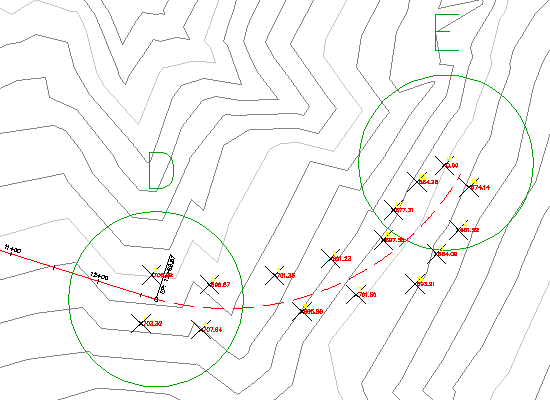
 A group of points is displayed. You will use these points as a basis for creating a floating curve that follows the most likely path through the points.
Note:If the points do not appear, enter REGEN on the command line.
- If the Alignment Layout Tools toolbar is not open, select the alignment. Right-click and click .
- In the Alignment Layout Tools toolbar, click the drop-down list
 . Select
  Floating Curve - Best Fit.
 - As prompted on the command line, click the tangent that ends in circle D (the ‘entity to attach to’).
- In the Curve By Best Fit dialog box, make sure that From COGO Points is selected. Click OK.
- The command line prompts you to Select Point Objects or [Numbers/Groups]. Enter G.
- In the Point Groups dialog box, select _All Points. Click OK. The points in the drawing are selected.
The Regression Data vista displays information about each of the points that are included in the regression analysis. The drawing displays a dashed red line indicating the path of the best fit curve. An X marks the location of each regression data point.
Note:The point numbers in the Pt No. column are sequentially generated as regression data points are added or removed. They do not correspond to the actual AutoCAD Civil 3D point numbers.
Now you will modify some of the regression data to better suit your design.

- In the Regression Data vista, select the Pass Through check box for Pt No. 16.
Selecting this check box specifies that if the curve does not deviate from the regression data, it will always pass through point 16.
- Click
 to create the best fit floating curve.
 The Regression Data vista closes, and the regression point markers disappear.
This exercise uses Align-2.dwg with the modifications you made in the previous exercise, or you can open Align-3.dwg from the tutorials drawings folder.
Modify the best fit curve
- In the drawing, select the alignment. Click the
 grip at the end of the floating curve, and drag it toward one of the other points. Click to place the grip in its new location.
 - In the Alignment Layout Tools toolbar, click
 Edit Best Fit Data For All Entities.
 Notice that the original regression data is displayed in the Regression Data vista, and the original best fit curve is displayed in the drawing. The
 icon in the Regression Data vista indicates that the alignment layout does not comply with the regression data. When you moved the grip in step 1, you moved the pass-through point from the location you specified earlier.
- Click
 to synchronize the entity to the original regression data. Click
  to close the Regression Data vista.
 The entity returns to its original location.
- On the Home tab
 Layers panel, in the Layer Control list, in the C-POINTS row, click
  to turn off the C-POINTS layer.
To add a floating reverse curve with spirals to the alignment
- On the Alignment Layout Tools toolbar, click the arrow next to
 . Select
  Floating Reverse Curve with Spirals (From Curve, Radius, Through Point).
 - As prompted on the command line, click the curve entity that ends in circle E (the ‘curve to attach to’).
- Enter a spiral in length of 75.
- Enter a radius of 200.
- Enter a spiral out length of 75.
- Specify a pass-through point in circle F.
The reverse curve with spirals appears.
- Exit the layout command by right-clicking in the drawing.

To continue to the next tutorial, go to Tutorial: Editing Alignments.