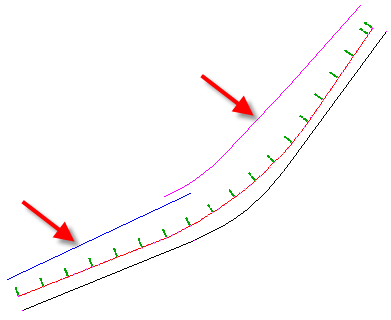
In this exercise, you will create a corridor using the assembly created in the last exercise. You will target the width and elevation of the right lane edge to a right alignment and profile, and the left lane edge to a polyline and a feature line.
This exercise continues from Exercise 1: Creating an Assembly with a Transition Lane.
Specify the basic corridor information
- Click
tab
 panel
panel  Find.
Find.
- In the Create Corridor dialog box, specify the following parameters:
- Name: Corridor - Transition Lanes
- Baseline Type: Alignment and Profile
- Alignment: Centerline (1)
- Profile: Layout (1)
- Assembly: Transition
The Transition assembly includes the BasicLaneTransition subassembly, which uses the Transition parameter to specify that both the offset and elevation can change on the right side of the corridor. The offset can change on the left side of the corridor but the grade is held at -2%.
- Target Surface: EG
- Set Baseline and Region Parameters: Selected
- Click OK.
This exercise uses Corridor-2a.dwg from the previous exercise, or you can open Corridor-2b.dwg from the Tutorial Folder Locations.
Specify the fixed lane horizontal target
- In the Baseline and Region Parameters dialog box, click Set All Targets.
- In the Target Mapping dialog box, in the Transition Alignment row for BasicLaneTransition - (Right), click the Object Name field.
- In the
Set Width Or Offset Target dialog box, specify the following parameters:
- Select Object Type To Target: Alignments
- Select Alignments: Right (1)
- Click Add. Click OK.
Specify the transition lane horizontal target
- In the Transition Alignment row for BasicLaneTransition - (Left), click the Object Name field.
- In the Set Width Or Offset Target dialog box, in the Select Object Type To Target list, select Feature Lines, Survey Figures And Polylines.
- Click Select From Drawing.
- In the drawing, on the left side of the alignment, select the blue polyline and magenta feature line. Press Enter.

The entities are added to the table at the bottom of the Set Width Or Offset Target dialog box.
- Click
OK.
Notice that because the subassembly names contain the assembly side, it is easy to determine which assembly must target which offset object. This naming convention is even more useful in road designs that contain many alignments and subassemblies. For information on updating the subassembly naming template, see the Modifying the Subassembly Name Template exercise.
Specify the fixed lane elevation targets
- In the Transition Profile row for BasicLaneTransition - (Right), click the Object Name field.
- In the
Set Slope Or Elevation Target dialog box, specify the following parameters:
- Select Object Type To Target: Profiles
- Select An Alignment: Right (1)
- Select Profiles: Layout (1)
- Click
Add. Click
OK.
The right-side edge-of-pavement elevation is set to the Layout (1) profile. The left-side edge-of-pavement elevation does not need to be set since its elevation is determined by the grade setting.
- Click
OK twice.
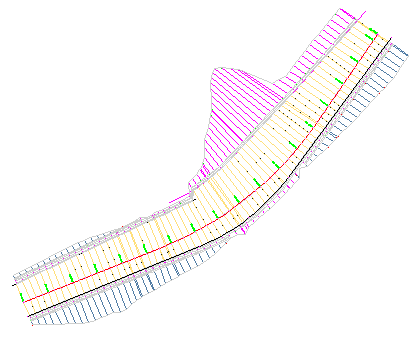
The corridor model is built, and looks like this:
 Note:
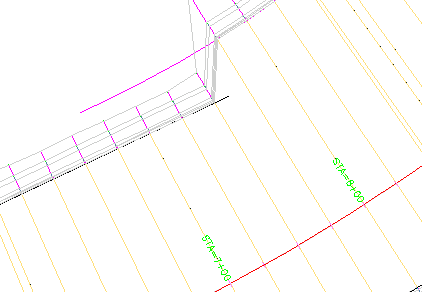
Note:Notice that at station 7+50, the lane uses the polyline as a target, and not the feature line. When more than one target object is found at a station, the object that is closest to the corridor baseline is used as the target.
A detail of the overlapping objects

To continue to the next tutorial, go to Creating a Divided Highway Corridor.