The following examples can help you to get a feel for the workflow of using different types of Matchbox effects in Action.
Using a GMask to Limit a Camera FX Matchbox
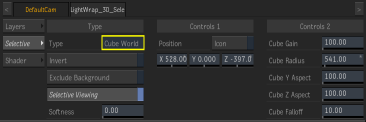
A GMask connected to the Camera with a GMask link can be used to limit the effect of a Camera FX Matchbox.
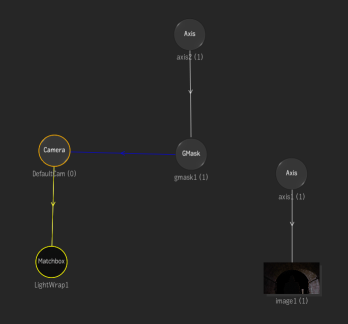
In this example, a Gmask is used to limit the effect of a Lightwrap effect that works well for the roof, but is too strong for the character. The Gmask limits the effect and the gradient gradually softens out the Lightwrap, so the top of the head of the character still has a little bit of Lightwrap.
 Without Lightwrap |
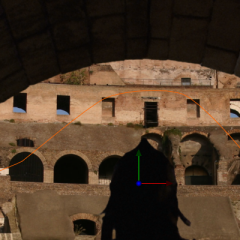
 Without GMask |
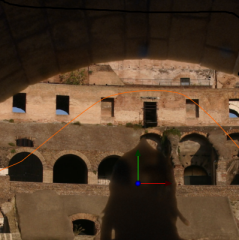
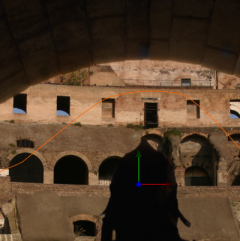 With GMask and Lightwrap |
3D Selectives as Camera FX
Some Matchbox shaders include 3D Selective functionality, allowing you to segment the render of Action using different 3D techniques, applying the given effects to a specific portion of the image.
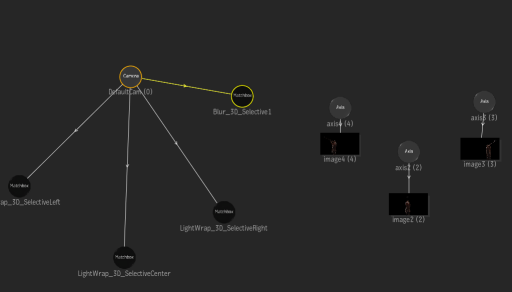
The following example shows the usage of 3D Selective with both the Lightwrap and Blur 3DSelective shader. The Blur is used to create a DepthOfField effect using the Distance mode, while three different Lightwrap3DSelective shaders are used to create independent Lightwrap effects on each of the trumpeters, as single values for all three didn't worked out in this case.
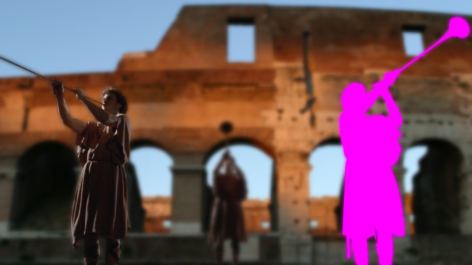 3D Selective on one trumpeter |
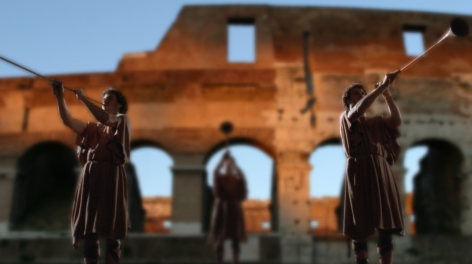 Result |
Replacing Lens Flare Elements with Matchbox Effects
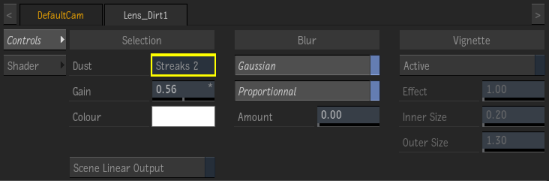
You can use the Matchbox Lens texture grid shaders with Action Lens Flares. You can use the LensBokeh, LensRefraction, and LensOptic Matchbox to replace Glint Texture, Glow Texture, Iris Texture, Ring Texture and Streak Texture nodes to create more organic Lens Flare results; and you can use LensDirt and LensSpatial Matchbox to replace the Lens Texture to create more organic lens dirt and light leak type of effects.
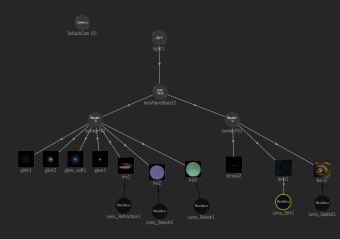 Lens Flare schematic with Matchbox replacements |
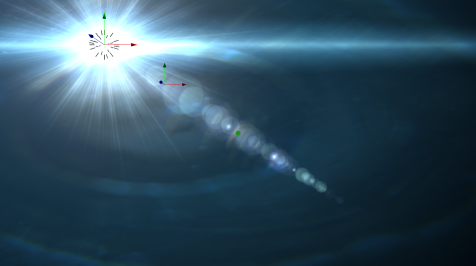 Result |
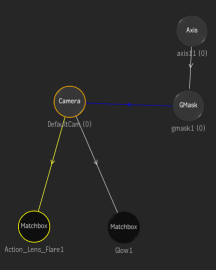
Using a Matchbox Lens Flare in the Camera FX Pipeline
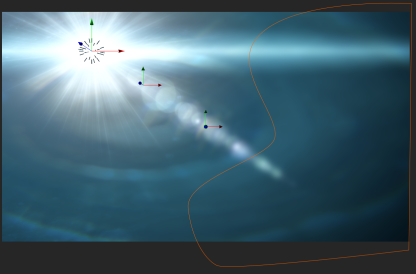
You can also use a Lens Flare Matchbox shader as part of the Camera FX pipeline. Since Lens Flares (and Rays) are rendered at the end of the Camera FX pipeline, you can use instead the ActionLensFlare Matchbox shader, which allows you to put the Lens Flare result anywhere in the Camera FX pipeline.

In this example, there is also a Matchbox Glow effect in the Camera FX pipeline, as well as a GMask that allows you to blur part of the Lens Flare result without affecting the Action result. The Glow can affect both the Lens Flare and the Action result, since the ActionLensFlare Matchbox allows you to place it anywhere in the rendering pipeline (and in this case before the Glow effect).
 Lens Flare Matchbox as Camera FX |
 Result |
Using Stingray Matchbox Shaders
Stingray Matchbox shaders are based on the Autodesk Stingray game-engine technology, allowing you to produce visually stunning results in Action. These shaders can be combined (as in the Camera FX example below). You can also use GMasks and 3D Selectives with the Stingray shaders to help you limit the effects to certain areas of your image.
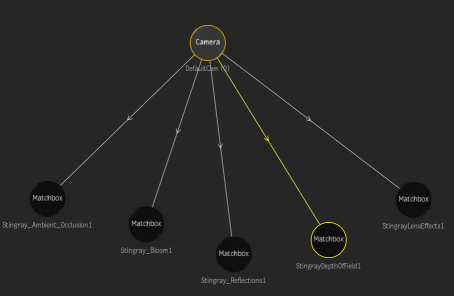 Stingray Matchbox Shaders as Camera FX |
 Result |
These are the available Stingray Matchbox shaders, as well as some usage tips:
- Stingray Motion Blur
- This shader allows you to create motion blur effects, based on the motion vector provided (either by the Action Motion Vector output or the Batch Motion Analysis node). This shader can also use a Z-Depth input to help provide better results. When used as Camera FX in Action, it can automatically receive the current Camera Near/Far values, when Frustum is set to Auto, otherwise it can be set manually. The Exposure field is available to allow control on how much motion blur to create. While this tool can create quite nice small and subtle motion blur effects, it cannot create large motion blur effects due to the nature of the technique used; therefore the Exposure value is limited to 10.
- Stingray Ambient Occlusion
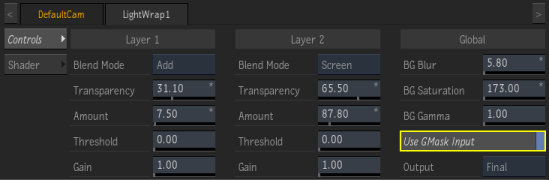
- This shader allows you to create lighting occlusion, by computing how each point in a scene is exposed to ambient lighting. To do so, the shader requires the Z-Depth and Normals information of a 3D scene. You can control its impact in the scene by modifying the Intensity, Radius, and Quality fields. The Use Z-Depth setting allows you to use a normal Z-Depth input, since, by default, the shader is expecting the Z-Depth HQ Action output for maximum quality (however a regular 16-bit Z-Depth input can be used). The Only AO setting allows you to output just the AO result without the scene result. When used as Camera FX, you can use both the Use GMask Input and the Selective options to tailor exactly where and how much ambient occlusion effect you want in your image. Multiple Stingray Ambient Occusion shaders can then be added, using different values and affecting different areas of the scene.
- Stingray Bloom
- This shader allows you to reproduce an imaging artifact of real-world cameras, where bright areas create feathering (when overwhelming the camera capturing the scene). By default, the shader is set to use the Stingray Tone Map, which handles geometry content, so in the case of an image sequence, you may prefer using the Scene Linear Input option instead, if applicable. The first step of the Bloom shader is to create the bright pass which can be isolated using the Bright setting of the Pass option. To control how much of the image is contributing to the bright pass, you can adjust the Threshold and the Exposure settings. This bright pass becomes the source of the blooming effect to which the Blur Amount, Falloff, Offset, Bloom Colour, and Gain settings are then applied. When used as Camera FX, you can use both the Use GMask Input and the Selective options to tailor exactly where and how much Bloom effect you want in your image. Multiple Stingray Bloom shaders can then be added, using different values and affecting different areas of the scene.
- Stingray Reflections
- This shader allows you to create single-bounce screenspace reflections, based on the Z-Depth and Normals information of a 3D scene. The shader uses the roughness information of the material through a Roughness map to control how sharp or diffuse the reflection is. To control this in Action, you can use the Shader node with either the Physically Based or the Cook-Torrance shading mode. The basic Reflection settings are the Intensity, Tint, Gain, and As Additive Ambient (which allows you to add the reflection as ambient light or blend it to the scene). The Use Z-Depth setting allows you to use a normal Z-Depth input, since, by default, the shader is expecting the Z-Depth HQ Action output for maximum quality (however a regular 16bit Z-Depth input can be used). The Only Reflections Output setting allows you to output just the Reflection result, without the scene result. You can use the Screen Edge and Surface Thickness Threshold settings to help control where the reflections are going to appear in the image. Since the Stingray Reflection shader is a single-bounce reflection, you may need to isolate which objects cast or which objects receive reflections, to get around some limitations of the technique. To do this, you can apply the shader as a Camera FX, and use the Casting and Receiving Selective settings. You can also use the GMask functionality to control the reflection further.
- Stingray Depth of Field
- This shader allows you to create focus range blur effects. Use the Centre Z setting for focus position, and the Range setting to define the size of the focus area. Both of these settings are in Action camera-space coordinates. To control the Blur, you have independent control on the Near and Far side of the focus area. Max sets the blur size, while Distance sets how quickly you will reach the Max blur value, starting from the corresponding focus area position. You can further impact how the blur is going to behave in the defined Distance region, by adjusting the curves found in the Advanced tab section. By default it is set to linear, but it can be freely adjusted. Lastly, you can change the chromaticity of the effect by setting a colour to both the Far and Near blur area which affects the RGB channels independently.
- Stingray Lens Effects
- This shader is a simple lens distort/correction tool with chromatic aberration capabilities. The Distortion setting distorts/corrects the image with a simple lens model, while the Fringe Intensity and Colour settings allow you to control the chromatic aberration of the lens. When used as a Camera FX, you can use the Use GMask Input option to only apply the overall effect to a portion of the image.