To Create a Parts List

Produce an organized list of parts in the drawing.
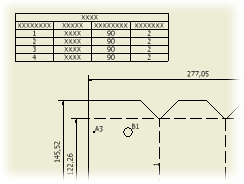
A parts list uses the default formatting set in the parts list style associated with the active drafting standard.

If you create a parts list by selecting a view of an iAssembly member, the default is the member in the view. The QTY column for the member is displayed in the parts list, if it has been specified in the style. If you create a parts list by browsing to an iAssembly, the parts list default is for the active member.

Tip: You can copy a parts list and paste it to another drawing sheet or another drawing. You can also drag parts lists.
  1. On the ribbon, click Annotate tab Table panel Parts List .
  2. On the Parts List dialog box, select the source for the parts list:
    • To create a parts list for a drawing view, select the drawing view in the graphics window.
    • To create a parts list from a source file, on the Parts List dialog box, click Browse and open the file.
  3. Select the appropriate BOM view for creating parts lists and balloons.
    Note: To be available for the parts list, the Structured or the Parts Only view must be enabled in the BOM of the source model.
  4. In the Table Wrapping box, set the wrap direction. If appropriate, select Enable Automatic Wrap, and set the maximum number of parts list rows, or number of parts list sections.
  5. Choose OK to close the Parts List dialog box.
  6. Click a location on the drawing sheet to place the parts list. You can snap the parts list to edges or corners of the sheet or the title block.

    Show Me how to place a parts list

    Get Adobe Flash player

Tip: To move a parts list, click the parts list and drag to a new location.