The Script Editor
Now that you have explored the beginnings of object creation and manipulation, the next step is programming.
MAXScript is a programming language at heart, and two of the most important concepts necessary for mastering MAXScript are conditional statements and loops.
At this point, real script writing comes into play. From the Main Menu > MAXScript menu item, select "New Script". A new MAXScript editor window will open. In this window, you can create, edit, save, and load scripts.
Another way to open a new script is the "New Script" button in the MAXScript Utility in the Utilities tab.
Other than the Listener, you can open many scripts as tabs inside the Editor and work on multiple scripts at a time, copy and paste code between them etc.
Thus far in this tutorial, you have been performing all of the script examples in the MAXScript Listener, however when you are writing or editing a script of your own, you will use the Script editor.
The main difference between the Script Editor and the Listener is that the Listener can only evaluate one set of information at a time. In contrast, you can enter long, complex scripts in the Script Editor and evaluate them piece-by-piece or all at once.
Scripts are entered using the same syntax and rules, however they are not executed upon pressing ENTER. In order to execute the entire script, use "Evaluate All" from the Tools Menu of the Script Editor, or press Ctrl+E.
You can also execute scripts several lines at a time by highlighting the lines you want to execute and pressing SHIFT+RETURN, or ENTER on the numeric keypad.
| IMPORTANT: |
| The rest of this page is for your information only and not a direct continuation of the tutorials from the previous chapter. Please do not attempt to use the tools described below yet, just note their existence. If you want to continue with the practical examples, please go to the next topic: Controlling Program Flow in Scripts. |
Navigating the Script Editor
The Script Editor contains several useful tools for navigating and error-checking large scripts.
Tabs and Indentation
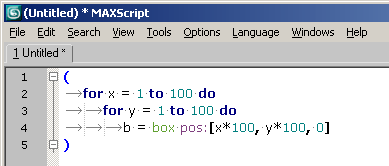
You can use the TAB key to control the indentation in your script. This makes it easier to read the script and to keep track of opening and closing parentheses used to create blocks of commands.
In contrast to some simpler text editors, selecting multiple lines and pressing TAB will not delete the lines but indent them as a block.
To move the selected line(s) back one tab position, you can press SHIFT+TAB.
If you press the RETURN key to add a new line while inside an indented block in your script, the newly inserted line will respect the indentation and will also use the same number of tabs as the surrounding code lines. If you want the new line to be less indented, you can press the BACKSPACE key one or more times to remove one or more Tabs.
Optionally, you can also display the tabs and other "white spaces" by pressing Ctrl+SHIFT+8 to make it easier to see and correct the formatting.

CTRL-Right Click Navigation
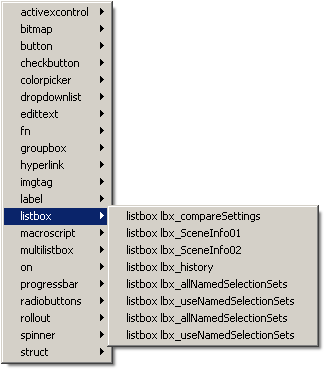
Pressing Ctrl+Right Mouse Button will open a right-click menu which allows you to jump to any specific event, UI item, function or rollout definition in the script. Selecting an entry from this menu will reposition the editor at the code line containing the definition of the selected item.

For this feature to work, the Editor must contain at least one of the supported elements. Otherwise, no navigation menu will appear.
Bracket Balance
In complex scripts, it is common to lose track of blocks of commands, causing you to add extra parentheses or leave them out. You can find these errors by pressing Ctrl+SHIFT+B. MAXScript will highlight the block that your cursor is on, showing you the start and end parentheses. Pressing Ctrl+B will jump the cursor to the matching parenthesis. Also, the Editor will show by default guides connecting pairs of parentheses, making it easier to see the relationships.

Color Coding
MAXScript will display different elements of your script in different colors, making it easier for you to navigate your script at a glance.Since 3ds Max 2008, the color coding is based on data exported from MAXScript directly into the listener, thus all kinds of keywords, functions, interfaces, object names and so on are recognized automatically and colored accordingly.
The color coding is performed dynamically, but can be switched off by using SHIFT+F11 or the Language > Text option from the menu. Select Language > MAXScript to enable the color coding again.
