Create hair clumps and curls
A new Clump modifier lets you generate realistic clumping effects in hair and fur. Clumping creates more natural looking hair by breaking up the uniformity of its flow.
Use the modifier to refine your groom by adding secondary clumping or by generating other interesting hair shapes and effects, such as, curls and coils. Control the size, shape, and distribution of the hair clumps using the modifier attributes, expressions, or control maps and masks.
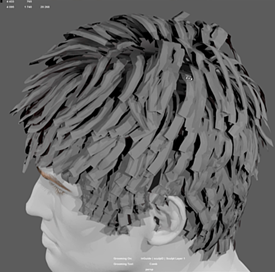
Interactive grooming for games characters

Maya 2017 Update 3 provides enhancements for using interactive grooming with games characters. After shaping hair and fur with the interactive grooming tools and modifiers, use the new Twist brush to quickly optimize the hairs, guides, or wires before converting the groom to Maya geometry. The Twist brush lets you rotate the facing angle of hairs and guides along their length. This way, the resulting polygon strips properly cover the character mesh surface at all angles.
See Prepare a groom for conversion to geometry.
To complete the workflow, convert the hairs or guides to polygon strips by selecting Generate > Convert Interactive Groom to Polygon. Converting interactive grooms to geometry does not alter the hair in any way. This means you can easily create multiple variations of your hair by modifying the description and then generating additional polygon versions. See Convert XGen hair and fur to Maya geometry.
Collide objects with hair and fur

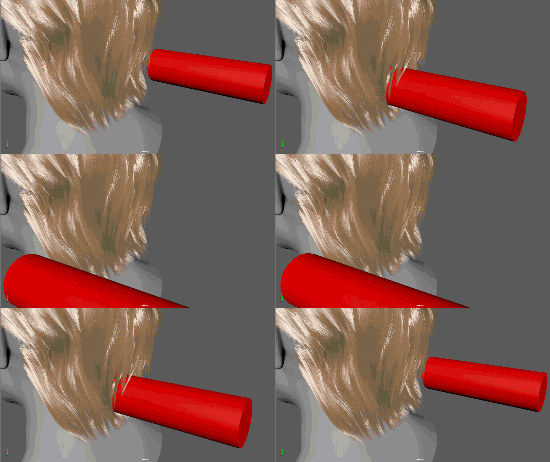
You can now collide hair and fur with meshe objects using a Collision modifier. Use a Collision modifier to deform hair and fur around objects, such as hats, or to prevent hairs from intersecting character meshes.
Cut modifier
Globally trim hairs to a specified length without affecting their shape by using the new Cut modifier. You can set the cut length in world space units or as a percentage of the overall hair length. Use a mask or an expression to vary the cut length.
Create hairs and guides from Alembic cache files
You can use curves from an Alembic cache file to create hair guides, and wires. This improvement lets you read the curve data directly from the Alembic cache without importing the cache into the scene.
See Create interactive groom hairs and guides from existing curves.
Interactive grooming tool updates
The Density and Place tools and description_base node now include a Smoothness attribute, which improves the interpolation results when generating new hairs. Higher values increase the amount of neighboring hairs that influence the shape of the new hairs. Use Smoothness if you see unwanted hair clumping or other unsatisfactory results with the new hairs.
Interactive Grooming MEL commands
A number of MEL commands are now available, which let you automate routine interactive grooming tasks and help you customize the way you handle interactive grooming splines in your production pipeline.
XGen Interactive Grooming technical documentation
Access interactive grooming data API example
A new API example demonstrates how to access XGen interactive grooming spline data for third-party plug-ins, such as the Arnold for Maya renderer. You can access this example from the devkit folder of the plug-ins\xgen directory. For example, from the Maya installation package browse to:
\runTime\plug-ins\xgen\devkit.
For API technical documentation for the example, see Access interactive grooming spline data using the XGen API.
XGen geometry instancer performance improvements
Viewport 2.0 interactivity and performance have been improved when working with large numbers of XGen guides and when sculpting guides using the Sculpt Guides Tool.
This improvement can be toggled off and on by setting the XGEN_ENABLE_GUIDE_GEOMETRY_OVERRIDE environment variable. By default this variable is turned on. See XGen Environment variables.