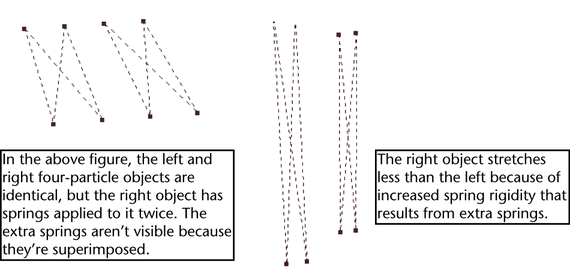
After you create springs on an object, you can add or remove selected springs to tune the spring effect. This is useful if you need to add a few more springs to an object between points previously without springs. You can also add two springs to the same pair of points to increase rigidity. A single stiff spring has an attractive force that differs from two springs set less stiffly.

To add more springs to an object
- Select the objects or components to receive the additional springs.
- If the associated spring object isn’t already selected, Shift-select it.
- In the Spring Option window, turn on Add to Existing Spring, then click the Create button.
To remove selected springs from an object
- Turn on Select by Component Type: Lines, preferably with all line types other than Springs turned off.
- In the workspace, select the springs you want to remove.
- Press the
 (Linux and Windows) or
  (Mac OS X) key.
To remove all springs from an object
- Turn on Select by Object Type mode, then select the spring object in the workspace.
Be careful not to select the particle object or geometry with the spring object. You can alternatively select the spring object in the Outliner.
- Press the
 (Linux and Windows) or
  (Mac OS X) key. Tip:
If you’ve animated spring attributes and don’t want to lose the animation, simply remove all selected springs on the object and add new ones. The new ones receive the prior attribute values.