The Kinect device enables you to use the Microsoft® Kinect® 1.0 device for Windows to capture a body performance of a single actor within the capture volume. You can use the captured performances to drive your MotionBuilder characters.
Connecting MotionBuilder to Kinect

Using the Kinect 1.0 plug-in properties you can connect MotionBuilder to the Kinect device.
To connect MotionBuilder to the Kinect device:
- Drag the Kinect 1.0 plug-in and drop it on the viewport.
The plug-in appears in the Navigator > Devices folder.
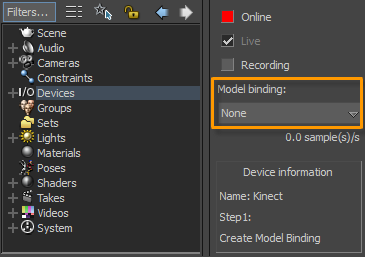
- From the Kinect 1.0 plug-in properties, choose
Create from the
Model binding drop-down list.
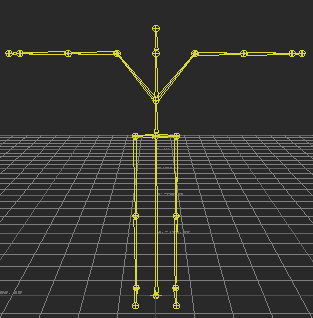
This creates a Kinect skeleton on the viewport.
 Tip: The Device information section on the properties pane provides step-by-step instructions about using Kinect.
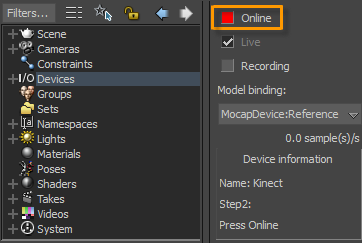
 - Click on the red
Online check box.
 The Mocap Device Info dialog box appears.
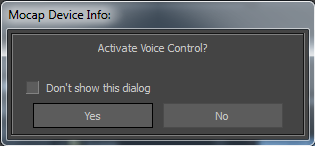
- Click
Yes, if you want to activate voice control.
The Online icon turns to green. It indicates that the MotionBuilder is successfully connected to the Kinect device.
Setting up a MotionBuilder Character
After connecting to the Kinect device, you need to setup a character in MotionBuilder to retarget a captured performance.
To setup a character:
- In the
Setup tab >
Character Path of the Kinect 1.0 plug-in properties, specify the path where your character file (.fbx) is available or click the button next to the text box to locate the file.
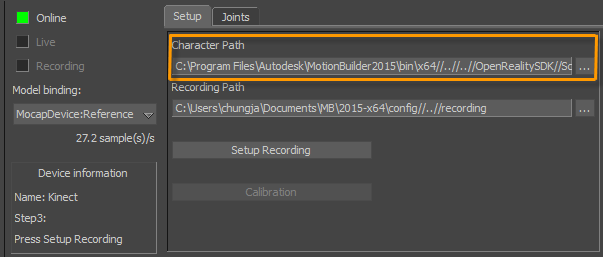
By default, the path is set to load the C:\Program Files\Autodesk\MotionBuilder2015\OpenRealitySDK\scenes\male_01.fbx file. This is the generic male character created using the Autodesk Character Generator. See the Autodesk Project Pinocchio website for more information.
- Adjust the following character attributes to achieve bets results on the retargeted character:
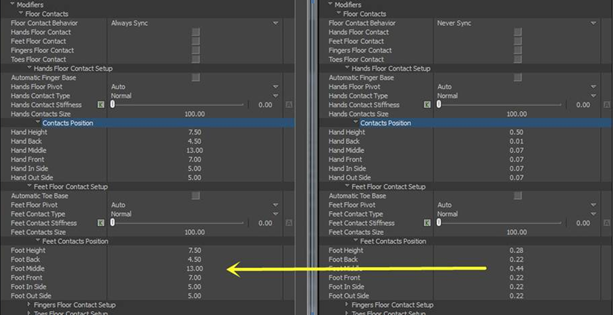
- Adjust the floor contact positions to a proper location. This keeps the hips at a proper height and also resolves the knee bending issue.
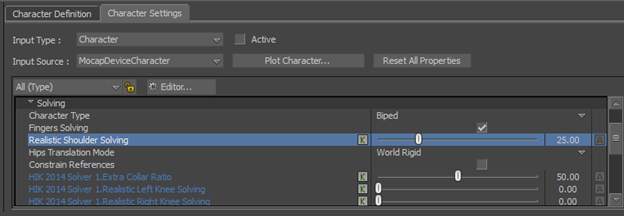
- Change the realistic shoulder solving setting from 0.00 to 25.00. This makes the shoulder motion on the target character to better follow the shoulder motion of the source device character.
- Adjust the floor contact positions to a proper location. This keeps the hips at a proper height and also resolves the knee bending issue.
- In the
Recording Path text box, specify the path where you want to save the performance capture or click the button next to the text box to choose a destination folder.
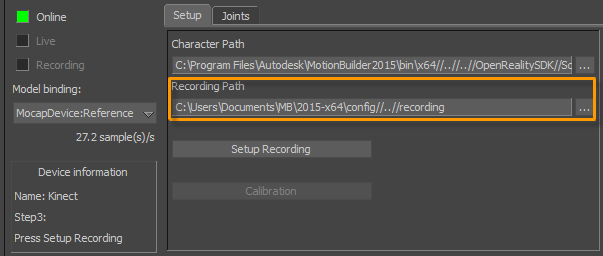
- Click
Setup Recording.
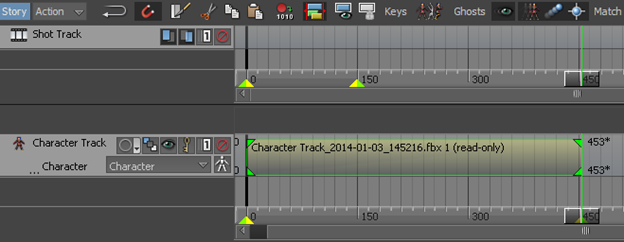
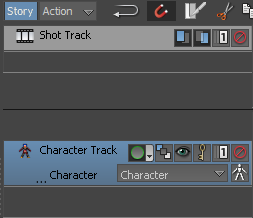
This brings in the specified character file, sets up the recording path, creates a new Character Animation Track in the Story tool, and assigns the character file in the Character Animation Track.
- Click
Calibration.
The Mocap Device Info dialog box prompts you to stand in front of the camera for calibration.
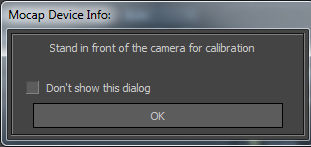
- Click OK.
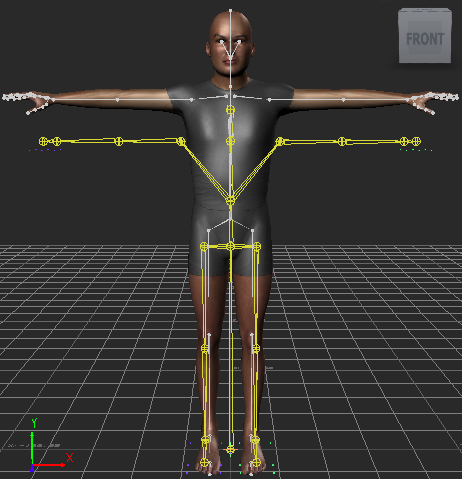
- Stand in front of the camera until MotionBuilder recognizes you as an actor.
Tip: You can get the best data when you are 2.5 to 4 meters away from the camera and the camera is around the same height as your hips. You can achieve this by standing closer to (0,0,0) in the viewport.Once the calibration is completed, you can hear the beep sound and notice the target character follow the Kinect skeleton.
Recording Motion Capture
You can record motion capture using either the buttons in the Transport Controls window or voice recognition.
To record using the Transport Controls window:
- Click the Record button.
- Click the Start button.

Standard recording voice controls for the Kinect device to recognize are:
- Record — Starts recording.
- Stop or End — Stops recording.
- Play — Plays the recorded motion capture.
- Reset — Resets to frame 0.