All parts have attributes which make them easier to organize in a Netfabb project, although they do not have a direct influenc on their physical characteristics when manufactured. These are the part’s name, color, group and number.
Rename Part
 Parts in your project can be renamed via the
context menu in the main screen or in the Project Tree, or the respective
Edit
menu option.
Parts in your project can be renamed via the
context menu in the main screen or in the Project Tree, or the respective
Edit
menu option.
Change Colors
 The color can be changed for parts and slices. Right-click them and choose
Change Color in the context menu, or double-click the colored dot next to the part in the Project Tree, to open the OS' standard color picker dialog. This dot always has the current color of the part.
The color can be changed for parts and slices. Right-click them and choose
Change Color in the context menu, or double-click the colored dot next to the part in the Project Tree, to open the OS' standard color picker dialog. This dot always has the current color of the part.
Groups
 Parts can be grouped via context menu in the Project Tree. You can either create a new, empty group and then add parts, or create a group from currently selected parts. Parts can then be added to the group or moved out of the group by drag & drop within the Project Tree.
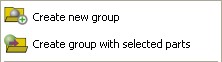
In the context menu of parts in the Project Tree you can create an empty group or a group containing all selected parts.
By clicking the group in the tree you select all parts in the group.
Groups have their own context menu. You can rename groups, remove groups and all associated parts or, if you have groups which do not contain any parts, you can remove all empty groups. Ungroup removes a group and places any contained parts on the same level where the group used to be. Furthermore, groups can be locked. This means that as far as the 3D Packers are concerned, any contained parts are regarded as one single part consisting of multiple shells (with empty, usable space in between). Intersecting parts in a locked group will also not trip Collision Detection.
Changing the group color changes the color of any contained parts. The icon of the group in the tree is updated so that the dot above the folder displays the group color. However, this color only applies to parts while they are part of the group. Moving a part out of the group, its own color is restored.
If you Show or Hide a group, all parts in the group are shown or hidden. You can also do that by clicking the eye icon next to the group in the tree. This eye also indicates whether the parts of the group are shown or hidden. Whenever all parts in the group are shown, the eye is orange. When all parts are hidden, it is grey. When some parts are shown and some hidden, it is half orange and half grey.
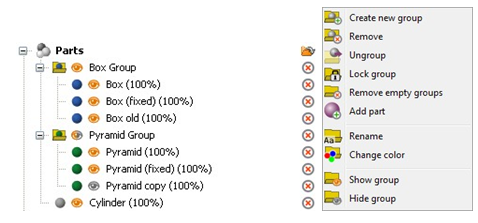
Left: Two groups in the Project Tree. Right: The context menu after right-clicking a group.
Part Numbers
As parts are added to a project, they are numbered incrementally. This increment is maintained even when parts with lower numbers are deleted from the project, or replaced by editing methods such as Repair, which may replace the original, should you choose to have it do so. The numbering of parts can help to keep an overview over projects containing many parts.
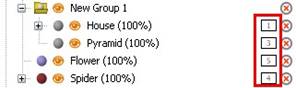
Here, the numbers of the parts are shown in the Project Tree.