This feature works similar to extruding surfaces. It does not only change the shape of the part in one direction though, but in 3D. This can be very helpful to determine an offset for specific regions of a part. You can find the 3D Extrude in the tab right next to the Simple Extrude.
Select the surface you want to edit and shift the extrusion by pulling the grey surface that is displayed. You can also enter the exact value in the Shift field on the right or with the slider.
By checking the Smooth box, the direction of the surrounding triangles will also be considered in the calculation. This way, the contrast between extrusion and remaining surface won’t be so radical. With the Improved mode, the size of the selected triangles are factored in. That means, that the direction of the extrusion is mostly determined by the bigger triangles.
3D Extrusion also enables you to thicken the walls of a part. Select the Thickening option in the extrude type window. After completing the thickening process it is necessary to run the extended repair script or at least use remove intersections. Otherwise the part will have some intersections and flipped triangles, causing issues with other modules (for example support) or when printing the part.
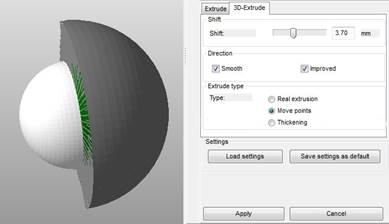
3D Extrusion of one half of a Sphere.