With manual repair operations you can perform simple repair and mesh editing jobs. The manual operations are available in the toolbar. Remove selected triangles and Flip selected triangles are also available in the Repair menu and in the context menu, if you right-click on a selected triangle.
 Add triangles: This mode enables you to close holes manually or to connect edges. A triangle is created by first clicking on a border edge of a triangle, which is then marked in a blue color. Now, if you move the mouse across another border edge, you get a green preview of potentially added triangles. By clicking on another border edge, triangles are inserted. If the two edges you clicked on are connected by a common corner point, it is one triangle. If they are not connected, two triangles are inserted. If any border edges of the new triangles are neighboring other border edges, these are connected automatically.
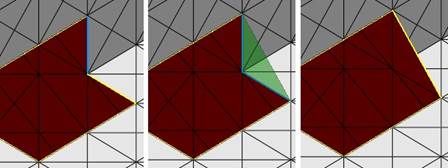
Add triangles: First, a blue marking of the first selected edge. Second, a projection of the new triangles. Third, the resulting triangles.
 Add nodes: In effect, this mode enables the user to refine the triangle mesh manually by inserting new corner points. A corner point can be inserted by a mouse click on a triangle. New edges are inserted, connecting this point with the three corner points of the old triangle. So, one triangle is split into three. If a node is placed on an edge, both adjacent triangles are split into two triangles. As long as the left mouse button is held down, the node is not placed and can be moved across the surface to the favored position. At the same time, you can see a bright blue preview of the new triangles. The shape of the part does not change, though the nodes can play a vital role during further repair operations.
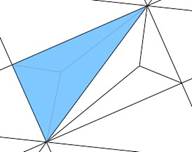
A node is added in the middle of a triangle.
 Collapse edges: This functions allows you to remove single edges out of the mesh. This can be useful for reducing the number of triangles needed to describe a plane, or simply to improve the mesh quality.
 Add free triangle allows you to add triangles to an open (yellow) edge. Here you don’t have to connect two edges. Simply move the mouse over the edge and it will turn blue, then hold down the left mouse button and drag the mouse in any direction to create the triangle.
 Move nodes: Netfabb is basically a software for file preparation, not for constructing. Holes and other errors therefore are repaired in the simplest way: A hole is usually closed by a plane, a curve won’t be adapted. This can cause troubles, especially with scans. But with the Move nodes mode you can easily tweak the model and tinker the curves.
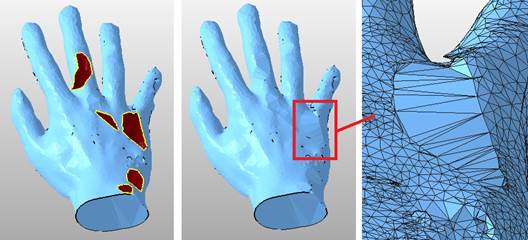
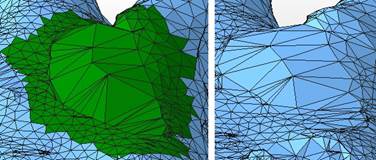
Left: A scan with holes. Middle: Holes are usually closed by a plane. Right: detailed view on the plane. - You can tweak these surfaces and reproduce the curves (see below).
When the mesh is very irregular, you should add nodes on the plane first (see Add nodes above). Then choose the move nodes mode and pull the nodes with the mouse. Whenever you start dragging a note, a label with the x,y and z coordinates of the node pops up.
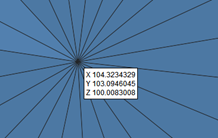
The label dynamically shows the coordinates of the node
By performing a right click on the label you can also change the numeric coordinates of the node for precise changes.
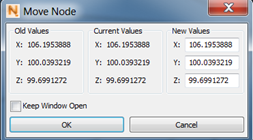
Perform a right click on the label to access this menu, where you can make numeric changes to the different coordinates.
Then you can continue repairing the file. You can for example delete unwanted bumps, close the holes and smooth the new surface.
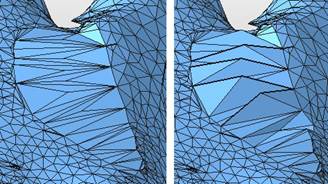
Left: Add nodes first to have better control over the mesh. Right: Pull the nodes with the mouse.

Possible further editing (a): delete unwanted triangles and close holes.
 Remove selected triangles: Selected triangles are deleted. This can also be done by pressing Delete.
 Flip selected triangles: The inside and outside of selected triangles are turned around. Thus, the triangles are inverted.
Possible further editing (b): select new surface and smooth it.