With a click on the white field that says <no image> in the tabsheet you can choose an image. Netfabb can read BMP, PNG and JPEG files - they work best when they are black/white only. If you have grey or color pictures, adjust the grey level with the threshold bar below. Now click on the model to view the image on the part.
In the tabsheet, define the height, width and depth of the image. It’s also possible to adjust height and width by dragging the label’s blue outlines with the mouse. Rotate the part by with dragging the little grey boxes. Then choose the build type: Add parts will make the label stand out of the model, subtract from part will engrave it. You can also use inverted texts, which is useful for creating molds for example. Press Apply to finally label the part.
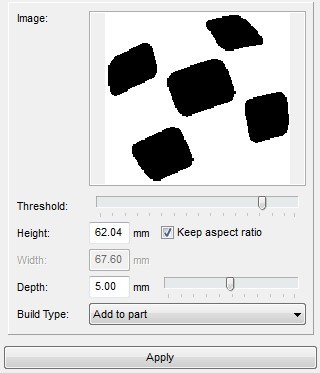
Choose an image with a click on <no image> and adjust the grey scale threshold.
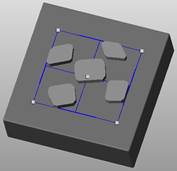
The preview of the labeled box. Change the size by dragging the blue lines, for rotating, drag the grey boxes.
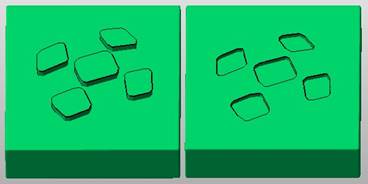
Left: an added label. Right: subtracted and inverted label.