The positioning of slices is very similar to the positioning of three-dimensional parts. These operations can be conducted either by drag & drop or by inserting specific values in a dialog box. If you move parts by drag & drop, the values for the scale, translation and rotation are updated live in the tabsheet as you move the mouse.
 Selected slices can be
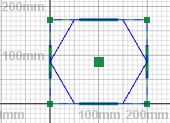
moved around on the X-Y-plane by drag & drop, clicking either on the selection box or on the green square in the center of the slice. Alternatively, by clicking on the Move Slices-icon in the toolbar or choosing Move in the context menu, a dialog box for manual transformations is opened. At the top of the dialog, the current selection, the part’s position and size are specified. Then you can set specific coordinates along all three axes for moving the slice. If the box relative translation is ticked, the coordinates you enter represent the direction of the movement from the current position. Or you can enter the coordinates for the absolute position with reference to the origin with the X- and Y-coordinates zero. When the box
Keep window open is ticked, you can apply the changes by
Translate, the dialog will stay open and you immediately can move the part again.

Slice at zero coordinates
 Slices are
rotated by clicking the corners of the selection box, holding the left mouse button and moving the mouse. By holding
Ctrl, slices are rotated in 10° steps. By holding Shift, they are rotated in 45° steps. Through the
Rotate Slices button in the toolbar or the option
Rotate in the context menu, you get the dialog box, just like in the three-dimensional default mode. You get the main information about the part again and you can specify an angle of clockwise rotation. If the box
Keep window open is ticked, you can apply the changes by Rotate, the dialog will stay open and you immediately can rotate the part again.
 Similarly, slices can be
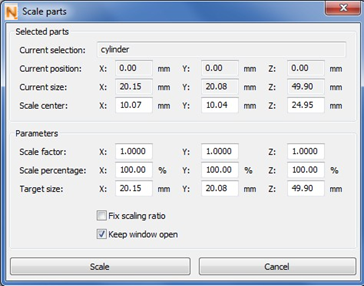
scaled by drag & drop or with help of the Manual Transformation dialog box. Click on the center of the selection box edges and drag them outwards or inwards to enlarge or shrink the slice. If you hold Ctrl, the center of the slice stays in the same position. If not, the opposite edge of the selection box keeps its coordinates.
With the option Scale in the toolbar or in the context menu, you can set specific scaling factors for the X- and Y- axes and for the Z-axis. First, you get information about the current selection, the part’s position, size and the scale center. Then enter the scaling parameter: a scaling factor (for example, factor 2 makes the part twice as big), by a percentage or by defining the actual size. Slices are always scaled evenly in both the X- and the Y-direction. With the Fix scaling ratio box ticked, the dimensions of all three axes are scaled by an equal factor and consequently makes the whole part bigger or smaller. If it’s not ticked, the values of X- and Z-axis can be changed. X- and Y-axis will always be kept synchronous. If the box Keep window open is ticked, you can apply the changes by Scale, the dialog will stay open and you immediately can change the part’s size again.
 The
mirroring function can be found in the submenu Extended in the context menu. As in the handling functions before, you can check the current selection, its position and size. Then decide whether you want to mirror it along the X- or the Y-Axis. Additionally, it’s also possible to define you own X- or Y-value for a specific mirroring plane. The slices will be mirrored along the Y-axis and placed in the same position as the original part. If you want it to be mirrored along the X-axis, simply rotate the part by 180° around the Z-axis. To keep the original next to the mirrored part, uncheck the respective box Remove original part. If you want to make several changes after another, it’s recommended to
Keep the window open. Now apply the calculations by clicking on Mirror.

Dialog box for scaling slices