 The Automatic placement module nests parts by their shape on the platform (2D). It is available in the Edit menu and via the shortcut icon on the bottom right of the default screen. For nesting, you can adjust:
- the Minimum distance between parts
- the Accuracy: the higher the accuracy, the finer the rasterization of the platform and the higher is the packing density
- the Z rotation steps: defines, how many options you have when rotating the part along the z-axis. The more steps you have, the more options and the higher the density you will reach.
Whenever you want to place specific parts manually and let Netfabb nest other parts around those, you can select these additional parts and chose Pack only selected parts. With this option, the unselected parts won’t be moved anymore.
The second checkbox decides, if you want to place non-fitting parts outside of the platform. It’s usually recommended to set this tick, as you have a better overview of packed and unpacked parts. In addition, the distance to the platform borders can be defined. Click on Pack Platform to arrange the parts.
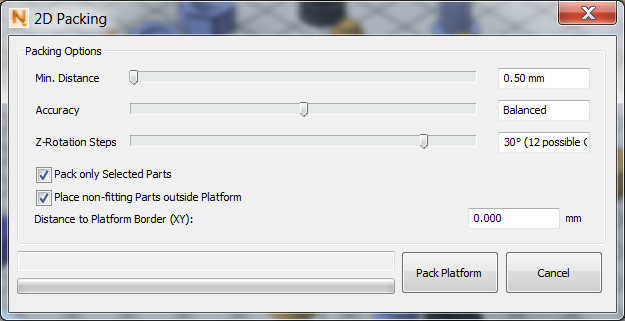
Set the parameters for the packing density.
On the right side in the tab you can see either a big red cross or a green tick. This shows whether any parts are intersecting or not.
It is possible to update the view of the Display collisions, by clicking on the according button at the top right. Thereby a new calculation is performed and a new view of the collisions becomes visible.

The result of a perfectly accurate packing process.
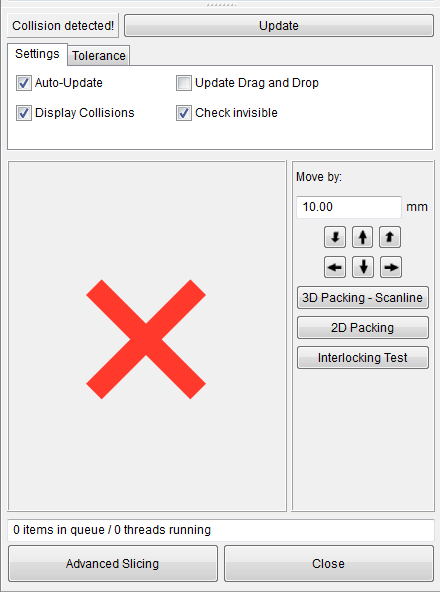
The context tabsheet while using Packers, as presented by Collision Detection. The red cross signifies that some parts are intersecting.
If the field Auto-Update is activated, each time you move a part a collision detection is performed. If you have ticked the button Update drag & drop, a Live-Update will be performed during each positioning of the part. This will help you to position the parts very accurately, but can lead to long calculation times when complex parts are processed. The field Display collisions must be ticked, if you want to visualize collisions. Again, you can save processing time by removing the tick mark from the box and set it back only after certain steps. If parts are hidden, it is also advisable to have them checked by clicking on the button Check invisible.
On the right of the red cross or green tick, there are six arrows, to move the select part to the left, right, top, front and back. If you use these arrows, the parts will be moved along the 3 axes.