A license is an authorization to run Autodesk Nastran. Possession of a license indicates that the software has been obtained legally and is an authorized copy which may be executed. There are two licensing options available for Autodesk Nastran, stand-alone and network. For more information on the types of licensing used and the licensing setup, review the Installation Basics and the Installation Administrator's Guide.
Activating Autodesk Nastran
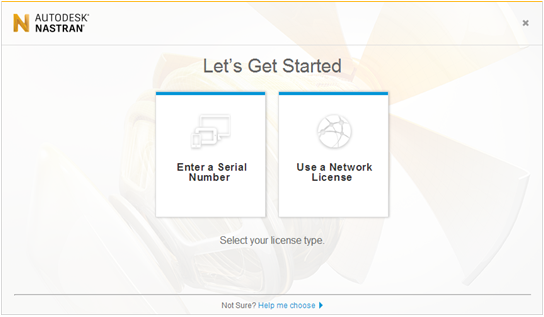
- After the Let's Get Started window appears, select the Enter a Serial Number or Use a Network License option.
- Click the Activate button.
- Enter the licensing information (Serial Number, Product Key, and server and port name if using the Network license). If you have a Network license, enter the server and port name in the format of port@servername. It may be necessary to use the server IP address instead of the server name.
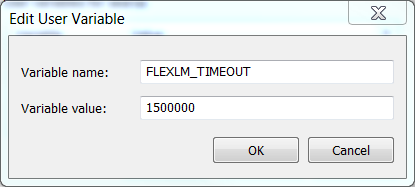
Note: If you experience issues connecting to your server, it may be necessary to add the Environment Variable FLEXLM_TIMEOUT with the Variable Value set to 1500000.
- Log in using your Autodesk User ID account. If you do not have an account, go to the Autodesk Account portal to create one.
Testing the Autodesk Nastran Installation
After you have successfully installed Autodesk Nastran you should test the installation and make any of the suggested changes to the configuration settings, as described below.
- Running Autodesk Nastran from the Autodesk Nastran Editor
- You can now test Autodesk Nastran by using the Autodesk Editor to open the Test.NAS file located in the installation folder (by default C:\Users\Public\Documents\Autodesk\Nastran 2017\Example Files\en-us\). Launch the Autodesk Nastran 2017 Editor from the menu item.
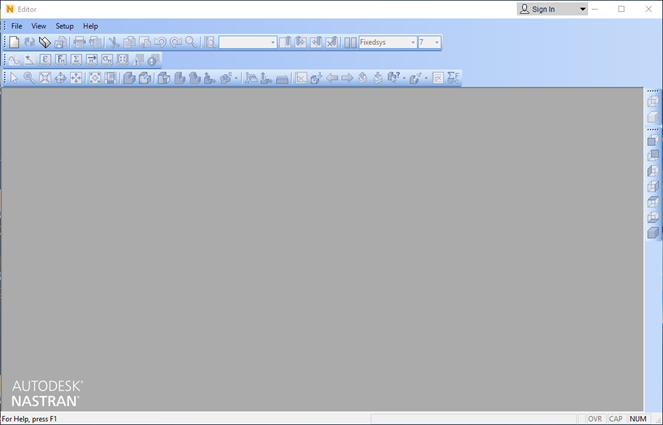
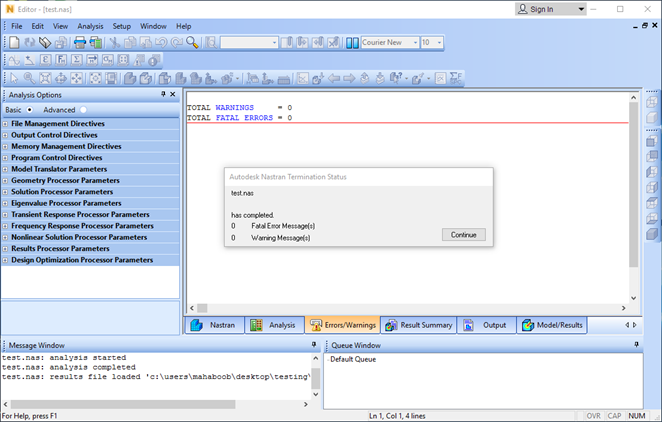
- Open Test.NAS file, select Analysis, Run (or press F5) to run the model. The Autodesk Editor should terminate with no error or warning messages as shown in the picture below.
 Note: Make sure everything works when you are logged in as Administrator.
 - Running Autodesk Nastran from the Command Prompt
- To run Autodesk Nastran from a Command Prompt window inside of Windows, see the Autodesk Nastran Reference Guide, Section 1, NASTRAN Command Line. You must open the Command Prompt using the right-click "Run as Administrator" command.
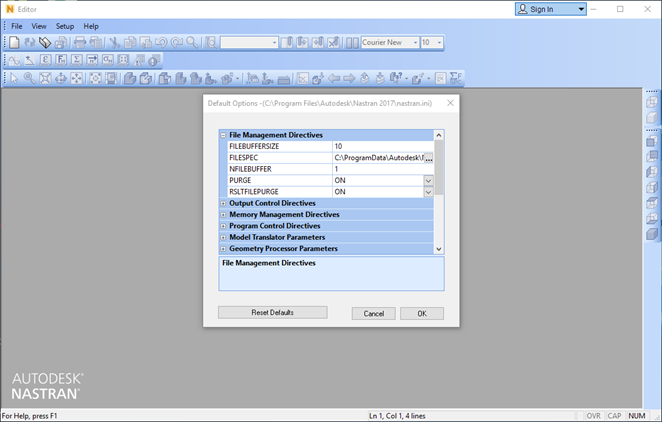
- Configuring the Model Initialization File
- The Model Initialization File (Nastran.INI) configures Autodesk Nastran to run on your system. It is divided into the following five sections:
- Each section has associated with it a group of related directives and each directive has a default setting (see the Autodesk Nastran Reference Guide, Section 2, Initialization, for directive syntax and default settings).
- For most configurations, the default settings in the Nastran.INI file will provide optimal performance. There are a few directives you may want to change depending on your configuration. Changes can be made either using a standard text editor or through the Autodesk Nastran 2017 Editor Options menu.
- The easiest way to modify the Nastran Model Initialization File (Nastran.INI) is to open the Autodesk Nastran Editor from the Start menu (). Then select and click on the desired section and option. To set model specific options, open the Model Input File and use the options menu displayed to the left.
- The first directives you may want to modify are the scratch file folders. Double-click File Management, then on the FILESPEC directive to change the folder. You will want to select a folder on a disk with a large amount of available space.
- The RAM directive setting can greatly affect performance and is automatically optimized for your particular computer when you install the Autodesk Nastran. If you want to modify it, you can do it under Memory Management Directives section.
- Another directive you may want to modify is under Geometry Processor Parameters, SHELLRNODE. Turning SHELLRNODE to ON converts all CQUAD4 and TRIA3 elements to CQUADR and CTRIAR. The CQUADR and CTRIAR elements are complete 6 DOF/node elements, which typically give more accurate results.
- One last directive you may want to modify is under Solution Processor Parameters, SOLUTIONERROR. You can avoid getting a fatal error when a non-positive definite caused by a modeling error is encountered by setting SOLUTIONERROR to ON and FACTDIAG to 0.0. You can also avoid getting a fatal error when a singularity is encountered by setting SOLUTIONERROR to ON and FACTDIAG to 1.0E-10. Note that while these options are useful for detecting modeling errors, they may lead to solutions of poor quality or fatal messages later in the run. It is recommended that SOLUTIONERROR be set to OFF for production runs.
Section Purpose [File Management] File Management directives allow the user to specify the names and locations of input, output, and database files. [Output Control] Output Control directives allow the user to control what output files are generated and what they have in them. [Memory Management] Memory Management directives allow the user to control what type of memory (virtual or physical) and how much will be used for memory intensive tasks such as matrix assembly and decomposition. By optimizing memory usage the user can optimize performance. [Program Control] Program Control directives allow the user to customize program execution by controlling how and what tasks are to be performed. [Parameters] Parameter statements that are specified using the PARAMETER command or entry can be specified in this section using the directive format. See Section 5, Parameters.