To turn on P&ID Painter
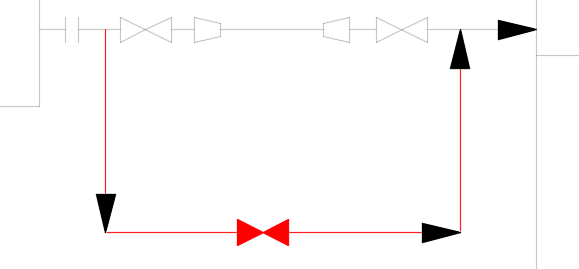
Color all P&ID drawings by property for the current session.
- On the ribbon, click Home tab
 P&ID Painter panel
  Painter Style list, click a style (for example: Color by Size).
- Click Paint by Property. All P&ID Drawings now display in the specified painter style.
To turn off P&ID Painter
- On the ribbon, click Home tab
 P&ID Painter panel
  Paint by Property.
Note: P&ID Painter is always turned off when you exit AutoCAD Plant 3D.
To change P&ID painter colors
- On the ribbon, click Home tab
 Project panel
  Project Manager
  Project Setup.
- In the Project Setup dialog box tree view, expand P&ID DWG Settings. Click P&ID Painter.
- In the P&ID Painter Styles list, click a style (for example: Color by Service).
- In the P&ID Painter Settings pane, in Color Settings, click a Color.
- In the Select Color dialog box, click a color. Click OK.
Note: If you want to disable a painter color, click BYLAYER.
- Click OK to close Project Setup. The new style displays in the ribbon P&ID Painter tab.
To add a painter style
Add a custom P&ID Painter style to the project.
- On the ribbon, click Home tab
 Project panel
  Project Manager
  Project Setup.
- In the Project Setup dialog box tree view, expand P&ID DWG Settings. Click P&ID Painter.
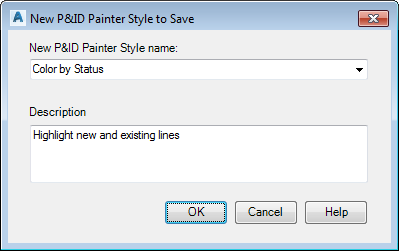
- Click Add. The New P&ID Painter Style to Save dialog box displays.
- In the New P&ID Painter Style Name box, enter a new name (for example: Color by Status).
- Optional: In the Description box, enter a description (for example: Highlight new and existing lines).
Click OK

 In the P&ID Painter Settings pane, click Assign color by. The Choose a Property List dialog box displays.
- Click a property (for example: Status). Click OK.
- If you want to change the default colors do the following:
- In the P&ID Painter Settings pane, in Color Settings, click a Color.
- In the Select Color dialog box, click a color. Click OK.

- Click OK to close Project Setup. The new style displays in the ribbon P&ID Painter tab.

To highlight unassigned properties
Display unassigned properties in red.
- On the ribbon, click Home tab
 Project panel
  Project Manager
  Project Setup.
- In the Project Setup dialog box tree view, expand P&ID DWG Settings. Click P&ID Painter.
- Click Add. The New P&ID Painter Style to Save dialog box displays.
- In the New P&ID Painter Style Name box, enter a new name (for example: Unassigned Status).
- Optional: In the Description box, enter a description (for example: Display unassigned status in red). Click OK
 In the P&ID Painter Settings pane, click Assign color by. The Choose a Property List dialog box displays.
- Click a property (for example: Status). Click OK.
- In the P&ID Painter Settings pane, in Color Settings, click a value that is used in the project (for example: New for a status, or P for a service).
- Click the Color for the selected value.
- In the Select Color dialog box, click ByLayer. Click OK.
- Click Color fading. Specify a fade value (for example: 75 percent).
- Repeat steps 8 to 11 for other values that you use in the project.

- Click a value that is not used in the project (for example: Property Value Not Set).
- Click the Color for the unused value.
- In the Select Color dialog box, click red. Click OK.
- Repeat steps 13 to 16 for other values that you do not use in the project.
- Click OK to close Project Setup.
