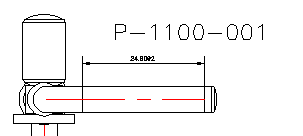
In an orthographic drawing, you can add dimensions in the orthographic viewports as you can in any AutoCAD drawing. For more information about adding dimensions in drawings, search for About Dimensioning in the AutoCAD Help system. Your CAD administrator has probably set up the default dimension style from the Ortho Settings dialog in the DWT.
Note:
Make sure you are in paper space when adding dimensions.
- In the Project Manager, click the Orthographic DWG tab.
- In the Orthos tree view, expand the project and the Orthographic Drawings folder. Double-click an orthographic drawing.
- On the ribbon, click Ortho View tab
 Dimensions panel
  Dimension.
 - In the drawing, specify the first and second extension line origins or press ENTER to select an object to dimension.
- Use the cursor to move the dimension line in the drawing. Click to set the dimension line.

Note:
Dimensions do not update when the model updates. You must adjust the dimensions manually.