Refine your scan by manually registering common points across two scans.
Manual Registration is available at any time during the registration process. Electing to leave the Auto-Registration compiles any registration already completed and allows you to finish the registration process through the standard manual workflow.
In some instances, Auto-Registration will not be able to find enough matching data to add a scan correctly. In these cases, you will prompted to manually register the unregistered scans
Auto-Registration is also active throughout the Manual Registration process. The actively selected scan on the right is automatically checked for fit against the selected scan in the scan group on the left. In the case of a match or potential match, you will be prompted to use the Auto-Registration function.
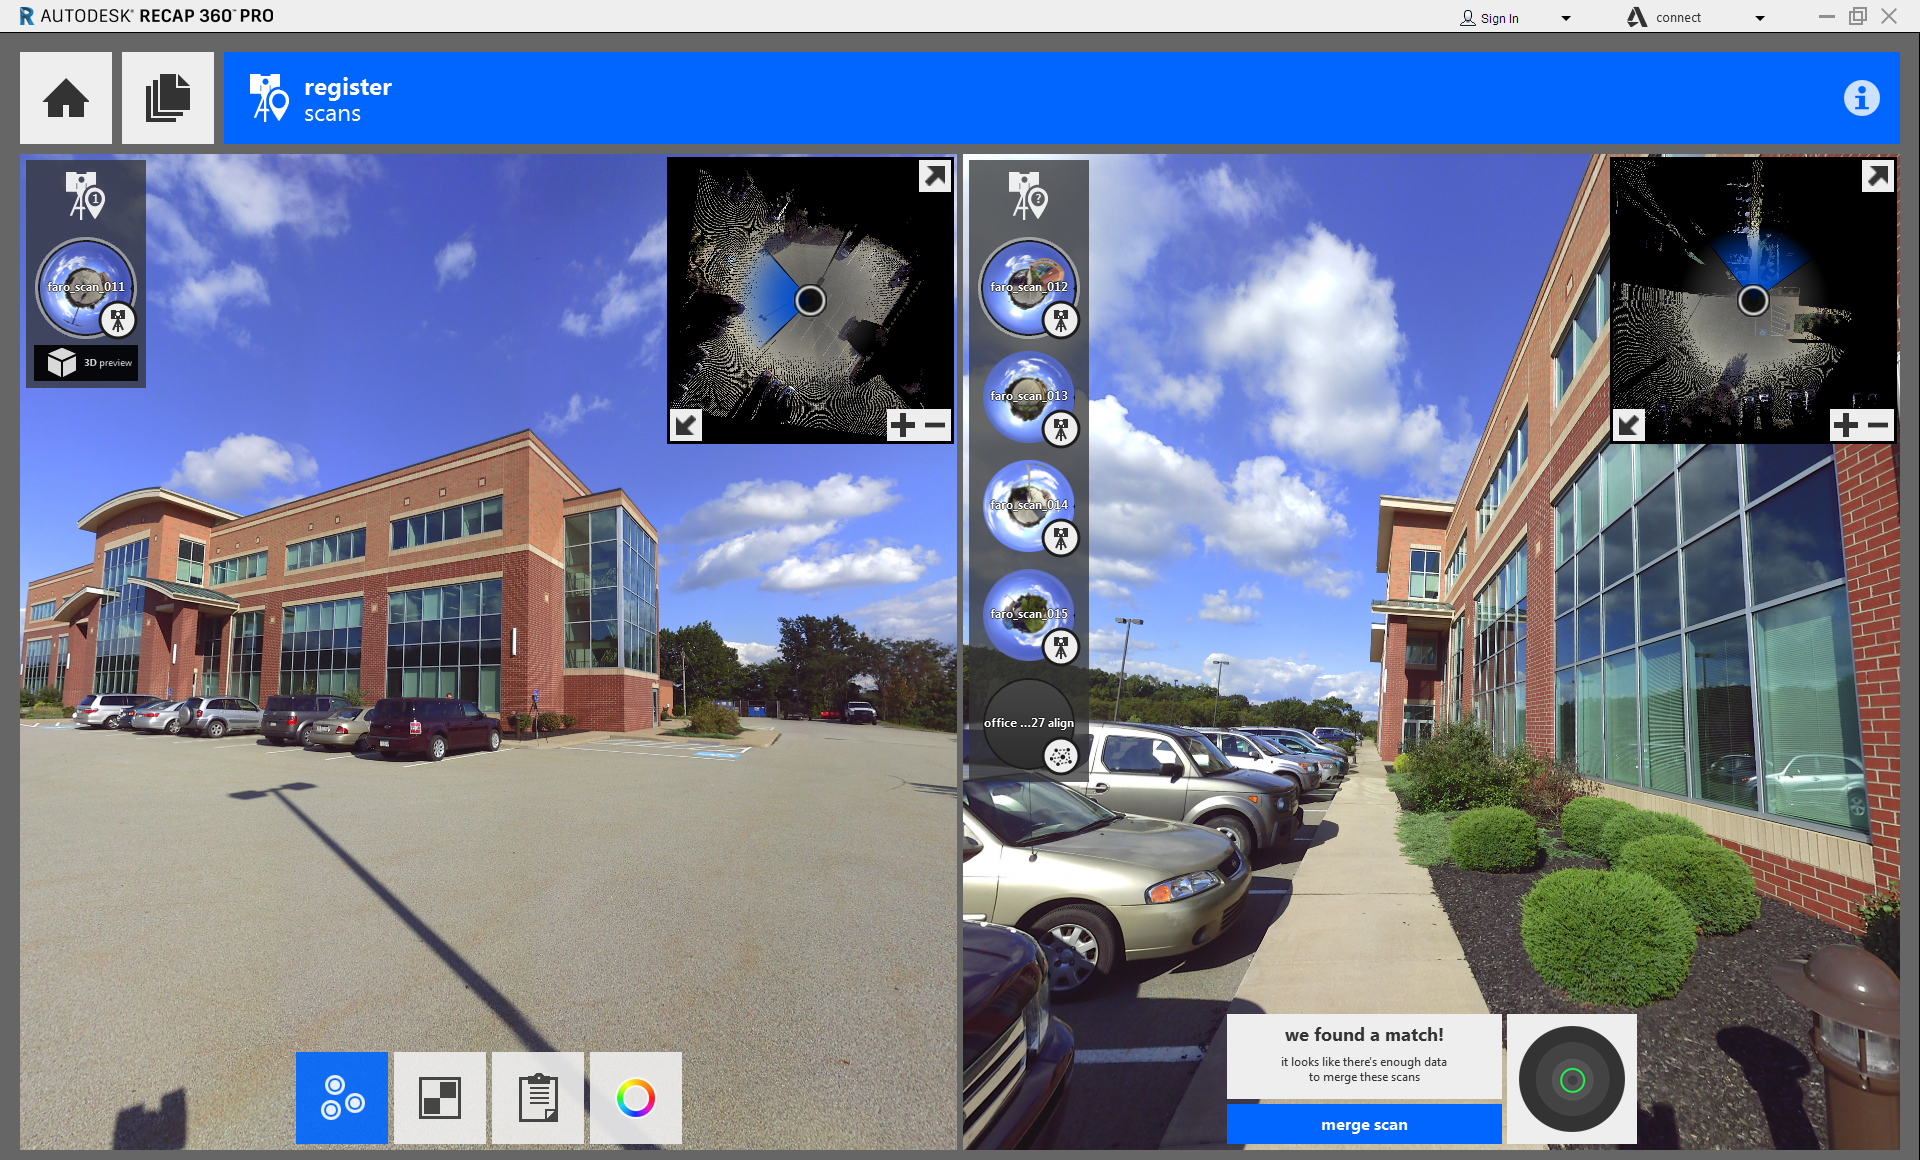
Choosing different active scans on left and right will provide different levels of success for Auto-Registration-matching based on the two currently visible scans, but the registration will be done on the entire scan group. The screenshot below portrays the hybrid of Manual Registration and Auto-Registration:

Manual registration can be completed through the cloud-to-cloud technique whenever Auto-Registration fails or in place of it. The tool can be accessed during the registration process from the bottom tool bar. Manual Registration is also only available in ReCap 360 Pro.
The left pane contains your primary scan group that you are registering. You should think of it as unregistered scans moving from the right pane and into the left pane once registered correctly. To register a scan, select a scan in each pane then place three points in corresponding locations between the two. At least three points are required for each scan, and X, Y, and Z coordinates must be supplied for each point.