ReCap 360's UI focuses on contextual interfaces, providing information and tools when and where you need it. For an in-depth review of specific UI components, please see the Glossary.
The Project Screen
The Project screen is where you do most of your work with point cloud data. It is divided into several areas:
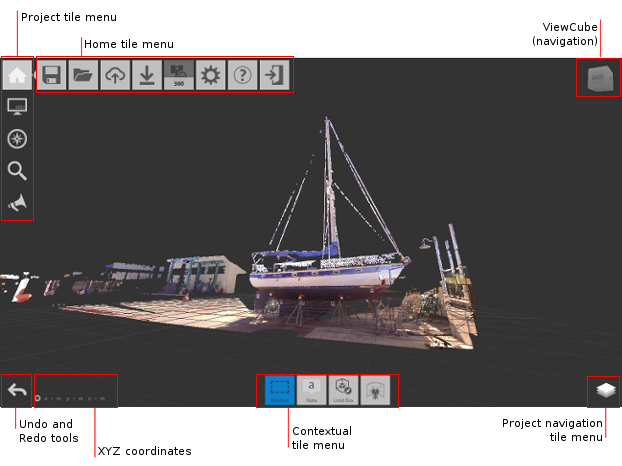
- The Home tile menu provides ways to work with the point cloud project as a whole.
- The Project tile menu analyzes and organizes components of the point cloud.
- Undo and Redo tools reverse previous actions that you've taken.
- XYZ coordinates display for the point your mouse is over.
- The Contextual tile menu changes to reflect current activities. For example, if you are editing a Limit Box, the tool set changes to display tools related to Limit Boxes.
- The Project Navigation tile menu provides access to tools such as Pan, Zoom, and Orbit. This menu is most useful to those with a single-button mouse. Flyout navigation tips on these tiles provide information about navigating with a three-button mouse.
- ViewCube provides a quick way to change the orientation of 3D views.
The Tile Menus
A majority of ReCap 360’s interface is executed in a series of nested menus. These menus provide quick access to wide variety of ReCap 360’s options and functionality. The example below outlines the behavior.
Move the cursor over tile (a), then over (b), to expand the flyout menu (c).:

You navigate to the tools on a flyout by hovering over their "parent" tiles to expand them, and then selecting the tile whose setting you want to change.