Take a temporary look at the dimension and alignment constraints in a view, to troubleshoot or modify elements in the model.
Video: Reveal Constraints
Note: This video was recorded using Revit. When performing the procedures using Revit LT, you may notice minor differences in functionality and user interface.
- On the View Control Bar, click
 (Reveal Constraints).
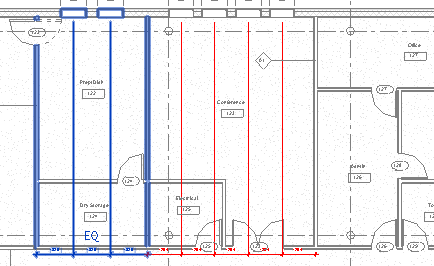
The Reveal Constraints drawing area displays a color border to indicate that you are in Reveal Constraints mode. All constraints display in color, and model elements display in half-tone (gray).
Note: To make it easier to see the constraints in this mode, make sure that the Thin Lines display option is not selected (View tab
(Reveal Constraints).
The Reveal Constraints drawing area displays a color border to indicate that you are in Reveal Constraints mode. All constraints display in color, and model elements display in half-tone (gray).
Note: To make it easier to see the constraints in this mode, make sure that the Thin Lines display option is not selected (View tab Graphics panel
 Thin Lines).
- Select a constraint to highlight the elements that are constrained.
In the following example, the constraint on the left is selected, and the 2 walls and 2 windows that are constrained are also highlighted.
- Optional: Remove the constraint by simply deleting it, or by unlocking it.
Note: Constraints that were added in sketch mode for an element display in half-tone color. Double-click the element to enter sketch mode to modify or remove the constraint.
- On the View Control Bar, click
 to exit Reveal Constraints mode.