Running a single is often just the first step in the process. In many cases, it is necessary to explore multiple design alternatives, compare the results, and determine which worked best.
Creating Model Variations
There are two primary types of design comparisons:
- One involves varying geometric features in the CAD model to produce design variations.
- The other is to vary settings such as material or boundary conditions on the same geometric model.
To compare geometry variations
- You must first make a copy of the design in the Design Study bar. To do this, right click on the design name, and click Clone. Enter a name for this new design, select which scenarios should be included in the new design, and indicate if you want to clone the mesh and results as well as the geometry and settings.
- Return to your CAD model, make the appropriate changes.
- Launch back into Autodesk® CFD. In the Design Study Manager, select the name of the new design, and click Update design.
- Confirm that all simulation settings are correctly applied, and update the settings as necessary.
- Run the new scenario.
Click here to learn more about this process.
Alternate workflow
- Instead of cloning the design, return directly to the CAD model and make the needed changes.
- Launch back into Autodesk® CFD. In the Design Study Manager, input the name of the new design, and click Add to design study.
To compare simulation settings on the same geometry
To vary settings such as boundary conditions, materials, or mesh settings, clone the scenario:
- Right click on the scenario name in the Design Study bar, and click Clone.
- Enter the name of the new scenario.
- Modify the appropriate simulation settings on the new scenario.
- Run the new scenario.
Compare Results from Multiple Scenarios
After running multiple variations, you can create Summary items and use the Decision Center to compare the performance of each scenario.
Summary Items
Summary Items are images, planes, XY plots, parts, or points that are created in one scenario and automatically mapped across other scenarios in the design study. Each type of Summary Item is created with a unique command:
To compare an image from multiple scenarios:
Create a
Summary Image with this icon:
 .
.
Autodesk® CFD automatically captures the same image in the other scenarios in the design study.
To compare numerical results on planes or parts:
Create
Summary Planes or
Summary Parts with this icon:
 .
.
After capturing a Summary Part or Plane in one scenario, Autodesk® CFD automatically captures the corresponding data from the other scenarios in the design study.
To compare numerical results at specific locations:
Create a Summary Point by checking Summary on the Points dialog.
Autodesk® CFD automatically captures the results at the selected point from the other scenarios in the design study.
To compare plotted data:
Create a Summary XY Plot by checking Summary on the XY Plot dialog.
Autodesk® CFD automatically captures the plotted data from the other scenarios in the design study.
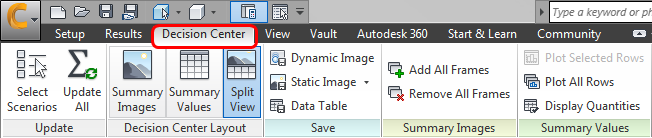
Decision Center
After capturing Summary items, compare them in the Decision Center. To open the Decision Center, click the Decision Center tab:
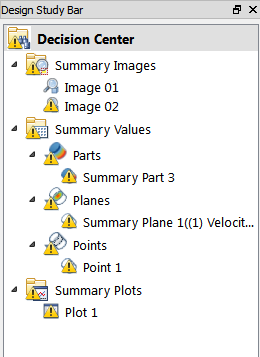
The Decision Center appears in the Design Study Bar:
Updating Summary Items
The following symbol means that a Summary item either has not been mapped to the other scenarios or that the results have changed since the last time it was mapped:

To update the Summary item, click
Update All from the Decision Center tab:

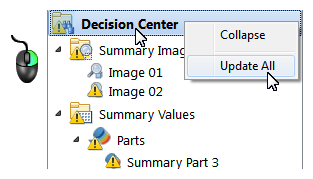
Alternatively, right click on Decision Center, and click Update all:
You can update individual Summary items by right clicking on them and selecting the update command.
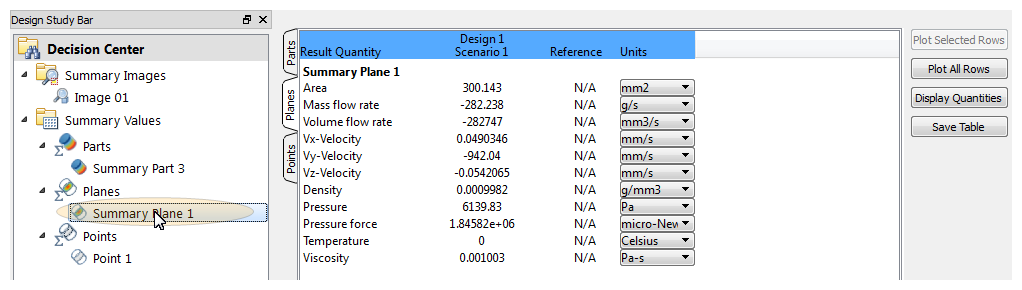
Viewing Summary Values
Use Summary Values to compare data from Summary Planes, Summary Points, and Summary Parts. To view the Summary Values table, click on a summary entity in the Decision Center.
Viewing Summary Images in the Design Review Center
Use the Design Review Center to compare visual data with captured Summary Images. Click the image name in the Decision Center, and the image for each scenario appears in a separate thumbnail image in the Output bar. To add a thumbnail view to the display, drag it into the graphics window.
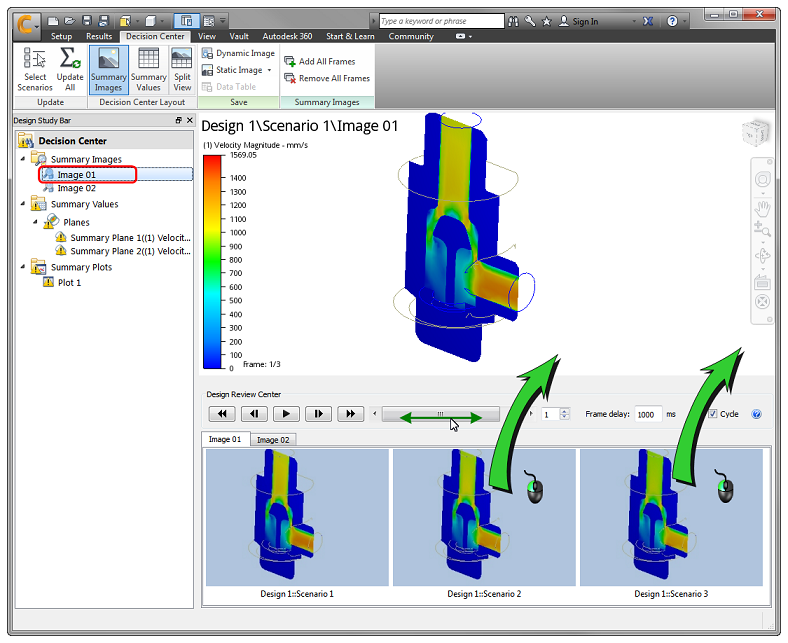
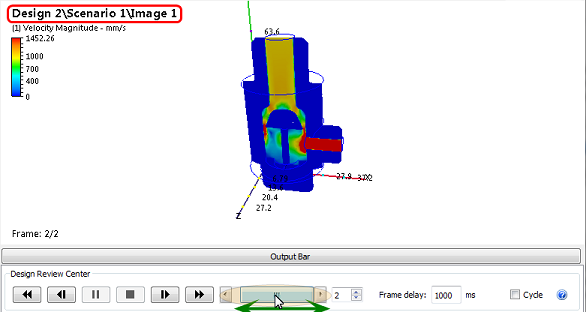
To view multiple images, drag the slider or use the "VCR" controls to flip between each design or scenario:
You can also divide the model screen into multiple viewports to compare results side-by-side:
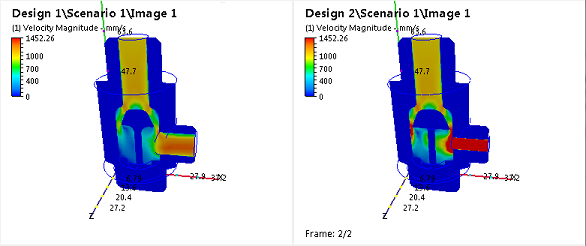
Do this with View > Window > Viewports.