Use advanced property mapping to write Vault properties back to the CAD file and display them.
Display Drawing Revision
Enable the display of document revisions so you can manage document releases. The following example describes how to make these adjustments to SolidWorks template files for consistent behavior. It is divided into three parts:
- Create a custom revision property
- Map the revision property
- Change the document revision
To create a custom revision property:
- With a CAD file open in SolidWorks, select .
- Go to the Custom tab of the Summary Information dialog box.
- Click inside the
Property Name box to create a new property, and select
Revision.
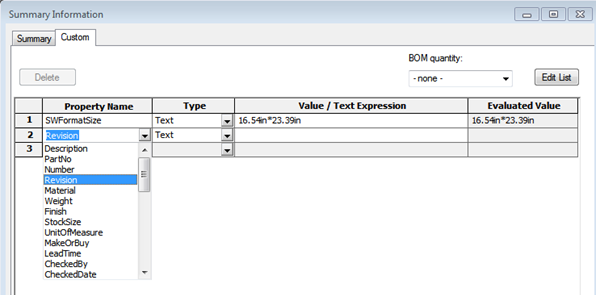
- Enter an initial value for the property; for example, “A”, “1” or “-“.

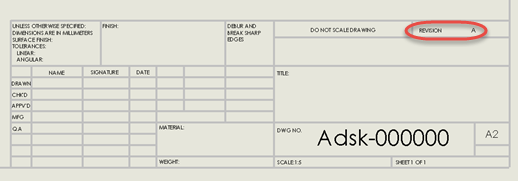
If you are using a standard SolidWorks drawing, you should see the revison value in the title block.

To map the Vault revision property:
- From the SolidWorks Tools menu, select Administration and Vault Settings.
- On the Behaviors tab, click Properties.
- In the Property Definitions list, select the Revision property and click
Edit.

- In the Edit dialog box, select the Mapping tab and click Add.
- Select File as the entity, and from the property provider box, select
SolidWorks.
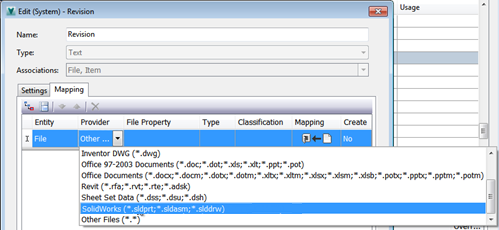
- If you have not yet loaded SolidWorks data into your Vault, select
Import From File in the
Import Properties box. Otherwise, select
Import From Vault.

- Navigate to the modified SolidWorks file.
When you select the file to import, you will see the SolidWorks custom property “Revision."
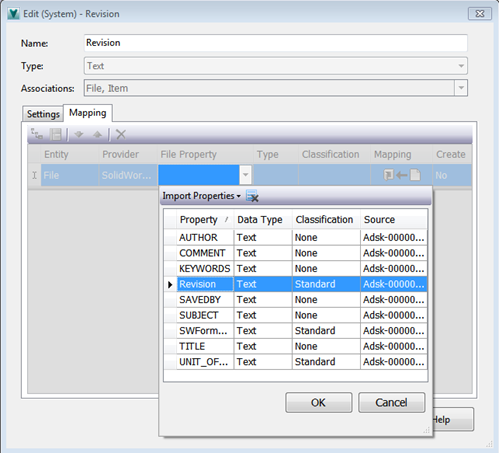
- Click OK.
The mapping is created; it is one-dimensional from Vault to the File. That is, revisions are controlled from Vault.
To change the document revision:
- Highlight a drawing file (slddrw) in Vault Explorer and from the Vault menu bar select Revise.
- With the document selected in the Revise dialog box, select
Primary from the
Select Next Revision box .
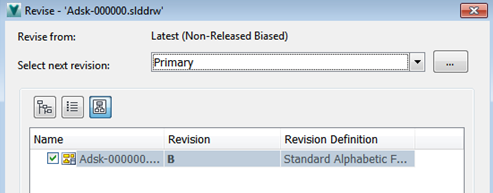
- Click
OK.
The revision updates to the next value.
- Check the Vault properties for the file. There is now an equivalence error for the revision.
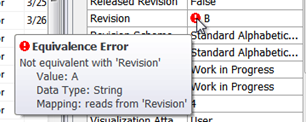
- Do one of the following to update the property.
- In Vault Explorer, highlight the file and select Synchronize Properties from the Actions Menu, or;
- In SolidWorks, use
Open File From Vault to open the
slddrw file, then select
Update Properties from the Vault tab.
The file is checked out and updated. You should see the new revison value in the title block.

Create Bidirectional Custom Property Mapping
Create bidirectional mappings so that you can edit a property from a CAD document, then edit it in Vault and write back to the CAD file. This is commonly done with properties such as Part Number, Title, Description, Project, Department, and so on. The following example describes how to do this and is divided into two parts:
- Create custom properties for a SolidWorks file
- Edit the custom property from Vault Explorer
To create custom properties for a SolidWorks file:
- With a CAD file open in SolidWorks, select .
- Go to the
Custom tab of the Summary Information dialog box and create your new SolidWorks properties.

Make sure you assign values to the new properties.
- From Vault Explorer, select .
- On the Behaviors tab, click Properties.
- Click New in the Property Definitions dialog box.
- In the New (Property) dialog box, enter a name and select a type.
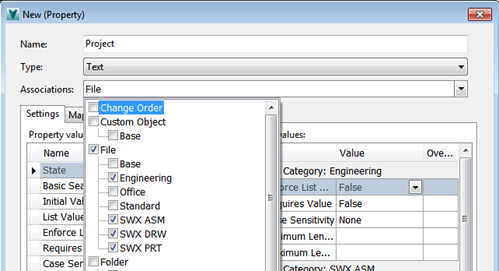
- In the Associations box, select
File and the appropriate file types.
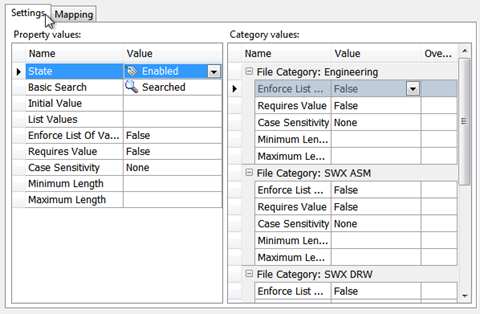
- Using the boxes in the Settings tab, set property behavior; for example, minimum and maximum lengths, required or not, case sensitive, predefined lists, default values, and so on.
- Go to the Mapping tab.
- Select
File as the Entity type, and
SolidWorks as the Provider.

- Under File Property, select .
- Select the file with the new properties you created.
- From the list, select the correct custom property for mapping.
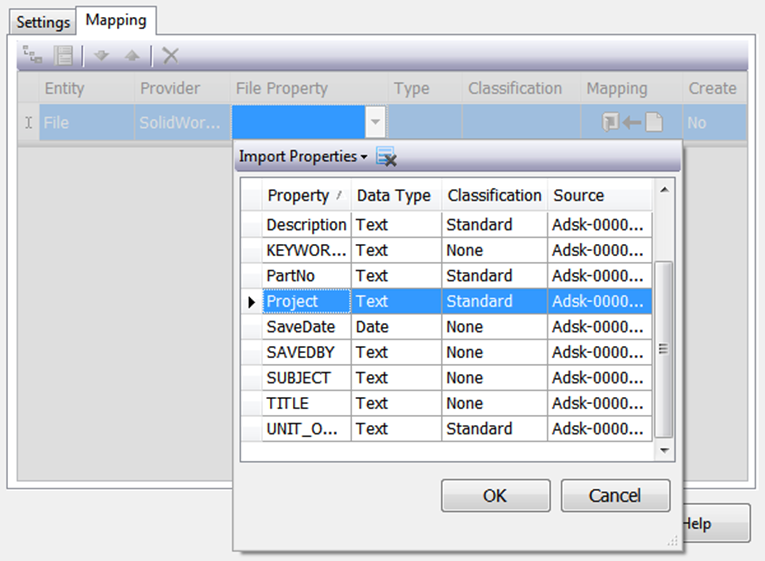
- Select bidirectional mapping so you can edit the property in Vault or CAD.

- Click OK to save the new property with its settings and CAD mapping.
- Return to SolidWorks and check in the file to add it to Vault.
You should now see the property you created, with the Correct SolidWorks custom property.


Now you can edit the property in Vault Explorer.
To edit a user-defined property in Vault Explorer:
- In Vault Explorer, select one or more files.
- Click
.
The Property Edit dialog box opens. You can edit the property that is in this dialog box, or add or remove properties from the grid as needed.

- Review the Property Edit Results dialog box.

- Close the Property Edit Results.
You can see that the user-defined property has been updated.

- Open the file again from SolidWorks to confirm that the property has been updated.
