Autodesk Vault manages toolbox components as part of a library once they are inserted and used in your SolidWorks models, similar to Inventor Content Center Files.
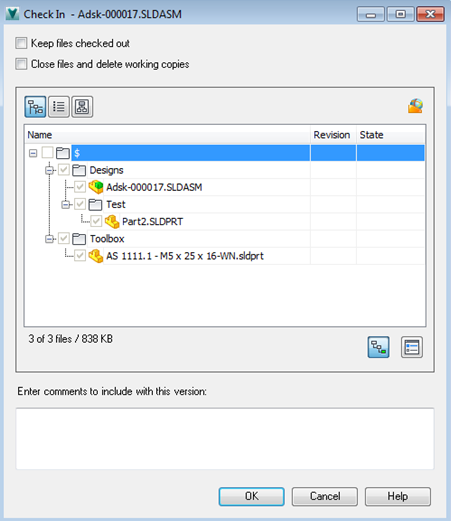
This library of reusable components is stored and shared on the ADMS server. When you check out files, the reusable components are copied to your local folder. You need to create a location on your local folder where these toolbox files are stored while you work. This should be a subfolder of the default Vault working folder, and should ideally be named “Toolbox.” All users should follow these configuration steps so that they have a defined local storage location for reusable components, and so that these reusable components can be shared from the same location on the ADMS server.
Set the Toolbox Save Location
- In SolidWorks, select .
- In the System Options tab, click Hole Wizard/Toolbox.
- Click Configure, then click Define User Settings.
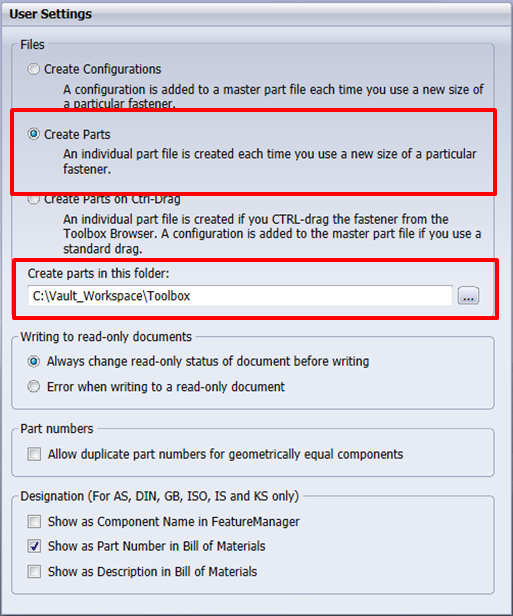
- Under Files, select
Create Parts.
The alternative, “Create Configuration,” would mean that you would only be able to see where the configuration file is used, not the individual instances (such as bolt size).

- In the
Create Parts in this Folder box, enter a local path where Toolbox files will be saved.
This must be a subfolder of your Vault working folder; for example, C:\Vault_Workspace\Toolbox, where C:\Vault_Workspace\ is your working folder.
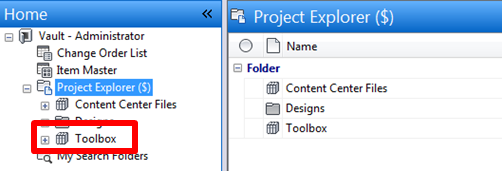
The new Toolbox folder will be replicated in the Vault library on the ADMS server.
