In this exercise, you will control the display of overlapping plot lines.
Plot style display order in AutoCAD Civil 3D controls which plot lines are visible where different types overlap.
Change plot style display order
- Open Parcel-3A.dwg, which is located in the tutorials drawings folder.
- In Toolspace, on the Prospector tab, expand the Sites
 Site 1 collection. Right-click the Plots collection. Click .
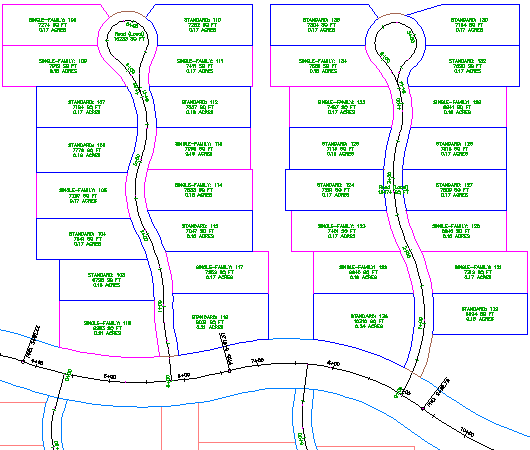
 In the Plot Style Display Order area, note that Single-Family plots have the highest display order, which explains why their magenta lines cover the blue Standard lines.

- In the Plot Style Display Order list, select Standard and click
 to move it to the top of the stack.
 - Click Apply.
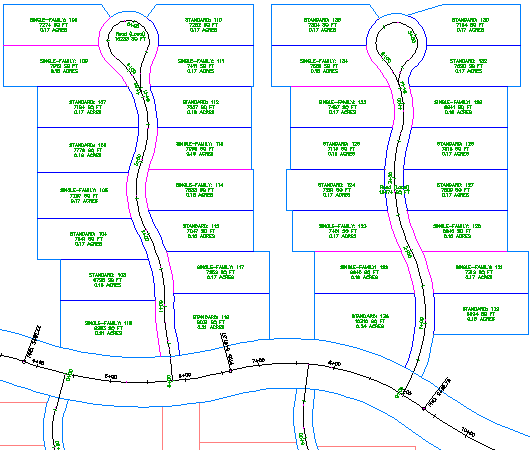
After the model regenerates, notice that the blue Standard plot lines have overwritten the pink ones for Single-Family lots.
- Repeat steps 3 and 4, but give the Property style the highest display order.
This setting displays a light blue line around the extents of the site.
Further exploration: Change the display order again, moving the Road (Local) plots to the top of the display order, then moving them to a position between Standard and Single-Family. These settings change the display of the curved road edges.
- Click OK.
To continue this tutorial, go to Exercise 2: Exporting Plot Data.