Bouncing a ball on an uneven surface can cause changes of direction. In this lesson, you use a point helper to control those changes, making the animation easy to edit.
Open the scene:
- Click
, navigate to the
\scenes\animation\auto_key folder, and open
bouncing_chaos_start.max.
Note: If a dialog asks whether you want to use the scene’s Gamma And LUT settings, accept the scene Gamma settings, and click OK. If a dialog asks whether to use the scene’s units, accept the scene units, and click OK.
The scene is the bouncing golf ball from the previous lesson. The plane has a texture that suggests a tile floor with recessed grooves for the grout. Uneven surfaces such as asphalt, tiles with grout, and so on, can make a bounce take off in unexpected directions.

You will retain the bounces, but remove the forward motion and replace that with changes of direction in X and Y.
Remove the motion in X and Y:
-
 Select the ball, right-click it, and choose Curve Editor from the quad menu.
Tip: If the tracks and curves don’t appear when the Curve Editor opens, pan in the controller window at the left until you see them, then click to highlight the position tracks.
Select the ball, right-click it, and choose Curve Editor from the quad menu.
Tip: If the tracks and curves don’t appear when the Curve Editor opens, pan in the controller window at the left until you see them, then click to highlight the position tracks. - Highlight the X Position track. Drag to select all keys in the curve window, and then press
 .
.
Now the ball bounces in place, with no forward motion.
- Highlight the Y Position track, and delete all its keys as well.
-
 Close the Curve Editor.
Now you want to add more “chaotic” motion to the ball: When it strikes the face of a tile, it should continue in the same direction, but when it strikes a groove with grout, it should change its direction.
You could animate this lateral motion using the ball itself, but a better method is to use a helper object: With this method, the helper animation is independent of the ball and its bounce track, so if you later need to change the lateral motion, you can do so without affecting the bounce.
Create a Point helper to control the ball:
- On the
 Create panel, activate
 (Helpers), then on the Object Type rollout, click to activate Point.
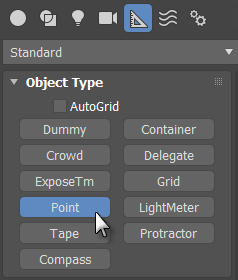 Note: Many animators use the Dummy helper instead of Point. The advantage of using a Point helper is that you can adjust its size without having to scale it. Scaling a helper in a hierarchy will affect its children objects: This is an effect that usually you want to avoid.
 - Click
 (Maximize Viewport Toggle) to display all four viewports.
- If you are not at frame 0, click
 (Go To Start).
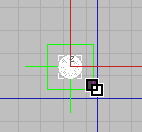
- In the Top viewport, click near the golf ball to create the Point helper.
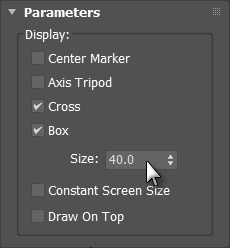
- On the Point helper’s Parameters rollout, click Box to turn it on, and then change the size of the box to
40.
- On the main toolbar, click
 (Align), and then click the ball.
- In the Align Selection dialog
 Align Position (Screen) group, turn on X Position, Y Position, and Z Position. Then choose Center for both Current Object (the Point helper) and Target Object (the golf ball).
- Click OK to close the Align dialog.
Link the ball to the Point helper:
- In the Top viewport,
 zoom in to get a better view of the ball and the helper.
- On the main toolbar, turn on
 (Select And Link).
- Click the ball, then drag to the box of the Point helper, and release the mouse.
Now the ball is a child of the Point helper: When you move the point, the ball will follow along.
-
 Move the Point helper.
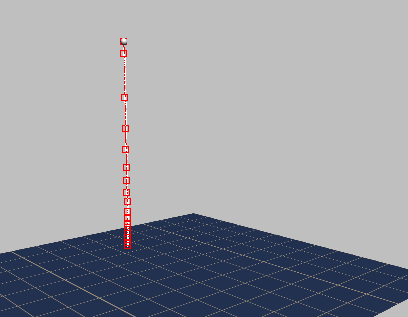
The ball and its trajectory both follow the Point.
-
 Undo the Point helper movement.
Animate the changes in direction:
- In the Top viewport, click
 (Zoom Extents) so you can see all of the floor, once again.
- Turn on
 .
.
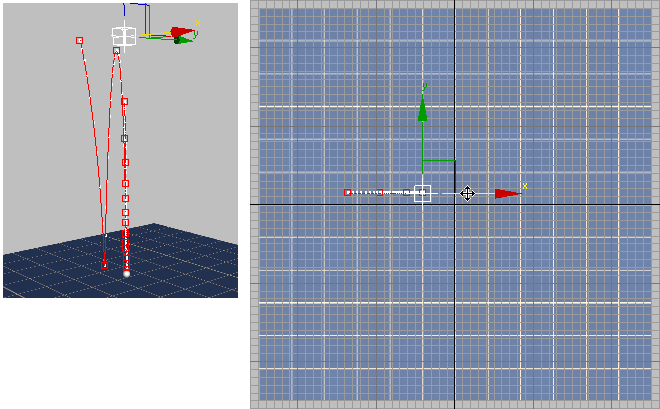
- Drag the time slider to frame 10. This is the first frame where the ball touches down.
- In the Top viewport, move the Point along its X-axis, forward about one tile. The ball should land on a tile.
Tip: Turn on
 (Selection Lock Toggle) to avoid deselecting the Point helper. This button is on the status bar near the bottom of the
3ds Max window. The keyboard shortcut is
spacebar.
(Selection Lock Toggle) to avoid deselecting the Point helper. This button is on the status bar near the bottom of the
3ds Max window. The keyboard shortcut is
spacebar.
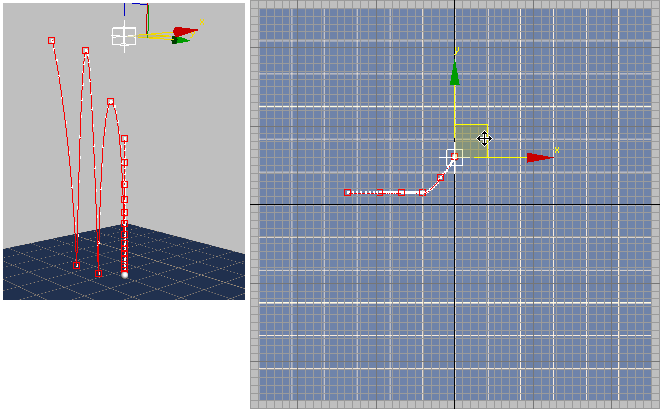
- Drag the time slider to frame 37. Move the point along its X-axis again, about one and a half tiles. This time, the ball should land on grout.
At frame 37, the ball lands on grout.
- Drag the time slider to frame 59. At this frame, move the ball in both X and Y, to the right and onto grout again.
At frame 59, the ball has veered to the right, only to land on grout once again.
- At frame 81, change the ball’s direction once more, so it moves to the left.
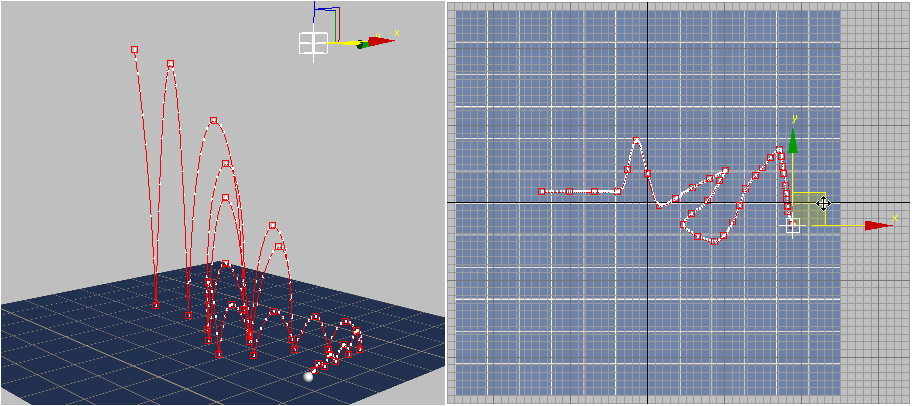
- By now, you should have the general idea. Move the time slider from one floor-contact frame to the next. After frame 81, these frames are 101, 117, 134, 147, 160, 173, 183, 193, 202, 219, 226, and 230.
Keep the ball moving laterally in the same direction if it lands on a tile, and change the lateral direction if it lands on grout.
Here is how the completed scene looks, after animating the helper:
- Turn off
 .
.
To make the ball move erratically, you want to give it lateral motion (via the Point helper) every time the ball hits the ground. If the ball hits a tile, it should continue forward. If the ball hits grout, it should change direction.
It’s easiest to move the Point in the Top viewport, while you watch the effect in the Perspective viewport.
Save your work:
- Save your completed scene as
my_chaotic_bounce.max.
To see a completed version of the chaotic bounce, you can
 open the scene,
bouncing_chaos_completed.max.
open the scene,
bouncing_chaos_completed.max.
To see a rendered version of this animation, play this movie:
Summary
This tutorial introduced several basic techniques of animating with Auto Key:
- You can use Auto Key to block out animation.
- You can use ghosting or trajectory display (or both) to help visualize an animation.
- You can use the Curve Editor to refine initial animation; for example, by changing the tangency and thus the speed of a key, or by deleting unwanted keys.
The Curve Editor also lets you create “out of range” repetition of an animation, and adjust amplitude by using a multiplier curve.
- The TCB Rotation controller is better than the default Euler XYZ Rotation controller when you want to have continuous rotation.
- A helper object such as Point can be useful for “separating” animation into multiple tracks, such as bouncing versus lateral motion.
This tutorial also introduced you to some of the general principles of animation:
- Mass Making an object behave as if it has weight, perhaps based on real-world observation, greatly increases the realism of an animation.
- Ease In, Ease Out Having a motion begin a bit slowly, then slow again when it comes to an end, in many cases also increases realism. Auto Key creates ease-in/ease-out timing by default. In some cases, as you saw, this isn’t the best solution. When a ball rebounds from a hard surface, the motion should be fast.
- Squash and Stretch Objects stretch out as they travel, and squash when they are stopped. You can exaggerate this effect, whether for a ball or a character, and still have a successful animation.