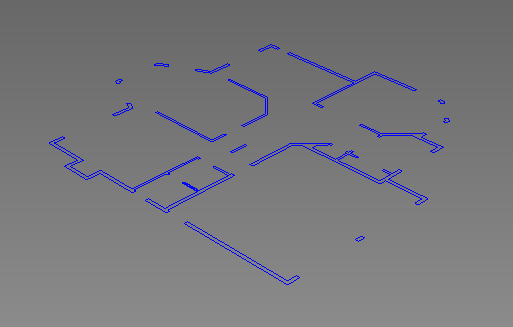
You are now ready to import the AutoCAD file into 3ds Max and use it to create the general structure of the 3D room.
Set up the units:
- Start
 3ds Max.
 - From the Customize menu, choose Units Setup.
- In the Units Setup dialog, choose US Standard
 Feet With Fractional Inches. Leave the other values set to their defaults, and then click OK.
The AutoCAD file you are importing is measured in feet and inches. It is best to use the same units setting in 3ds Max.
Import the DWG file:
- From the
 Application menu, choose Import.
 3ds Max opens a Select File To Import dialog.
- Browse to the folder
\import\AutoCAD_files\
and choose the file
wt_2dplan.dwg,
or use the one you created yourself in the first lesson.
After a pause, an AutoCAD DWG/DXF Import Options dialog appears. If you get a warning about proxy objects, just click Yes.
Adjust the import options:
- On the Geometry tab of the AutoCAD DWG/DXF Import Options dialog, leave the settings at their defaults. (These are shown in the following illustration.) Before you click OK, you must change settings on the Layers tab.

- Click to go to the Layers tab.
- Choose Select From List to enable individual layer selection.
At first, all the layers are selected.
- Click Invert.
Now none of the layers is selected.
- Click the 3Dwalls layer to select it, and then click OK.

3ds Max imports the floor plan, which should appear similar to the following illustration.

Save the scene file:
- From the
 Application menu choose Save As, and save the scene as my_wt_floorplan.max.