You can shear the relief clipart horizontally and vertically. Shearing can be visualised by thinking of an image superimposed onto a flexible rubber sheet. If you hold the sides of the sheet and move them up and down in opposite directions, the image undergoes a spatial stretching known as shearing.
Shearing relief clipart using the cursor
To shear relief clipart using the cursor:
- Select the relief clipart.
- Click the
Transform
 button.
- Position the cursor over a pink shearing handle adjacent to the transform box. The cursor changes to
 .
.
- Click and drag the pink shearing handle to adjust the angle of the relief clipart. The values shown in the
Shear area are updated.
Note: Hold down Ctrl when you click and drag to leave behind a copy of the relief clipart in its original shape.
- Release the mouse button to position the relief clipart.
Shearing relief clipart using exact values
To shear relief clipart using exact values:
- Select the relief clipart.
- Click the
Transform
button.
- In the
Shear area, enter the angles by which you want to shear the relief clipart. To shear:
- horizontally, enter an angle in the W box.
- vertically, enter an angle in the H box.
- Click
Apply to shear the relief clipart. The
Repeat button replaces the
Apply button.
Note: Hold down Ctrl when you click Apply to leave behind a copy of the relief clipart in its original shape.
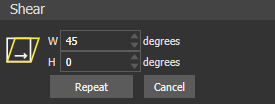
- Click
Repeat to shear the relief clipart again by the angles in the
W and
H boxes.
Note: Hold down Ctrl when you click Repeat to leave behind a copy of the relief clipart in its original shape.