To add and configure a new tool:
- In the
Toolpath Operations area of the
Toolpaths panel, click the
Tool Database
 button. The
Tool Database dialog is displayed.
button. The
Tool Database dialog is displayed.
- Click
Add Tool to display the
Edit Tool dialog.
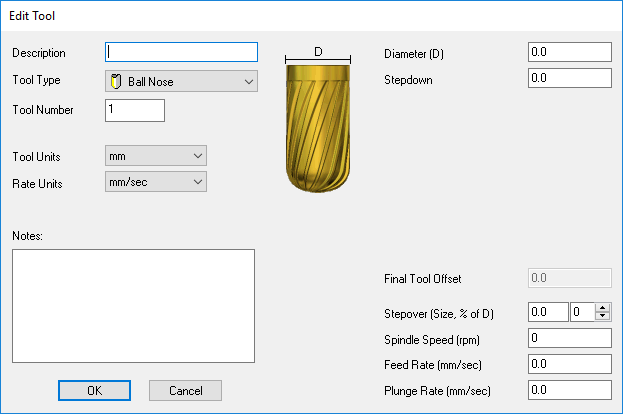
- In the Description box, enter the name you want to give to the new tool.
- In the Tool Type list, select the tool type you want to use. An image representing the selected Tool Type is displayed in the middle of the dialog, and boxes for the required tool machining parameters are displayed on the right.
- In the Tool Number box, enter the number of the tool according to its current position on your tool changer.
- Click the Tool Units list, and select the unit of measurement you want to use with the tool.
- Click the Rate Units list, and select the unit of speed that you want to use with the tool.
- In the Notes box, enter information on the use of the tool.
- Using the boxes on the right of the dialog to specify the tool's machining parameters.
- Click OK to add the tool to the Tool Database. The tool you have added is displayed in the Tools and Groups window, and its details are shown in the Tool / Group Description area of the Tool Database.
- In the Tools and Groups window, click and drag the tool into the appropriate group in the Tool Database.
- Click OK to close the Tool Database dialog.