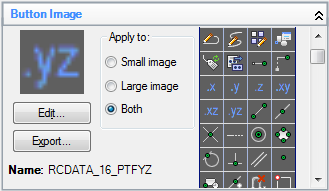
- Click

 . Find
 - In the Customize tab, Command List or Customizations In <file name> pane, select a command to display the Button Image pane.

- In the Button Image pane, select an image from the Image list that is closest in appearance to the image you want to create or select an existing image to edit. Click Edit. Tip: If you want to start with a blank image, select any image from the image list. Click Edit to display the Button Editor dialog box and then click Clear.
- In the Button Editor dialog box, use the Pencil, Line, Circle, and Erase tools to create or edit the button image. To change the working color, select a color from the color palette, or click More to open the Select Color dialog box.
- Pencil button. Applies the selected color to one of the squares on the canvas. Each square represents one pixel. You can drag the pointing device to edit several squares at once.
- Line button. Creates lines in the selected color. Click, drag and release to draw lines.
- Circle button. Creates circles or ovals in the selected color. Click, drag and release to create circles or ovals.
- Erase button. Resets the color of one square of the canvas to the default color.
Note: Click Import to import an image file stored on a local or network drive to edit it in the Button Editor dialog box and store it in the working CUIx file. - Click Save.
- In the Save Image dialog box, Image Name box, enter a name and click OK.
- Click Close.
- Click Apply.