Complete the following steps to publish an asset:
- On the
Asset Builder tab, click
Publish Asset
 in the
Publish panel to open the
Publish Asset dialog box:
in the
Publish panel to open the
Publish Asset dialog box:
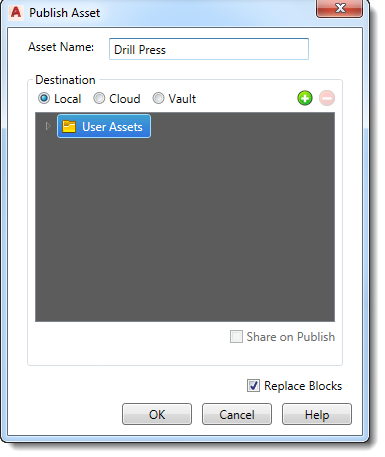
- Indicate where to publish the asset. By default, assets are published to the
User Assets library. To specify a different folder for your published asset, right-click the
User Assets folder and select
New from the pop-up context menu or click
 . The new folder appears as a subfolder in the
User Assets folder. Type the new folder name and press
Enter.
Note: If the list contains an empty folder, you can delete it by clicking
. The new folder appears as a subfolder in the
User Assets folder. Type the new folder name and press
Enter.
Note: If the list contains an empty folder, you can delete it by clicking . You cannot delete a folder containing sub-folders. The
Explore context menu option, accessed by right-clicking on a folder, opens the selected folder in
Windows Explorer.
. You cannot delete a folder containing sub-folders. The
Explore context menu option, accessed by right-clicking on a folder, opens the selected folder in
Windows Explorer.
- After specifying the default
User Assets folder, or creating a new subfolder for the asset, select where to publish the asset:
Local,
Cloud, or
Vault. Use the
Add
and
Remove
buttons to manage cloud folders.
- Select
Share on Publish if you want share the asset with other users on the cloud. Leave this box cleared to keep the asset private. When an asset is shareable, other users can rate it or comment on it in the
Factory Asset Warehouse.
Note: Public sharing of assets can also be toggled on and off using the Factory Asset Warehouse.
- Leave the Replace Blocks check box checked if you want to automatically replace the block used to create the asset with the newly published asset.
- Click OK to add the asset to the Factory Assets library and close the Publish Asset dialog box.
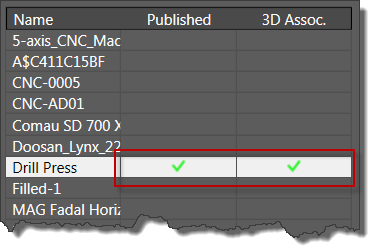
- On the
Asset Builder tab, click
Finish Asset Builder
 in the
Exit panel to exit the environment. A green check mark is added to the
Published column in the
Block Browser dialog box.
in the
Exit panel to exit the environment. A green check mark is added to the
Published column in the
Block Browser dialog box.
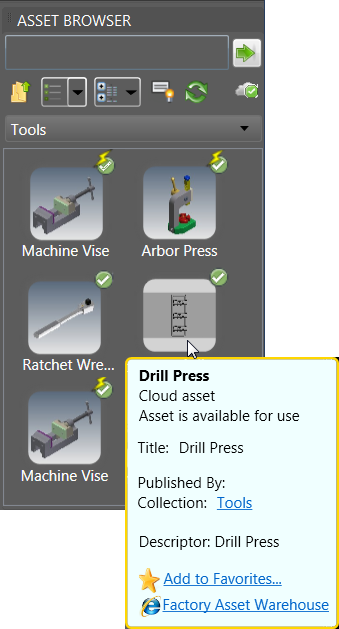
Once published, the asset becomes available for download in the Asset Browser. Access to the Factory Asset Warehouse is also provided through the browser for cloud-based assets.