In Paint, you select colours using the Colour Picker.
You store colours in the Colour Palette, mix or try out colours on the canvas, and create colour or greyscale gradients using the colour gradient.
The Colour Picker
- Setting colour model channel values;
- Sampling pixels in a clip;
- Sampling a pixel’s colour inside a Viewport (Player or Tools) to get its RGB values;
- Selecting a colour from the Palette widget;
- Selecting a colour from the Spectrum widget;
- Mixing colours in the Canvas widget.
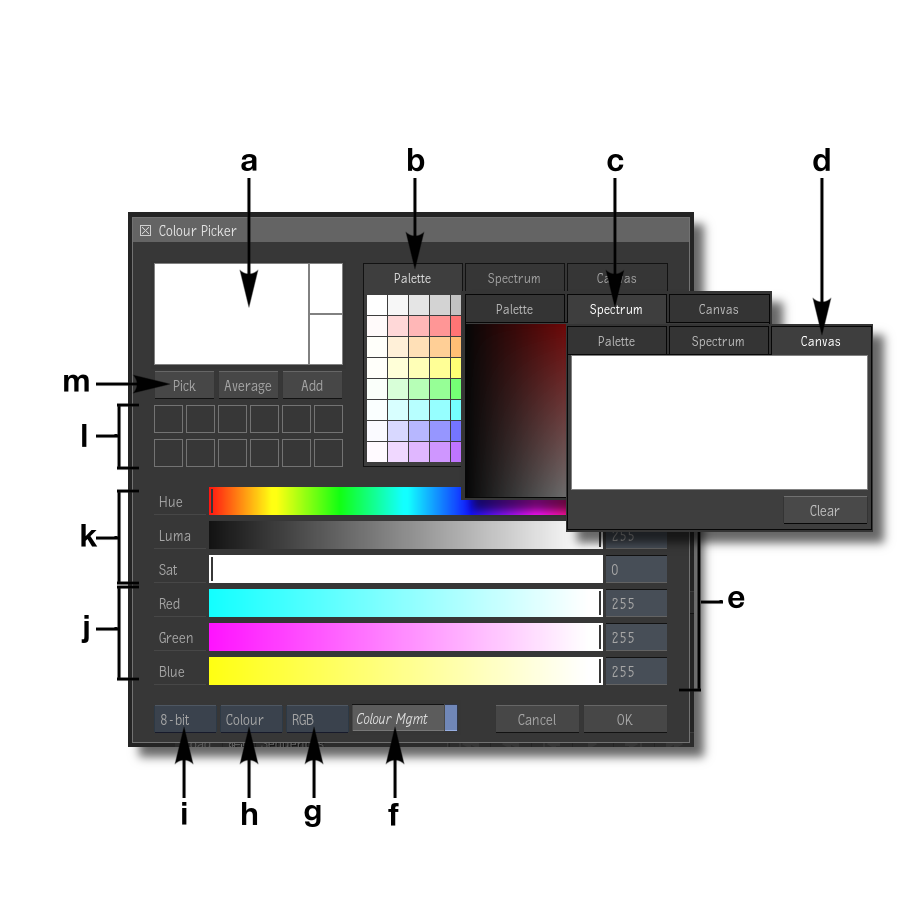
- a
- Colour Patches: The colour picker includes three colour patches:
- The large colour patch, on the left, displays the currently selected colour.
- The smaller colour patch, on the bottom right, displays the original colour that was selected.
- The smaller colour patch on the top right, displays the previous colour that was selected.
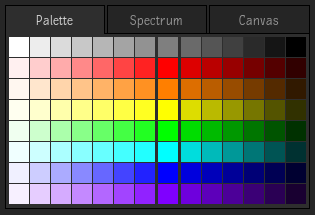
- b
- The Palette Widget: Enables you to quickly select a default colour. Towards the middle of the palette, between the bold separators, you can select pure colours.
- c
- The Spectrum Widget: Enables you to pick contrast and saturation variations of a same colour.
- d
- The Canvas Widget: Enables you to mix and create custom colours.
- e
- Colour Values: Displays the current value of the channel sliders. These can be either numeric or percentage values.
- f
- Colour Management button: Enable viewport colour management on the colour swatches, based on the tagged colour space associated with the colour being picked.
- g
- Colour Model box: Toggle to select between the RGB or YUV colour model.
- h
- Mode box: Use to select how the numeric values represent each channel. Options are:
- Colour: Use a range based on bit depth (0-255 for 8-bit, 0-1023 for 10-bit, 0-4095 for 12-bit). Only available with Bit Depth set at 8-bit, 10-bit, or 12-bit.
- Colour %: Use a percentage value, relative to the entire range of the selected bit depth, ranging from 0-100%. Only available with Bit Depth set at 8-bit, 10-bit, or 12-bit.
- Range: Use the full range of colours in a 16-bit floating point colour space, entered as a floating-point number. The brackets enclose the 0-1 range. Only available with Bit Depth set at 16fp.
- [0-1]: Display the 0-1 range inside the full 16-bit floating point range, where 0 and 1 are enclosed by brackets. You can still use values outside the 0-1 range. Only available with Bit Depth set at 16fp.
- i
- Bit Depth box:
Use to select the media bit depth. Options are:
- 8-bit
- 10-bit
- 12-bit
- 16-bit fp
- j
- RGB / YUV Channel sliders: Use to modify the values of the Red, Green and Blue channels or the YUV channels, as set by the Colour Model box.
- k
- HLS Channel sliders: Use to modify the values of the Hue, Luma and Saturation channels.
- l
- Custom Colour patches: 12 custom colours can be stored using the "Add" button.
- m
-
- Pick button: Click to sample the colour of the pixel under the cursor.
- Average button:
- Click and drag to draw a box and sample the average colour of the pixels within that box.
- Alt+Click and trace a path to sample an average colour from the pixels under the cursor, along the path you traced.
- Add button: Click to save a sampled colour to one of the 12 Custom Colour Patches.
The Colour Palette
The colour palette appears in the Paint, Graphics, and CutOut menus. It contains the scratch pad and colour gradient. A series of colours are stored in the colour palette in colour pots. To select the current colour in the colour palette, click a colour pot. To set the current colour, press and hold a colour pot.
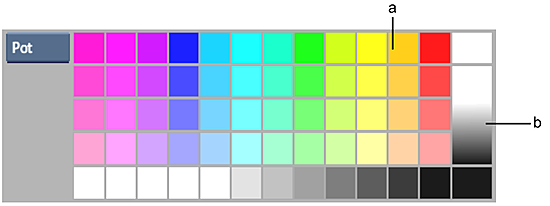
(a) Colour pot (b) Colour gradient bar
Build your own colour palette by storing the current colour in the colour pots. You can also save and load colour palettes.
To store a colour in the colour palette:
- To display the colour palette, swipe the bar at the bottom of the screen.
The colour palette appears.
Tip: If you do not see the palette, click the Palette button. To hide it, swipe the bar a second time. - Set the current colour.
- Click a colour pot in the colour palette and hold the cursor down momentarily.
The colour is saved in the colour pots.
The Scratch Pad
Use the scratch pad to mix colours selected from the image or colour pots and to test the selected brush type. You can also paste cutouts into the scratch pad to use when mixing colours.
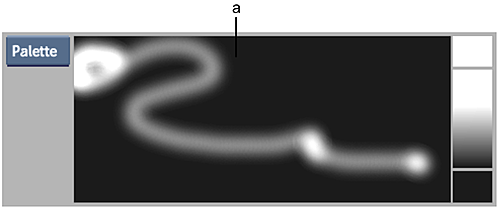
(a) Scratch pad
To mix colours on the scratch pad:
- Click the Pot button.
The scratch pad appears.
- Paint on the scratch pad.
- Change the current colour and paint over the previous brush strokes.
The colours are mixed.
You can also use the Wash, Shade, Smear, Drag, Warp, Impressionist, Recursive Clone, Stamp, and Blur Special Effects media in the scratch pad.
To use one of the media types in the scratch pad:
- Select the Special Effects medium you want to use.
- Enable Medium.
- Use the brush cursor to apply the medium in the scratch pad.
To set the current colour using the scratch pad:
- Click the Current Colour pot.
- Use the colour picker to select the mixed colour in the scratch pad.
- Click the Current Colour pot to use the selected colour.
The Colour Gradient Bar
The colour gradient bar is used to set the gradients for graphics you create in the Graphics menu. You can also set the current colour by selecting a colour on the gradient using the colour picker.
To set the gradient:
- Set the current colour.
- Click either the upper or lower colour pot on the gradient bar.
Note: You must hold the cursor down for a moment to set the Gradient colour pot.
To set the current colour using the colour gradient bar:
- Click and drag the cursor across the gradient bar.
The selected colour appears in the Current Colour pot.
- Select a colour.
The selected colour becomes the current colour.