There are five new advanced mesh editing tools to support mesh editing.
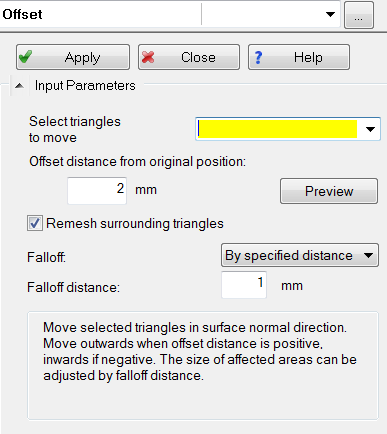
Offset
Use the Offset command to offset surface mesh elements from their original position in the surface normal direction. When you use the Offset command, the surrounding elements also change, to smooth the transition between the two surfaces.
Use this tool to change dimensions or thickness of features, and to test the effects on the results.
To access this tool:
Click
 ().
().
UI and Control Parameters of Offset tool
When Remesh surrounding triangles is on, all triangles on neighboring faces are remeshed. When it is off, the triangles on neighboring faces are stretched, but not remeshed.
Click Preview to make sure that the offset direction and distance are correct. Preview does not include remeshing of surrounding triangles.The falloff distance is the dimension of the affected area around the offset. Select By specific distance and enter then the Falloff distance to define this area.
Extrude
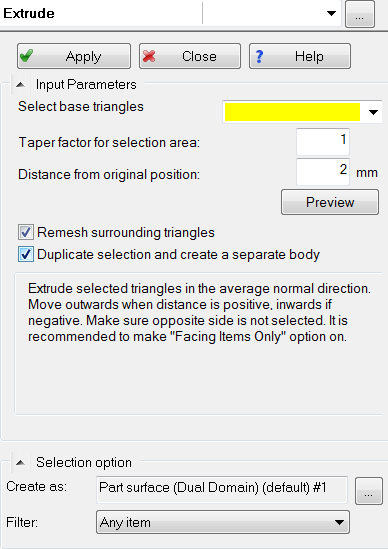
Use the Extrude command to shift a selection of triangles to a new location. This tool also joins the displaced triangles to the rest of the mesh with a linear tube of triangles.
Use this tool to create features or bodies.
To access this panel, click
 ().
().
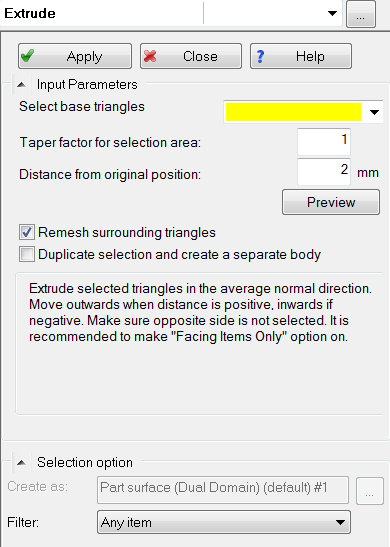
Select triangles and specify the distance you want to move them from their original position. When the distance is positive, triangles move outwards. When the distance is negative, triangles move inwards. When Remesh surrounding triangles is on, all new triangles on side faces are remeshed, based on the average edge length in the selection area. When it is off, a minimum number of triangles are created on the side faces to connect with the rest of the mesh. Click Preview to make sure that the move direction and distance are correct. Preview does not include remeshing of surrounding triangles.
When Duplicate selection and create a body is on, selected triangles are duplicated and a new body is created by extrusion. You can choose the property for the new body.
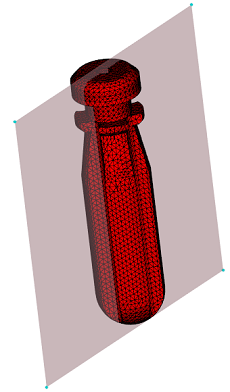
Plane Cut
Use the Plane Cut tool to cut the visible surface mesh with a plane.
This tool cuts symmetrical parts in half.

Example
To access this tool:
Click
 ().
().
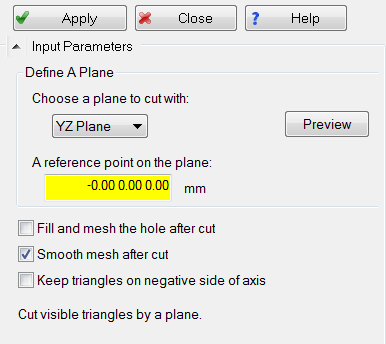
Select XY, YZ, or XZ as a plane to cut the visible mesh. The selected plane is displayed for preview purposes. Specify a reference point to define the position of the plane. Click a point on the mesh to fill the coordinates or enter it manually. Then click Preview , to see the update of the plane.
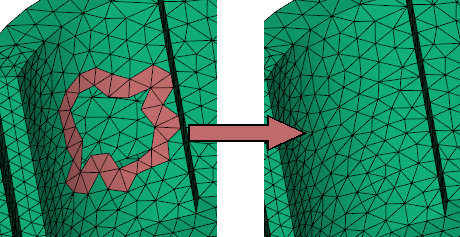
For Dual Domain meshes, Plane cut may create holes between the two layers of the mesh. Check Fill and mesh the hole after cut to fill the hole with triangles with similar local edge length. Check Smooth mesh after cut to remesh the affected area with similar local edge length. When it is off, the affected area may have sharp triangles. Check Keep triangles on negative side of axis to retain triangles on -X, -Y, or -Z side. By default, it is off, and triangles on positive side are retained.
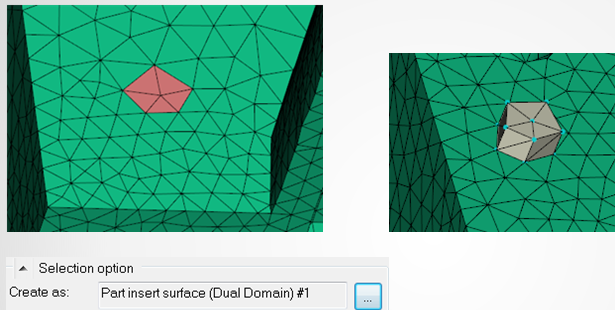
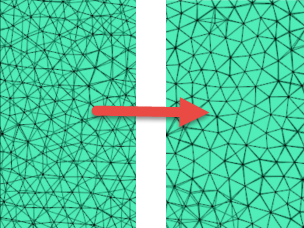
Fill Hole
Use the Fill Hole tool to mesh the interior of a hole and gaps with triangular elements. You can select triangles on a small feature or with defects and delete them. This tool allows you to fill the hole.
To access this panel:
Click
 ().
().
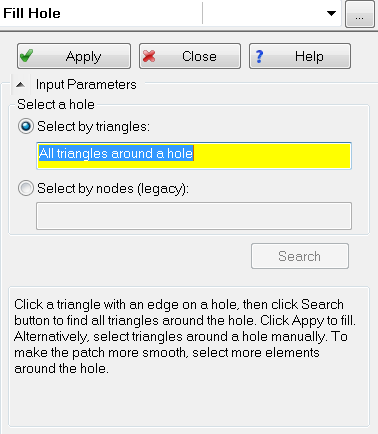
Select triangles around a hole and fill the hole with triangles of similar edge length. Select one triangle, then click Search to find all triangles around the hole. The initial triangle should have at least one edge on the hole. Alternatively, select all the triangles around a hole, manually. Selecting more triangles may make the filling patch smoother.
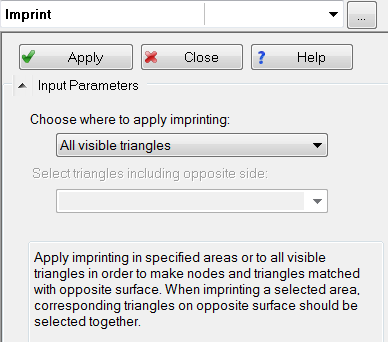
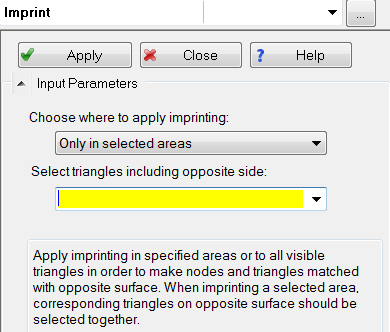
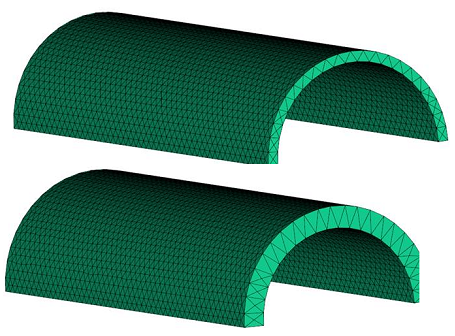
Imprint
Use the Imprint tool to match nodes and triangles on one surface with those on the opposite surface in specified areas.
This command imprints meshes after mesh editing. It can also match meshes imported from third parties.
To access this panel:
Click
 ().
().