The view options allow you to control which objects appear in the display and how those objects are visualized.
To hide and show parts
When you need a clear view of certain parts, it can be useful to hide other parts from view.
There are multiple ways to hide a part:
- Click
View >
 Hide all Parts.
- Click
View >
 Hide Unselected Parts.
- Select one or more parts and click
View >
 Hide Selected Parts.
- Click the
 yellow lightbulb icon next to the part name.
To make hidden parts visible:
- Click
View >
 Show all Parts.
- Select one or more parts and click
View >
 Show Selected Parts .
-
Tip: To temporarily preview a part in the background that is obstructed by parts in the foreground, select the part and press the H key on your keyboard.
To flip the visibility of all parts:
- Click
View >
 Invert Part Visibility. This command makes the hidden parts visible, and the visible parts hidden.
To adjust the level of detail
A reduced level of detail may be necessary for projects containing many parts or complex parts. Netfabb operations run faster when parts are displayed with lower levels of detail.
- Select a part.
- Click
View >
 Level of Detail and choose the appropriate level of detail.
Note: If no parts are selected, the level of detail is applied to all parts.
Level of Detail and choose the appropriate level of detail.
Note: If no parts are selected, the level of detail is applied to all parts.
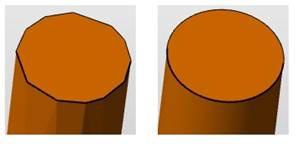
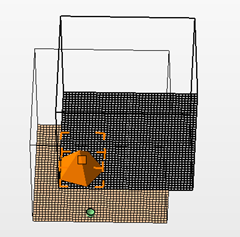
Left: Part with low level of detail. Right: Part with high level of detail.
Despite the coarse appearance of low-detail parts, the part attributes remain unchanged. The project tree reports the current level of detail for each part.

Part levels of detail
To highlight backfaces
- Click .
When enabled, the interior side (negative normal) of triangles are always colored red, even when the part is selected. It helps to detect inverted triangles, holes, and cuts.
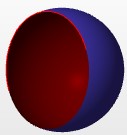
Backfaces are marked red
To highlight mesh edges
- Click .
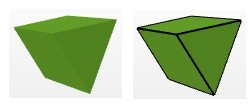
When enabled, sharp edges (<135°) on objects are highlighted with black lines.
To show the platform
- Click .
-
Tip: Hold the P key to display a local platform with the selected parts at the origin.
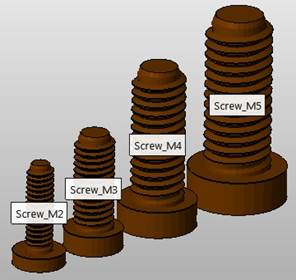
To show part names
If you have loaded several parts, Netfabb can show part name labels in the display.
- Click .
-
Tip: You can also press Ctrl + L on your keyboard.
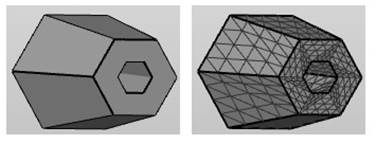
To show the triangle mesh
- Click .
-
Tip: You can also right-click a part and choose Highlight Triangles to show the triangles for just the selected part.