Walkthrough for creating and loading a configuration using the Graphical Toolpath Editor
Custom configurations can be created from scratch or by modifying an existing configuration.
To create a new configuration,
- Make sure you have a part added to the project and click
Prepare >
 Load Machine Workspace.
- Choose the SLM 125HL machine and click OK.
- Drag the part from the parts list in the project tree under the machine to create a duplicate. Make sure to leave the duplicate part selected.
- On the Parts tab, click Change.
- Select a default configuration type and click Edit Configuration.
- Click Yes when prompted to create a duplicate.
- In the top-right corner of the dialog, click Change Type and choose the Diagram type. Click Yes when prompted to accept the change.
- Click
 Create new build strategy to create a new build strategy.
- Provide a name for the new strategy and click OK.
- Click the
 hatchfilling filter from the row of
Configuration Editor toolbar.
hatchfilling filter from the row of
Configuration Editor toolbar.
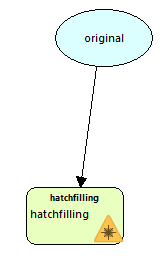
- Click in the white space of the diagram to drop the hatchfilling block.
- Click
 Create connection and click the
Original block, followed by the
hatchfilling block. This will create a connection between the two blocks.
Create connection and click the
Original block, followed by the
hatchfilling block. This will create a connection between the two blocks.
- Right-click the hatchfilling block and choose
Set as result.
- Click Apply and Select to create the configuration and return to the SLM 125 HL workspace with the configuration selected.
To change the order in which the results are rendered and exposed:
- To the right of the diagram area, select the tab Results.
- Click, drag, and drop the entries in here into the desired order. Entries at the top are exposed earlier.