Revit will only export grid axes on the Base Level - Elevation 0. The grid axes from other levels will be projected in the Base Level. When importing or synchronizing a Revit a . smlx file in Advance Steel, all grids will be created in Z = 0 coordinate of the WCS.
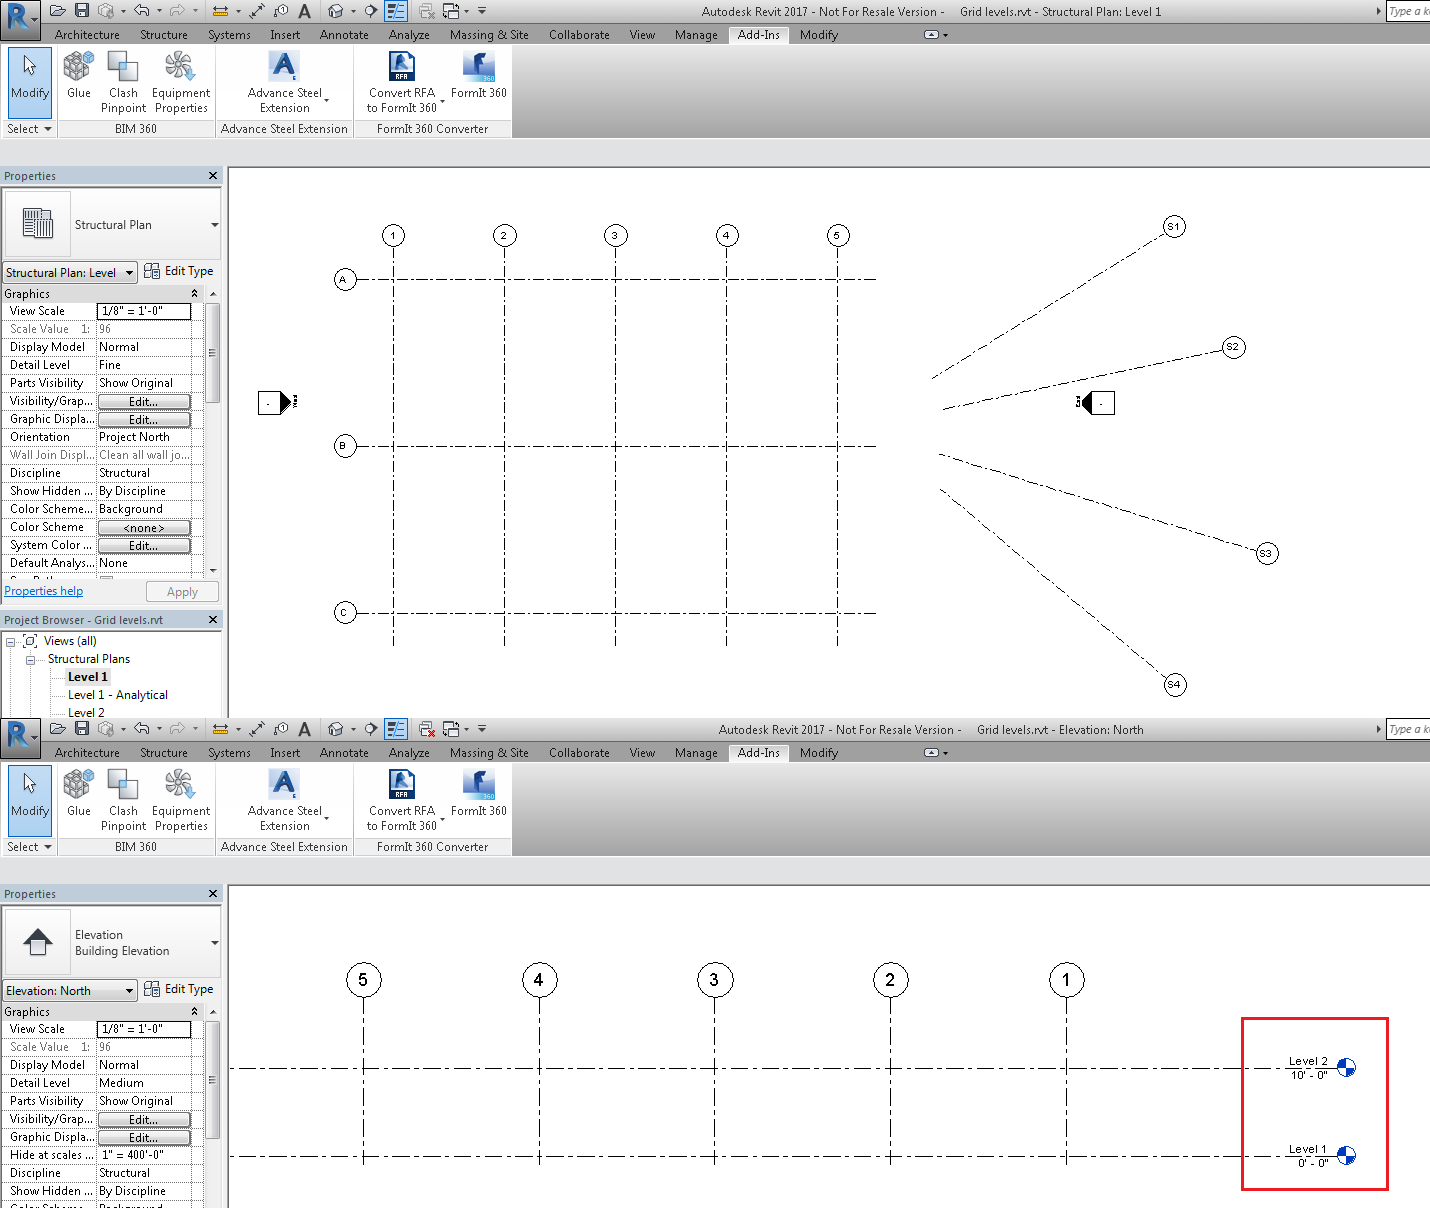
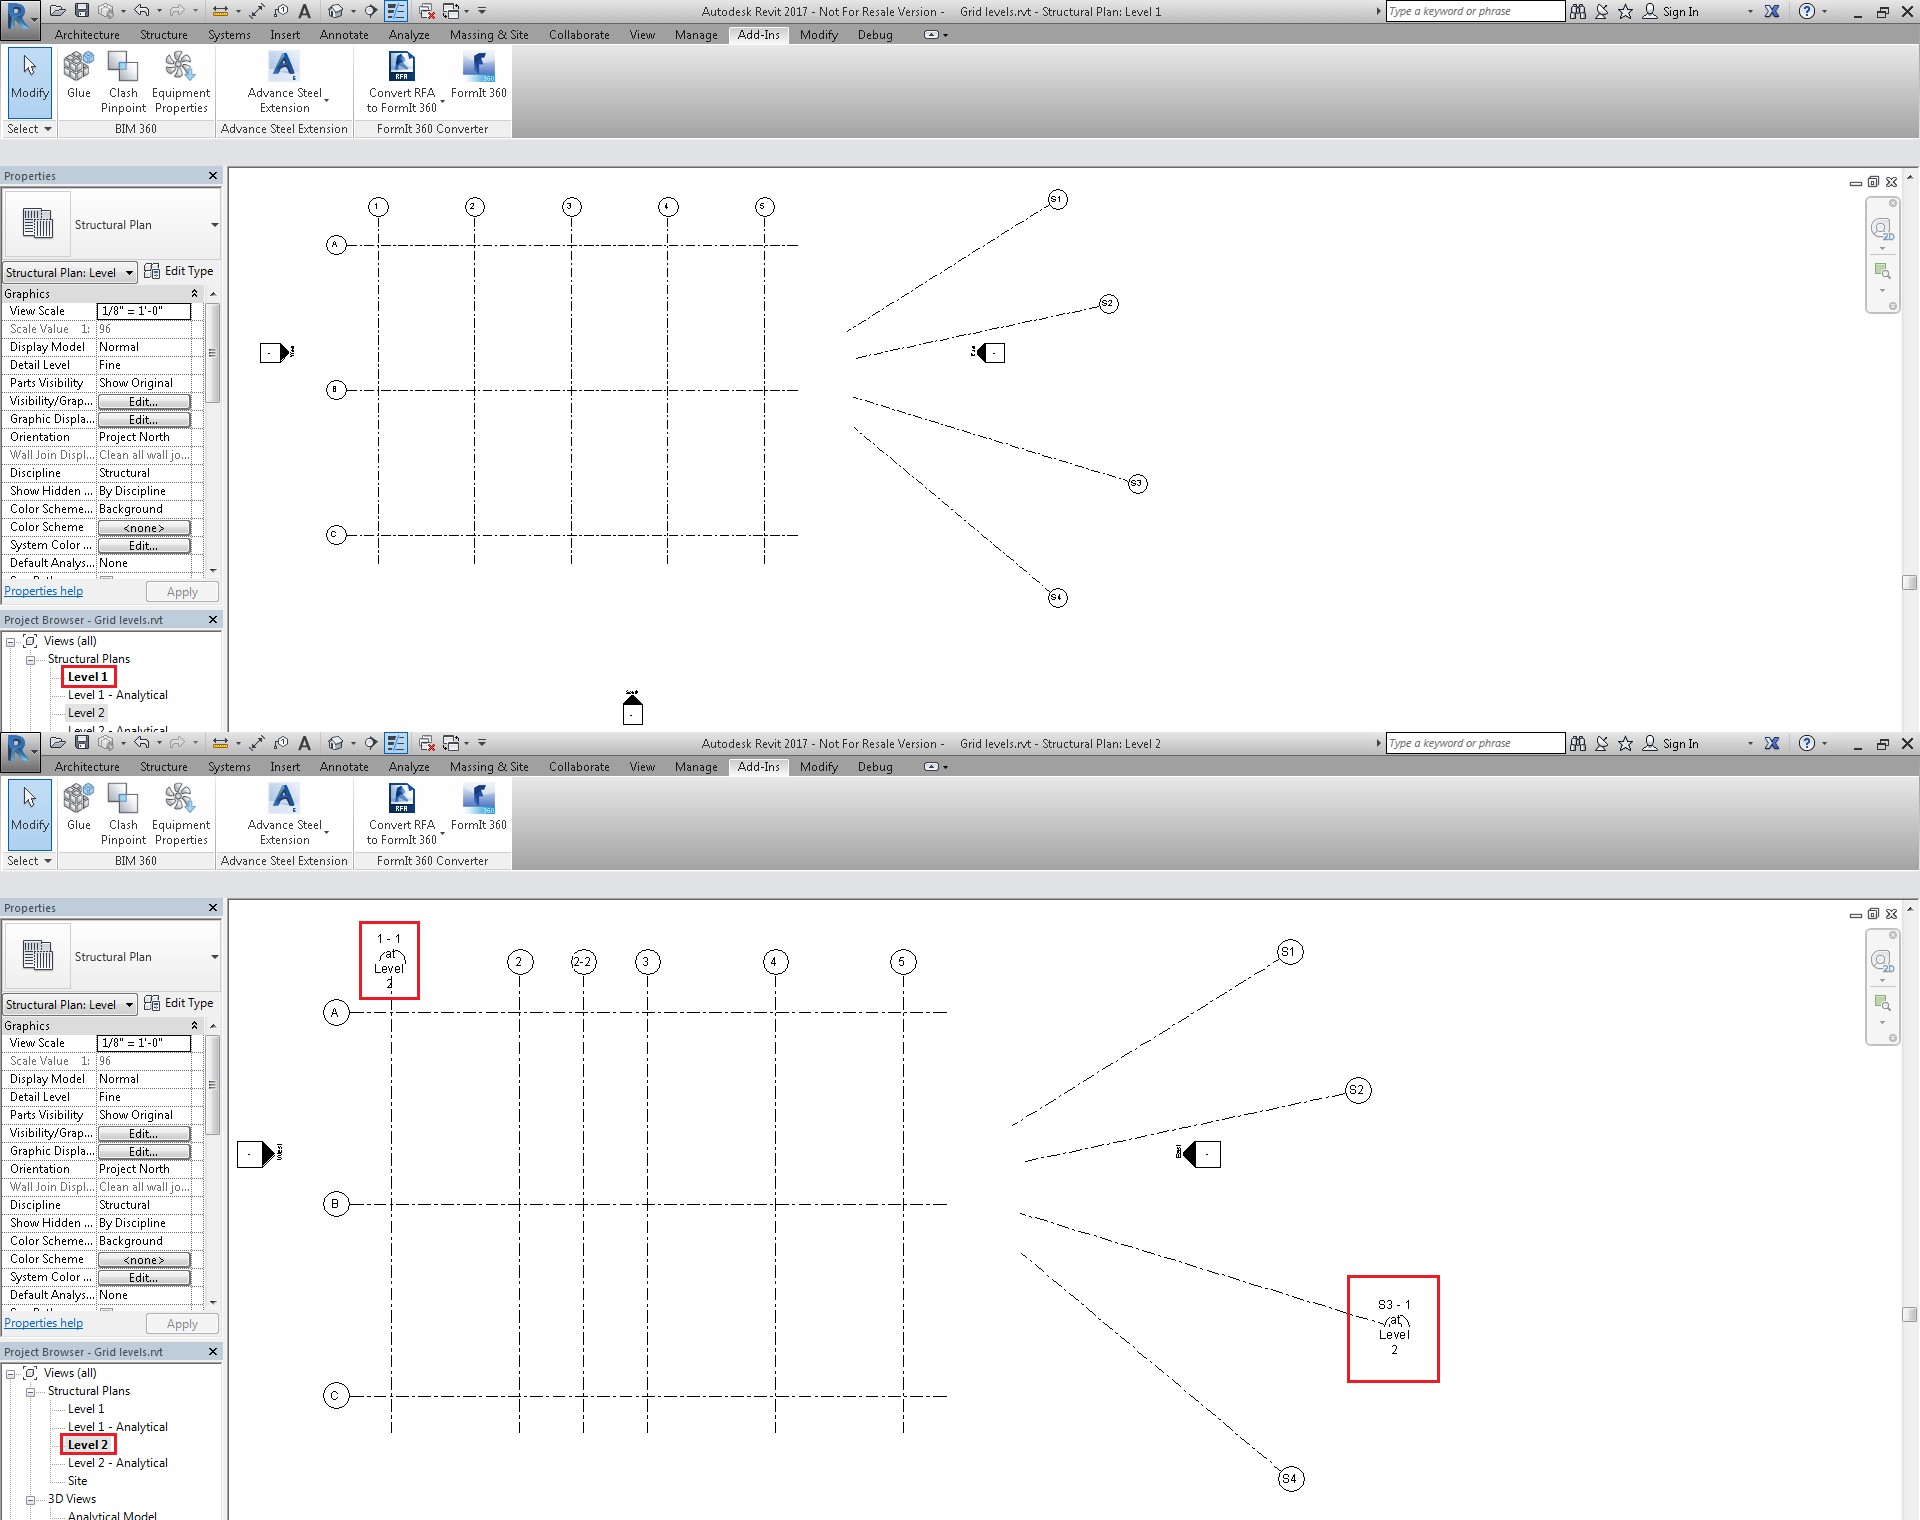
In the following example, there is a grid created in Revit, visible on both Level 1 and Level 2:
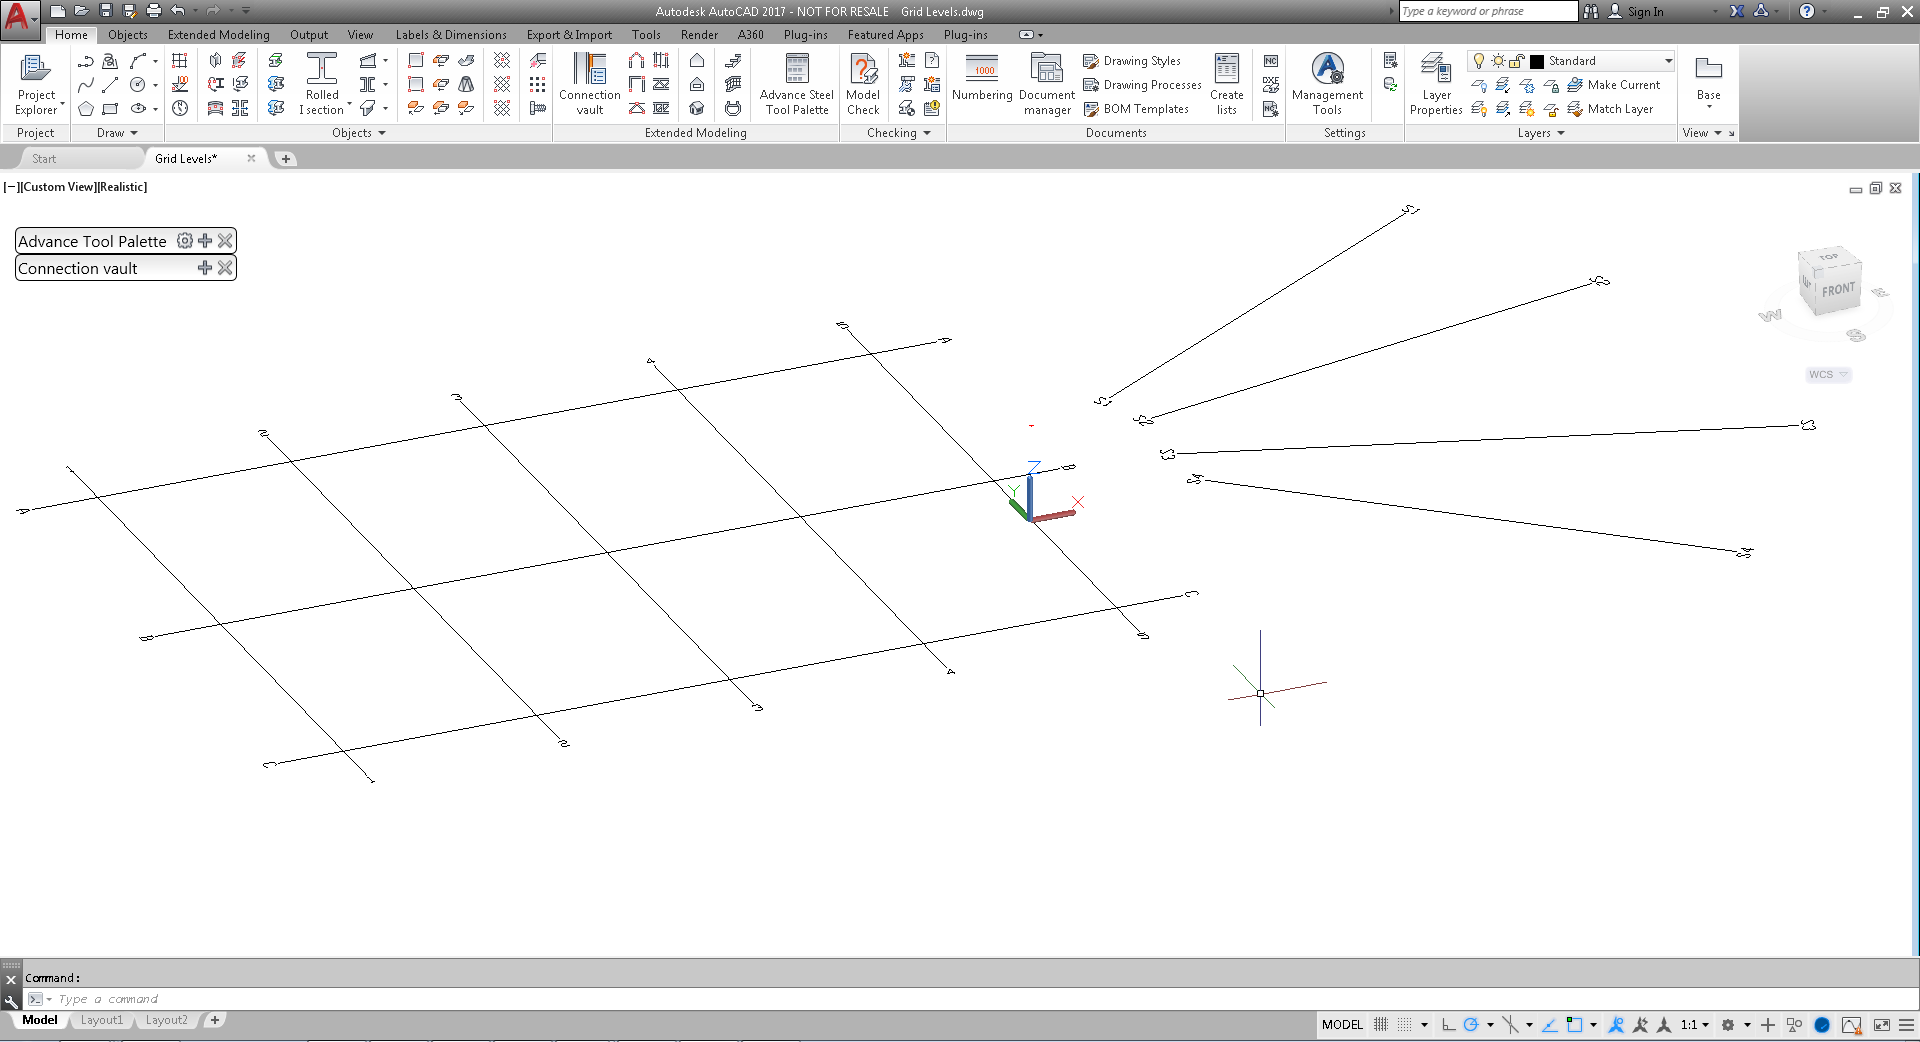
If this model is imported in Advance Steel, there will only be one grid, created in the Z=0 coordinate of the WCS (base level):
If an additional grid is created in Revit (e.g. 2-2), only visible on Level 2, and it is exported to . smlx and synchronized in Advance Steel, the grid will be created on the bottom level: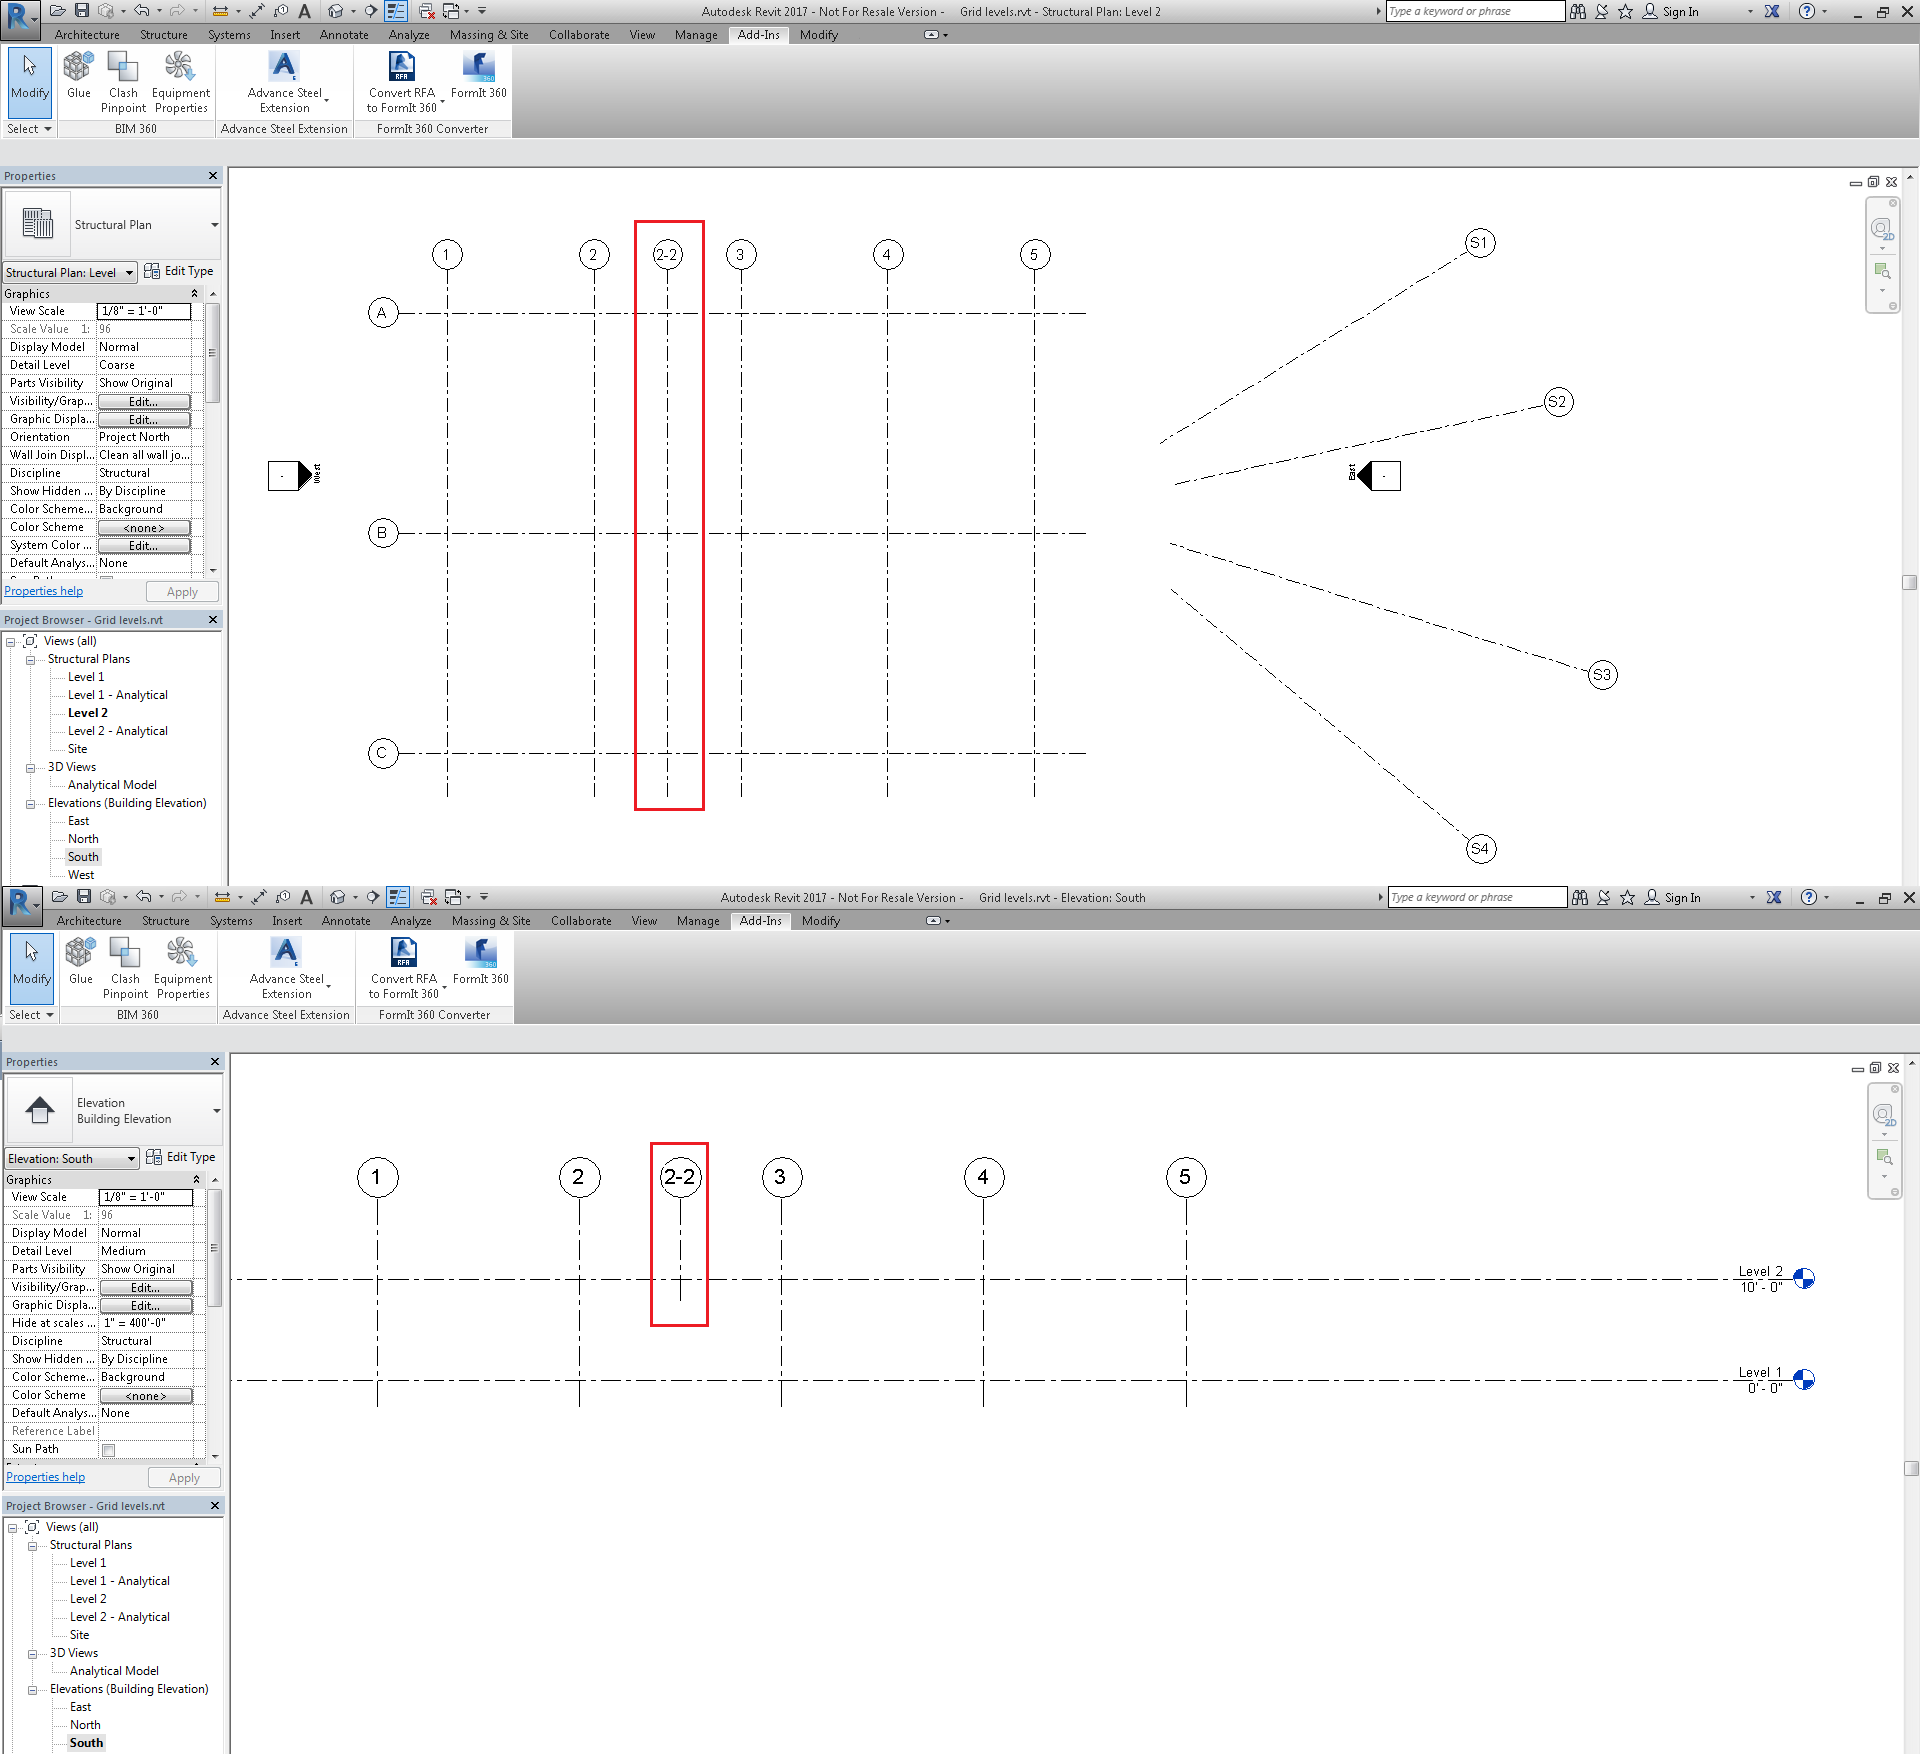
After loading the . smlx form Revit, the synchronization dialog in Advance Steel will display as follows:
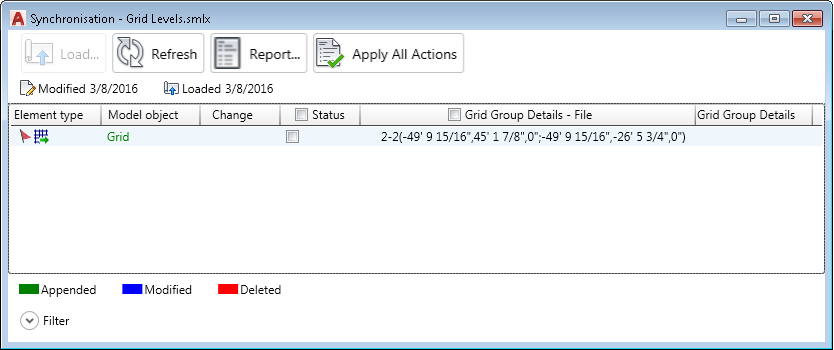
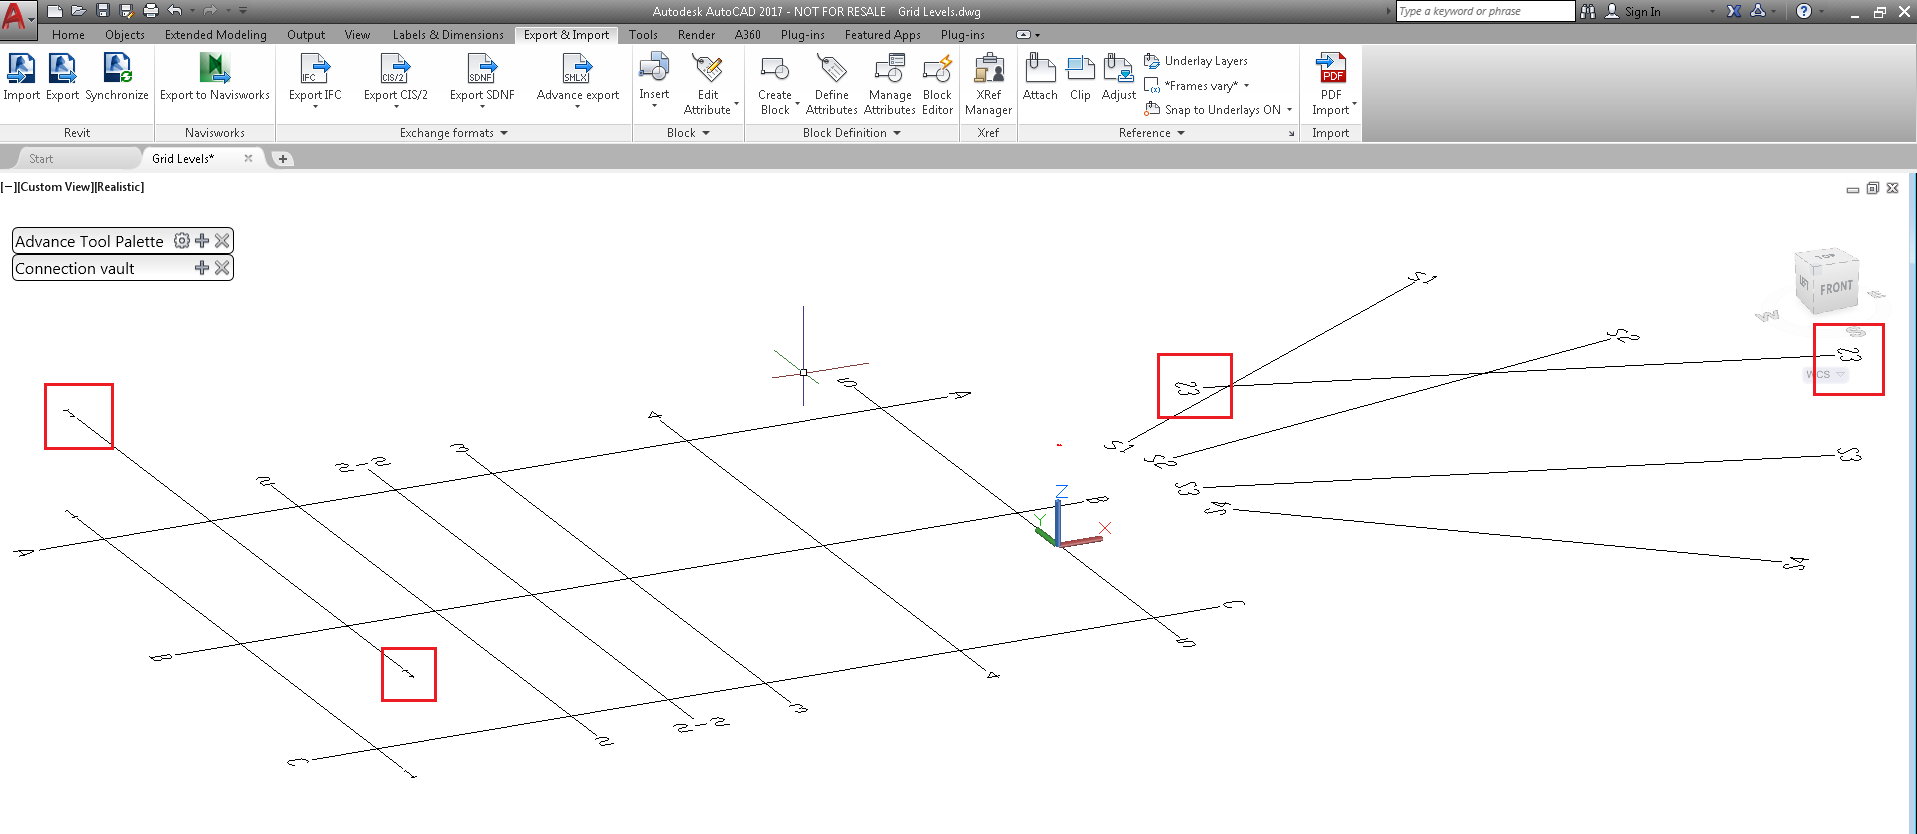
If you select and apply the appended line in Advance Steel, the grid line will be added at its projection on the base level:

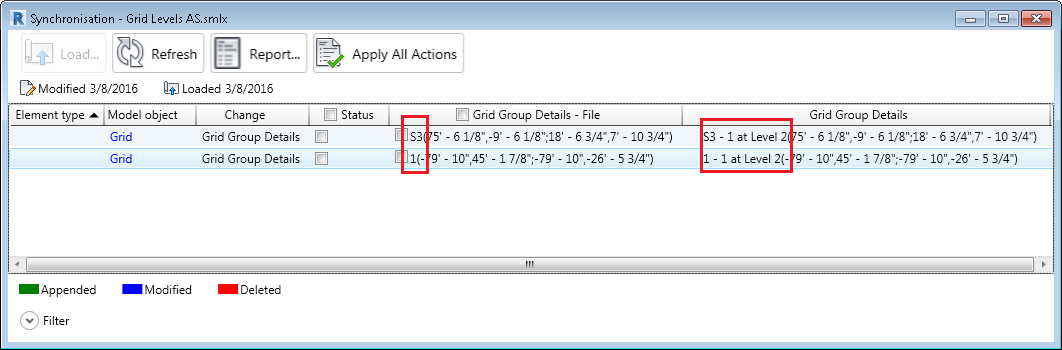
Grids from Advance Steel will be visible in Revit only on the level where they were created. In the following example, grid Label 1 and LabelS3 were copied in Advance Steel. If the model is exported to . smlx and the changes are synchronized in Revit, grids 1 and S3 will only be visible on Level 2:
In Revit, after the modifications made in Advance Steel were synchronized, grids 1 and S3 are only visible on Level 2, and their labels were changed to 1 - 1 at Level 2 and S3 - 1 at Level 2:
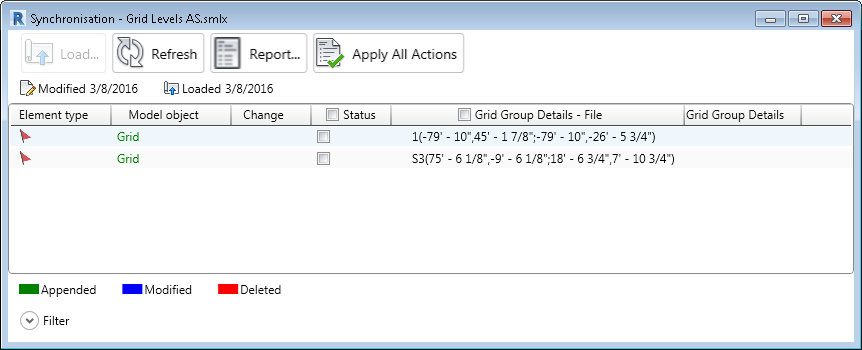
After applying the appended lines to the Revit model, the synchronization dialog displays two modified lines. This is because the file contains two grids labeled 1 and S3, and the model contains two grids renamed to 1 - 1 at Level 2 and S3 - 1 at Level 2: