Use the information in this topic to set up and print linear nest reports.
Use the Linear Nest Report Builder dialog to create new reports or customize existing reports.
To set up linear nest reports
- Open a Revit model and select fabrication parts.
- Click Add-Ins tab
 Revit Extension for Fabrication panelFabrication Reports drop-downSetup Linear Nest Reports.
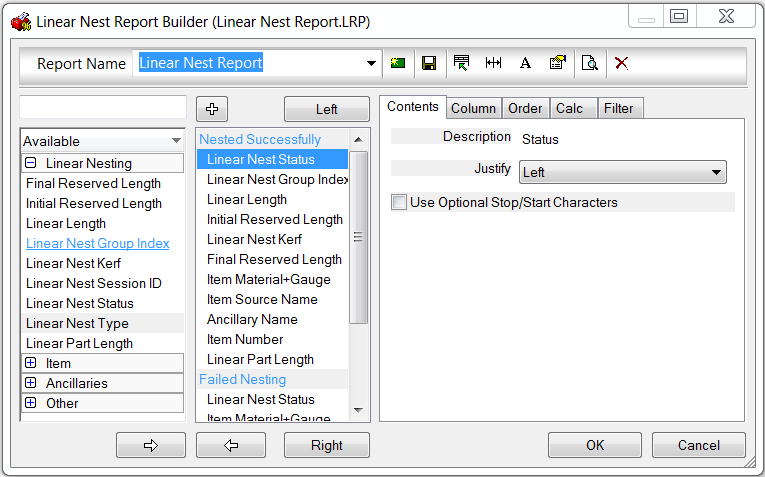
The Linear Nest Report Builder dialog displays.
- Click OK to save your changes to the linear nest reports.
Refer to the information below to set up linear nest reports.
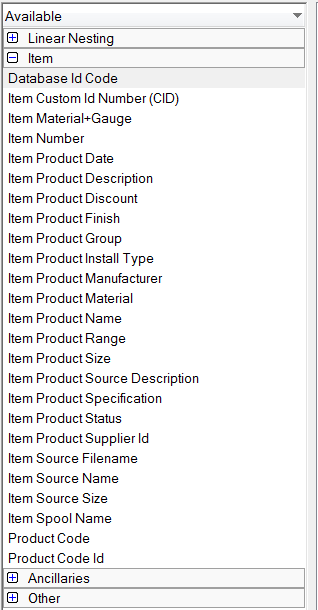
A variety of item property information can be included on Linear Nest Reports, and can also be exported using data export features. These properties are listed in the Available column on the left side of the Report Builder dialog. Expand the collections to see all of the properties available.
For example, expand the Item collection to display the Product Information Details properties, as shown below:
The dialog is organized into four main areas. The top section is used to select the report currently being worked on, and also contains various options associated with the file. The leftmost section contains a list of all the Print Objects that it is possible to display on this type of report (the list will vary for the different kinds of reports). The middle column shows the actual layout of the report, and the right hand column shows the details of the particular Print Object highlighted in the middle column.
 New: Creates a new report. This command prompts if you want to copy an existing report displayed in current view.
 Save: Saves the report and renames the report <filename>.
 Edit: Edits the header layout. For more information, see
Header Layout.
Edit: Edits the header layout. For more information, see
Header Layout.
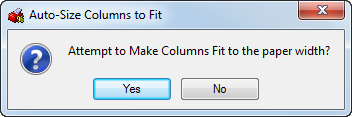
 Resize: Automatically resizes the report columns to fit the page.
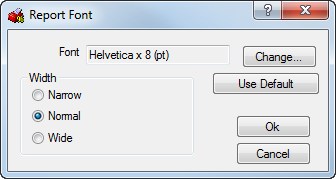
 Font: Specifies report font options.
 More: Provides additional report options, described below.
 Preview: Previews the report in the current view.
 Delete: Deletes the report currently selected in the view.
Auto resize: When selected, attempts to resize to fit all report print objects set to display in the column within the paper width without cropping any text.
Report Font: Specifies the font to be used on the report selected in the view.
Report Options: This dialog provides a variety of other options, described below.
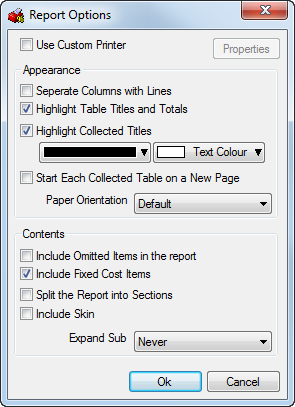
- Use Custom Printer: Lets you specify different printers or printer settings per report. Each report can be assigned to a printer or to different printer settings.
- Separate Columns with Lines: Separates each column within a table with vertical lines (borders).
- Highlight Table Titles and Totals Creates differently colored headers from the information fields for improved readability. Click the color boxes to display a color pallet for color selection.
- Highlight Collected Titles: Creates differently colored headers for collected titles for improved readability. Click the color boxes to display a color pallet for color selection.
- Start Each Collected Table on a New Page: Places tables on separate pages.
- Paper Orientation: Specifies the report orientation to the default (Portrait) mode or Landscape mode.
- Include Omitted Items in the Report: Omitted items in the report can be toggled on or off.
- Include Fixed Cost Items: Specifies whether fixed costs are displayed on the report.
- Include Skin: For Double Wall items, specifies whether or not to display the item's skin details on the report, not just the item's body details.
- Expand Sub: Specifies whether or not to include the sub assembly name if set to Never. Using the Never expand method totals (combines) all the properties and reports 1 value for the entire assembly. Sub assemblies can list out the individual items that comprise the sub assembly, with each one being a row of data. Leaving this set to Auto allows the Item Properties option to specify whether this is used in reports or not.
Print Object Details: The section on the right displays details for the Print Object highlighted in the Report Contents Display. This information is organized into the Contents, Column, Order, Calc and Filter tabs, described below.
Contents Tab: Specifies various options for each of the print objects selected. The options displayed on the Contents tab depends on the print object in use.
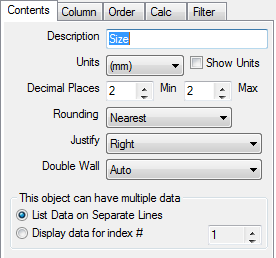
- Description: Specifies a title for the column.
- Units and Decimal Places: Specifies the desired units of measurement and the degree of accuracy to be displayed.
- Rounding: Specifies the method of rounding that is implemented, to the nearest whole number or decimal place. The available settings are Nearest, Round Down and Round Up.
- Qty: This field can be used on a quantity Print Object to specify which quantity is to be used. The available settings are per Connector / Stiffener, per Item Qty and for Total Item moving from the most local to the most global quantity.
- Multiple data: Specifies all relevant information to display using the List Data on Separate Lines toggle, or the information can be filtered by Index using Display data for index#. The indexing works on the relevant item, for example: Connector Name set to Index# 1 will display the name of the connector at duct end 1.
- Justify: Specifies the text justification.
Column Tab: Allows the information for each column to be configured in accordance with the following options.
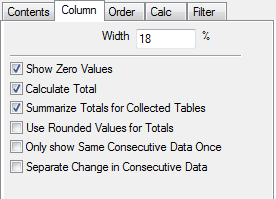
- Width: Specifies the column width as a percentage of the entire page width. Setting the value to 0 hides the column, which is useful if the column is only required for a calculation, or is being collected to form a sub-table.
- Show Zero Values: Specifies whether or not the values that would normally appear as zero are printed on the report.
- Calculate Total: When this option is selected, a total is displayed at the bottom of the column.
- Summarize Totals for Collected Tables: Totals for any tables marked as Collected in the Order tab will be printed in a separate summary section at the bottom of the Collected Table.
- Use Rounded Values for Totals: Totals generated at the bottom of each column will be calculated from the rounded totals on the report. If this option is not enabled, the total at the bottom of the column will be more accurate, but may not be consistent to the sum of the figures in the column itself due to the displayed figures being rounded.
- Only Show Same Consecutive Data Once: Repeated consecutive data is displayed only once. This option allows the report to avoid including repeated data.
- Separate Change in Consecutive Data: When this option is selected, if the value of the data changes between two consecutive rows, then a horizontal separator line is inserted between them.
Order Tab: Allows additional configuration of each column.
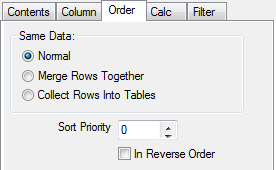
- Normal: Displays all separate data on a new line and sequentially if given a sort priority. For example, Item Connector Duct End #1 with Sort Priority 1 would display all of the duct sizes from smallest to largest.
- Merge Rows Together: Rows of data are combined into a single row if the data for this column, and all other columns with this switch on, are consecutively the same. Data that is not the same is combined or totaled.
- Collect Rows Into Tables: Collates data into a separate table based on the column set to this form of order.
- Sort Priority: Specifies the order in which items are displayed on a report, with 1 being the highest priority. This can be used to sort by size, weight, and so on. The In Reverse Order option makes 1 the lowest priority.
Calc Tab: Calculates mathematical equations constructed in the top dialog. The calculations can be constructed from the categories that appear in the main window within the dialog. The options that appear in this window are determined by the print objects that appear before the print object or column being edited. For example, if the column being altered is first in the list, then no other options are displayed in the main window.
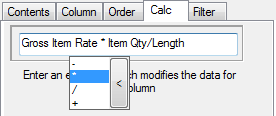
- The text field at the top of the dialog contains the calculation that is to be used.
- Reset: Clears the calculation field.
- X, /, + and - buttons: Provide the typical mathematical calculations for these characters.
Filter Tab: Prevents certain unwanted data from appearing on a printout. Click in the Filter field and click (select) options from the drop-down list.
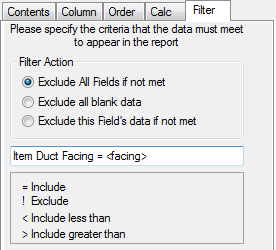
Exclude all fields if not met: Excludes the whole row of data if the condition is not met.
Exclude all blank data: Excludes the whole row of data if this data is empty or zero.
Exclude this field’s data if not met: Specifies this field’s data to empty or zero if the condition is not met.
You can insert < NAME > rule that prompts for the value at the time of printing. This example shows that typing in a Facing name applied to the items filters out the other data that does not match the criteria.
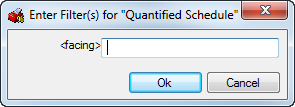
Filters can also be specified with a unique filter using the inverted commas. "NAME" refers to the data that is required to have the name of the filter before being isolated.
