Using Advance Steel, you can define grids inside a sequence. In this case, the grids will be transferred to Revit as single axes and when imported back in Advance Steel, the sequence is preserved: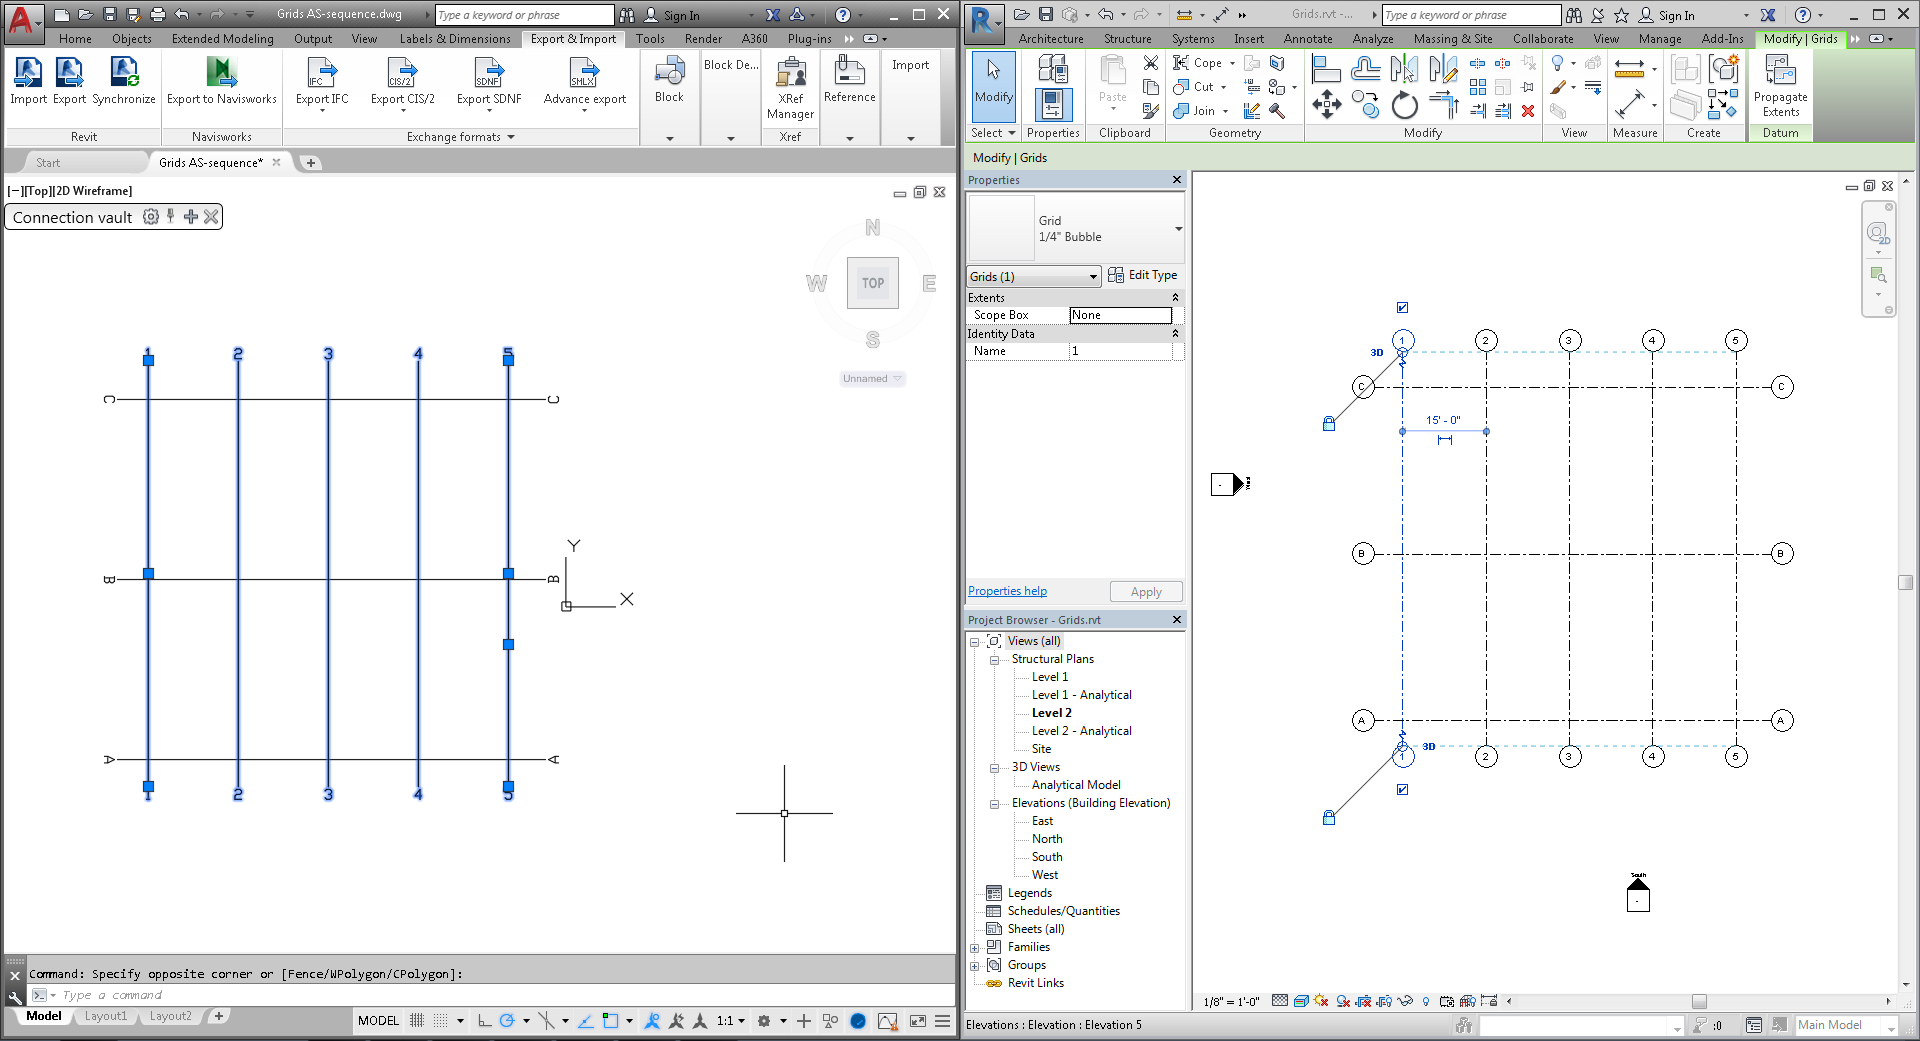
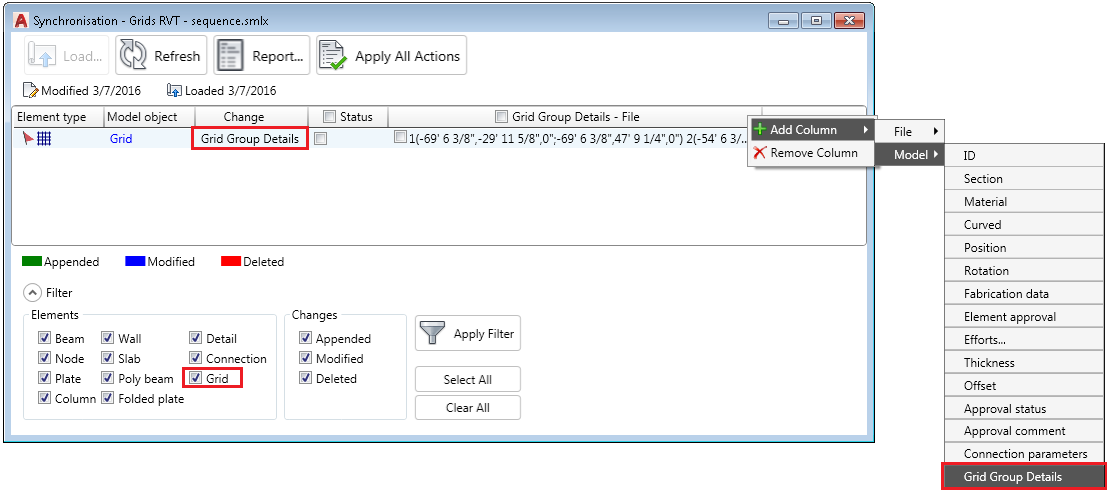
In the Synchronization dialog, each grid sequence (such as 1 to 5 or A to C) will be displayed in a separate line (Modified, Appended or Deleted):
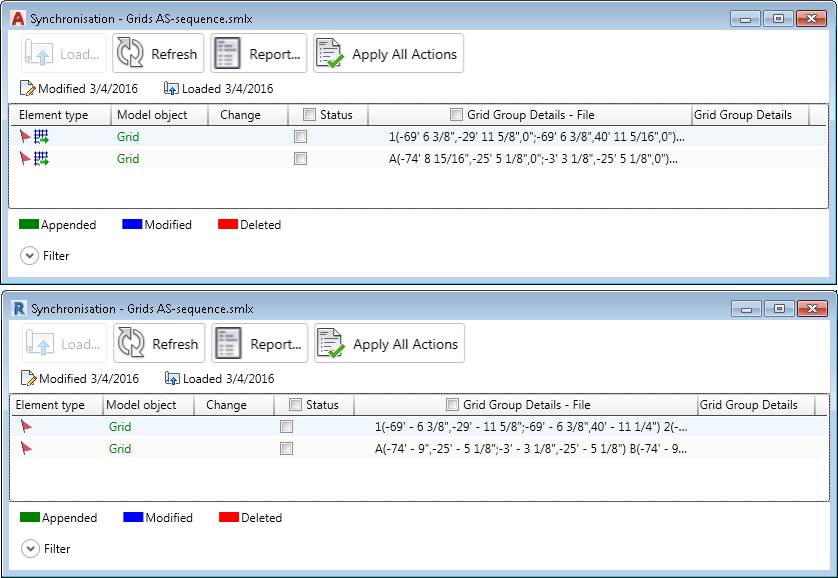
The Synchronization dialog spots any modification in the grid axis length (extension, shortening), position and label. The changes are reflected by the Grid Group Details text in the Change column of the synchronization dialog.
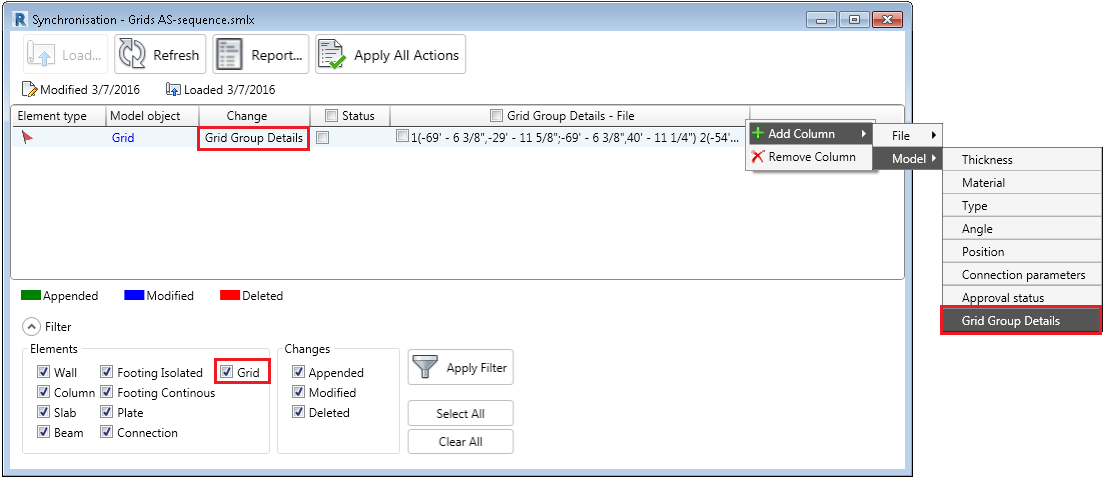
You can also load two additional fields inside the dialog: Grid Group Details - File and Grid Group Details. The fields display the axis label and the start and end point coordinates, in brackets.
A Grid filter is also available in the dialog. Using this filter you can display or hide the Grid lines in the window.
Using Advance Steel, you can define grids inside a sequence. In this case, the grids will be transferred to Revit as single axes and when imported back in Advance Steel, the sequence is preserved:
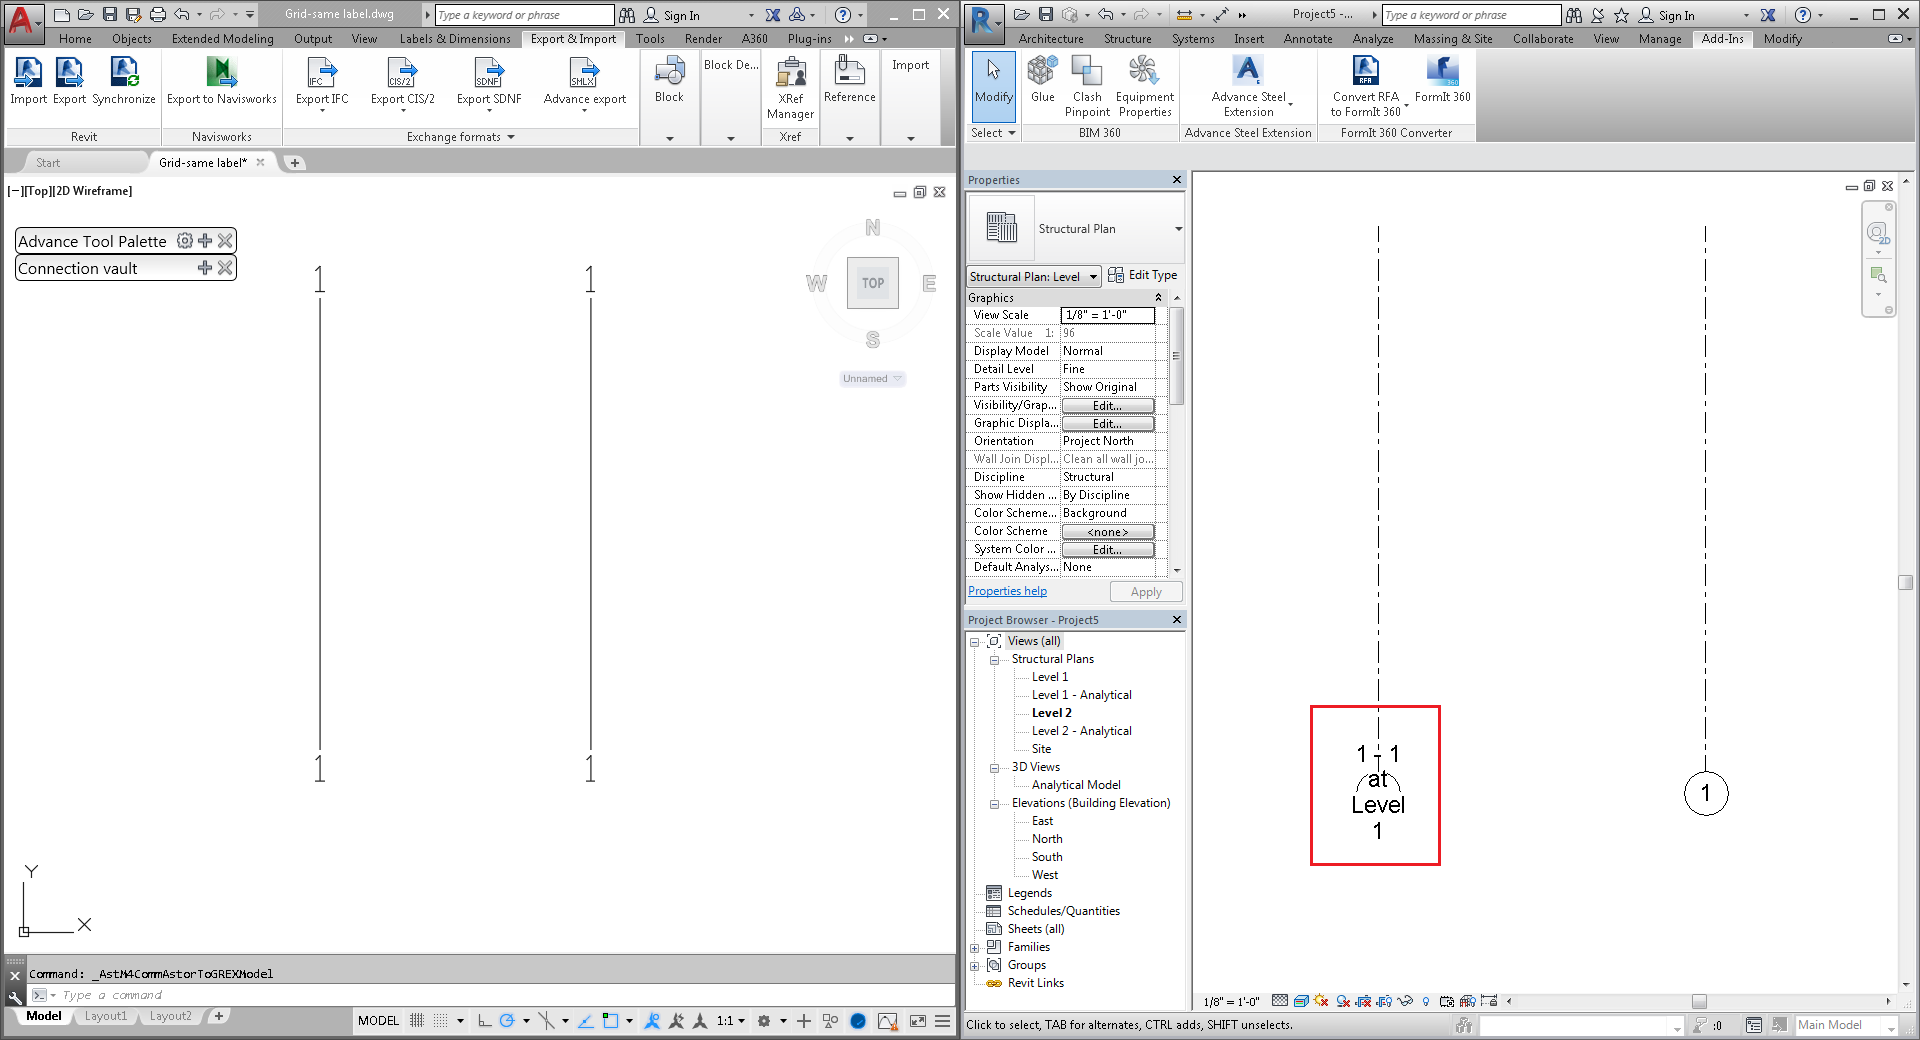
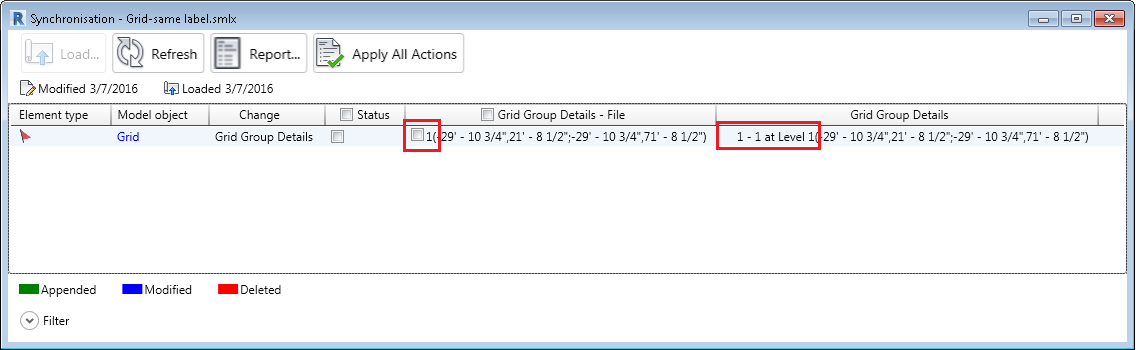
If you synchronize the Revit model using the same .smlx file that you imported, a Modified line will be displayed in the dialog - this is because the file contains a grid line labeled "1" and the model contains a grid line renamed "1 - 1 at Level 1".