Use the Advance Steel Extension for Revit, to transfer analysis results from a Revit project to an Advance Steel model.
Workflow
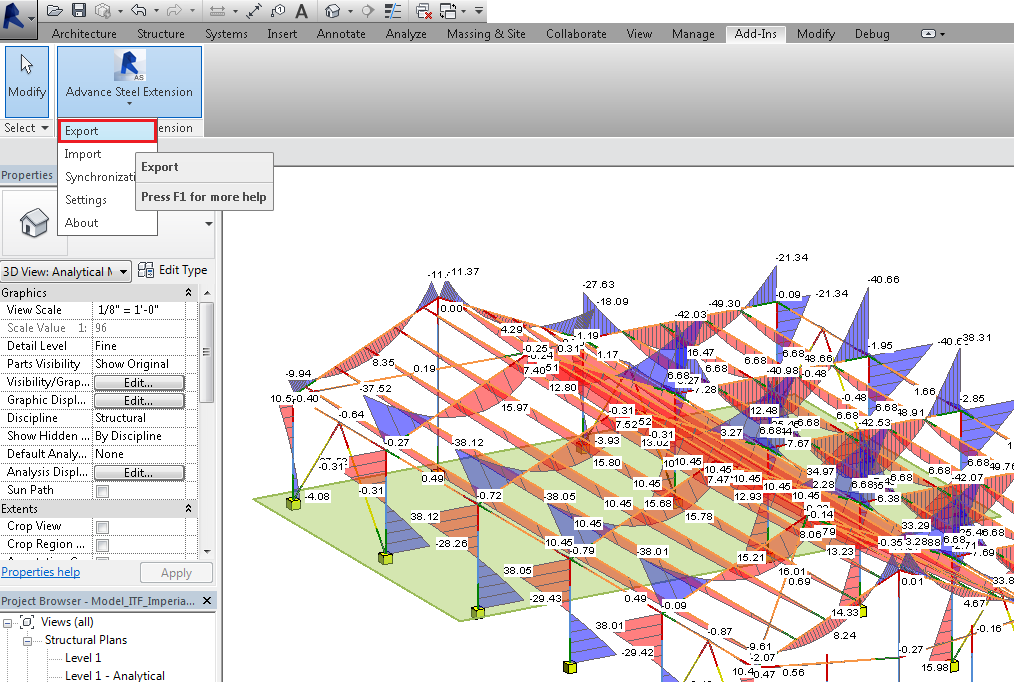
Analysis results are transferred using the .smlx format. You need to export the model (or selected parts of it) from Revit with the Advance Steel Extension, located in the Add-Ins tab, using the Export command:
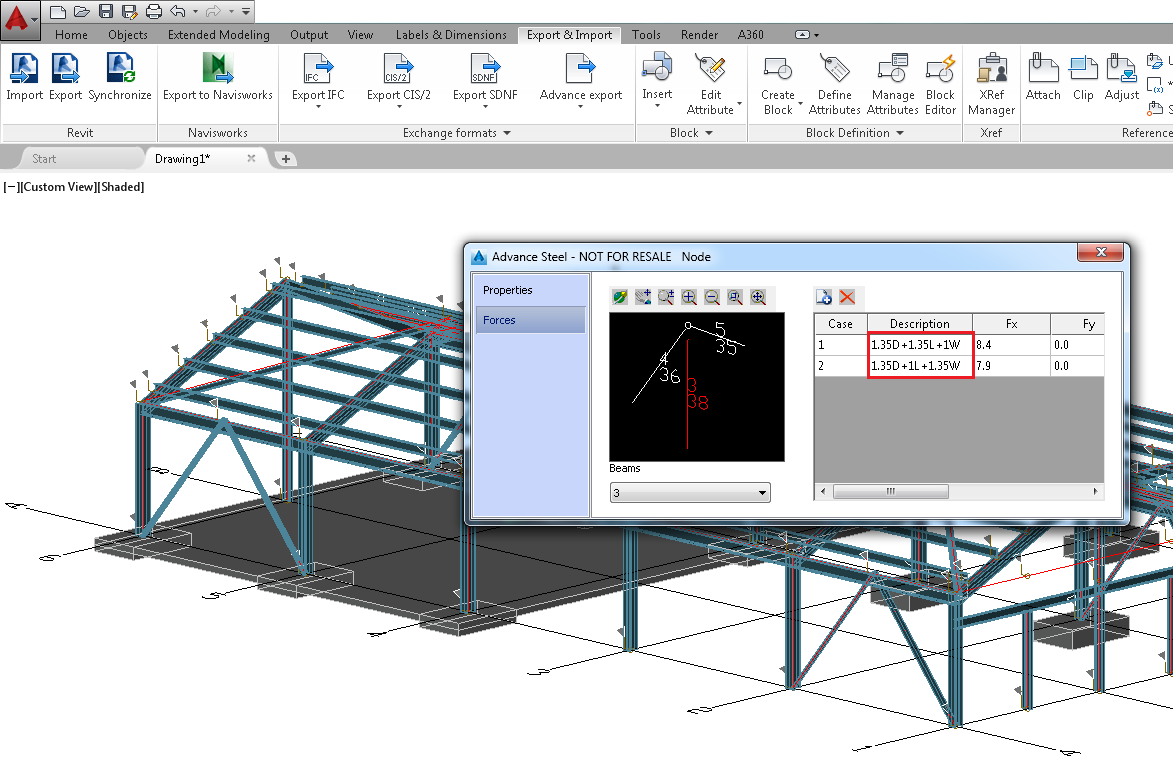
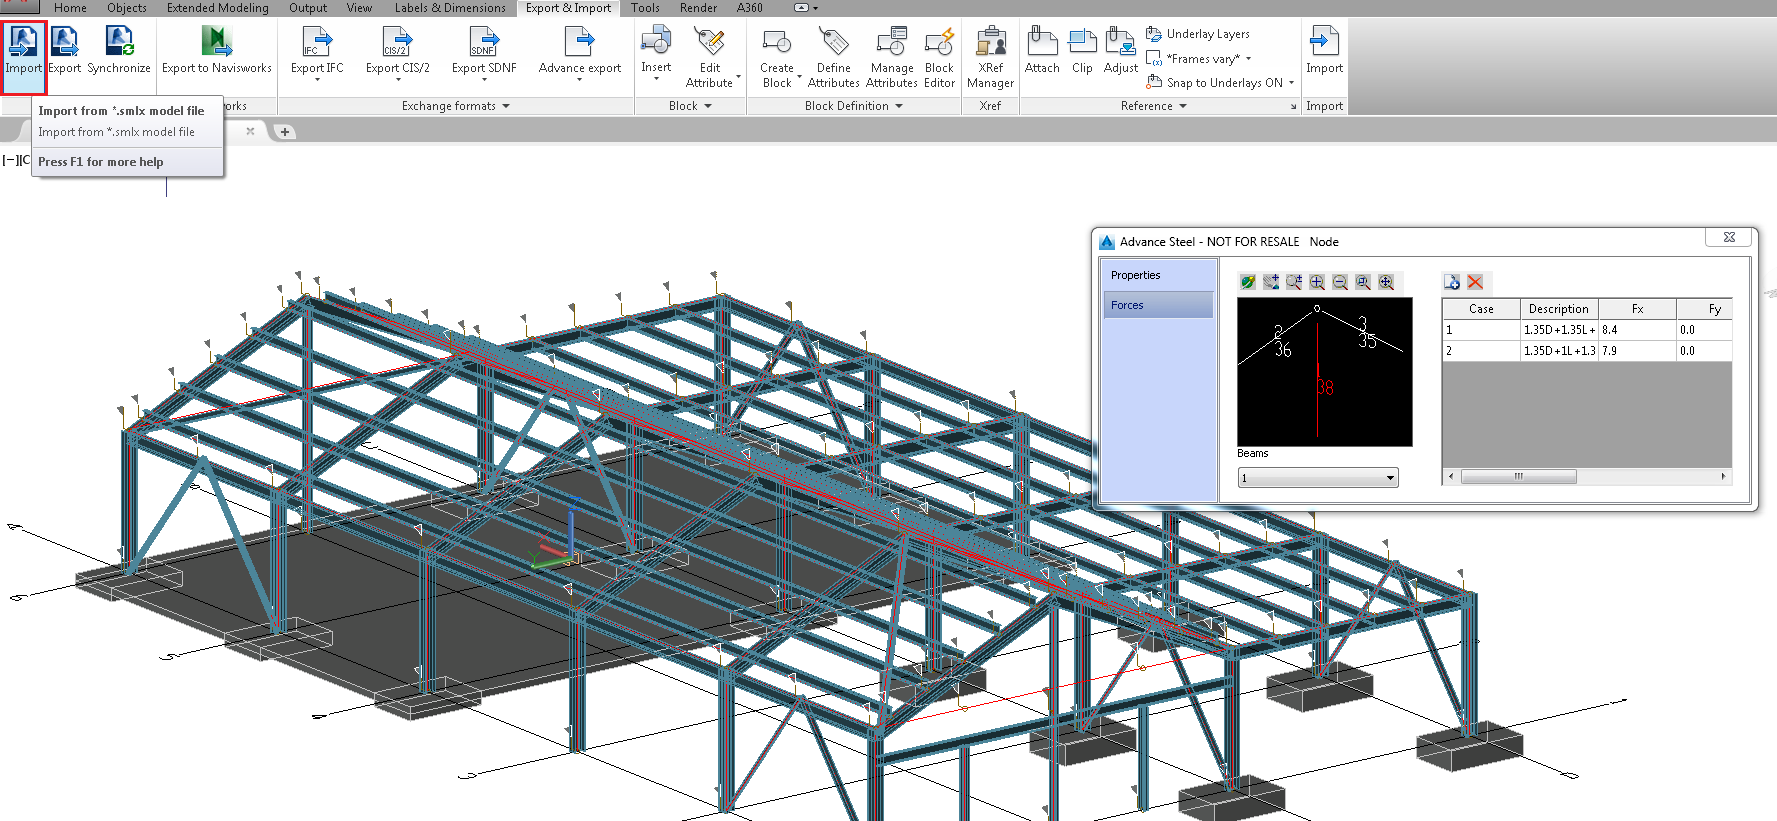
And then import the smlx file in Advance Steel using the Revit Import command, found in theExport & Import tab. Analytical nodes, which hold the analysis results from Revit, will be created at each necessary beam end.
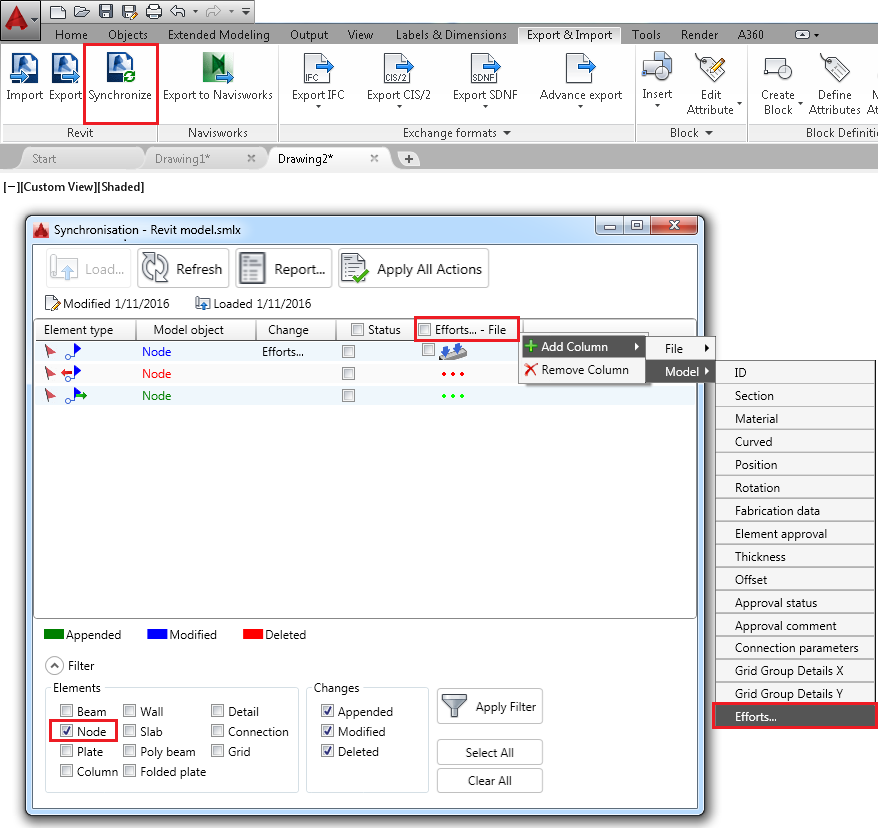
Analytical nodes are also available inside the Advance Steel Synchronization dialog. The dialog is able to spot the deletion of a node, the creation of a new one or the modification of the analysis result values inside any of the nodes.
The Synchronization dialog has a Node filter that, when used, will display only the Node lines in the dialog. Two columns are also available, in order to display the force and moment values from inside a node, from the File (smlx file) or the Model. The columns are named "Efforts…-File" and "Efforts…" and they are accessible when you right-click on the Header.
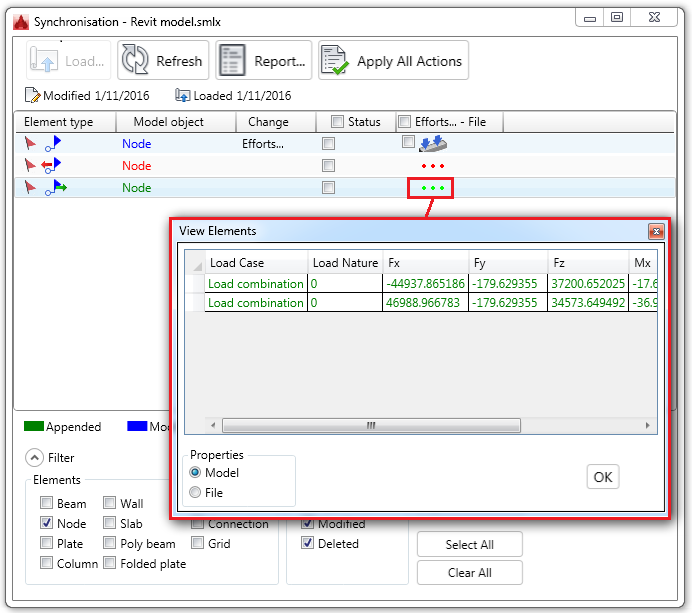
For each force or moment direction, the differences between the smlx file and the model can be displayed in a separate dialog. You can access this dialog by double-clicking on the three dots in each synchronization line:
What is transferred
Only the analysis results from Load Combinations are transferred from the Revit project to the Analytical Nodes in Advance Steel.
In the following image, the Load Combinations window in Revit, displays only 2 load combination cases. Robot Structural Analysis Toolkit spots analysis results for these 2 Load Combinations and also for several other Load Cases.

The Revit model is imported in Advance Steel. The properties dialog of the analytical node displays values only for two cases, this are the Load Combination cases in Revit. The Load Cases are not imported.