Learn about setting up Internet Information Services (IIS) with Secure Socket Layers (SSL) to work with Autodesk Vault.
The configuration described in the help provides an encrypted secure connection between Vault clients and the Vault server. When configuring SSL, you need to determine where you get a certificate for the bindings in IIS. Certificates can be generated as a self-signed certificate in IIS, an internal certificate authority (CA), or a publicly known certificate authority such as Verisign.
- 1. Create a Self-Signed Certificate
- 2. Set Up SSL on IIS
- 3. Configure the Vault Server
- 4. Configure Client Workstations
1. Create a Self-Signed Certificate
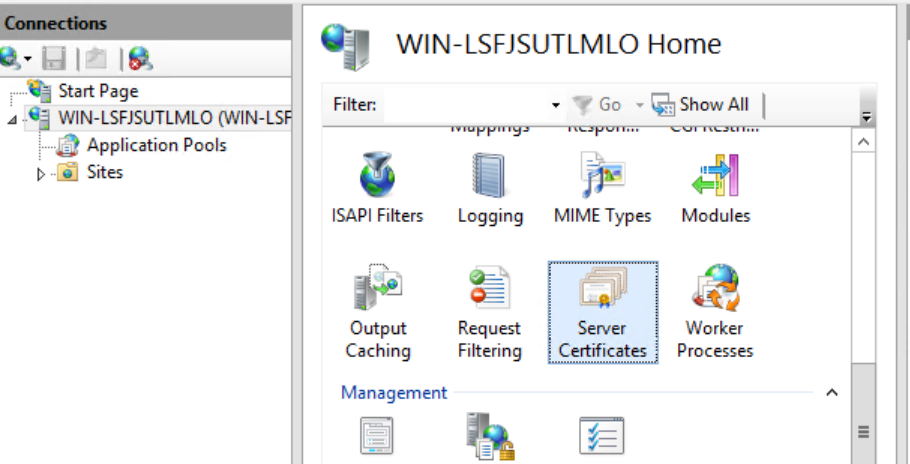
- Select the server node in the tree view and double-click the Server Certificates feature in the list view.
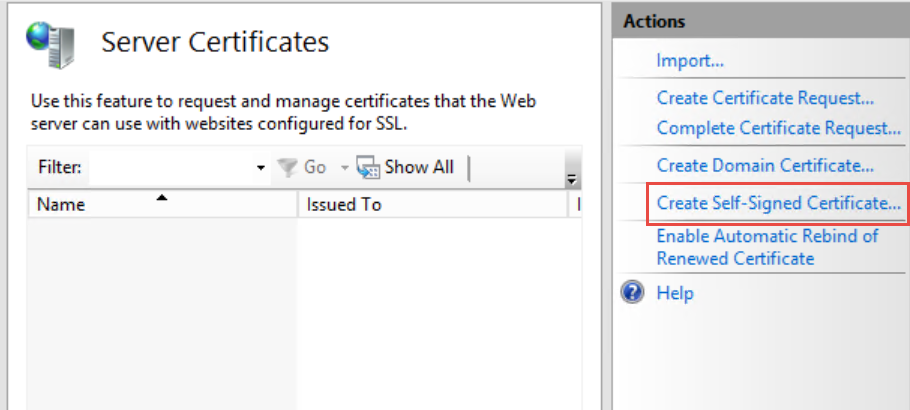
- Click Create Self-Signed Certificate... in the Actions pane.
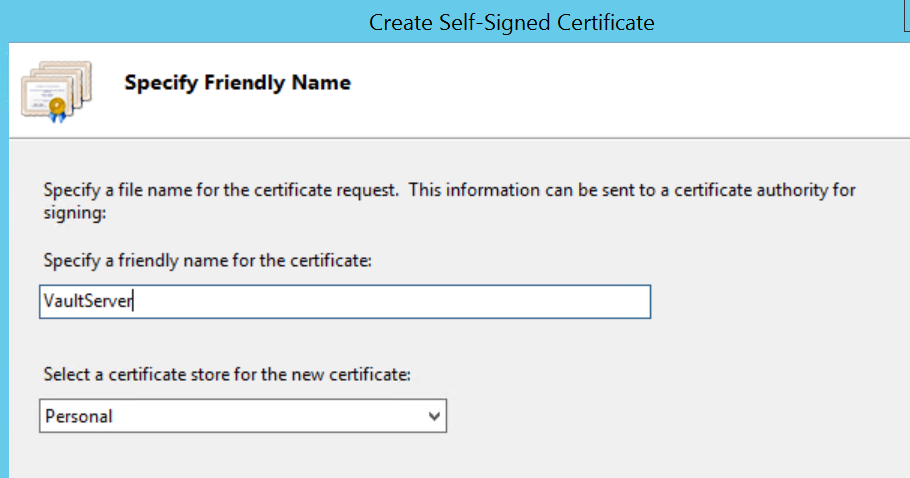
- Enter a friendly name and click OK.
2. Set up SSL on IIS
- Start Internet Information Services, if it is not already running.
- Expand the Sites tree and select the website that is hosting the AutodeskDM Virtual Directory. In the image below, the website is Default Web Site. Select Default Web Site and click Bindings from the Actions pane.

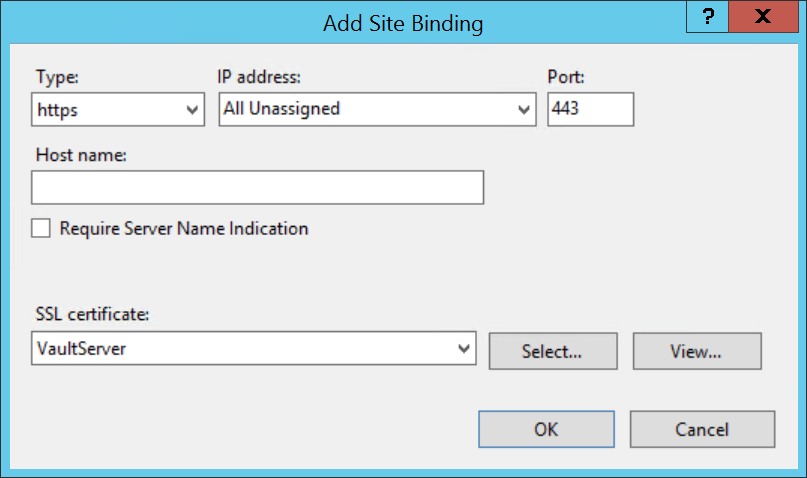
- Click Add and change the type to https and change the SSL Certificate to the certificate's friendly name that you installed. Click OK.
- Click Close.
- Start the ADMS Console, select Tools
 Administration.
- In the Advanced tab, check the box next to Enable compatibility with SSL. Click OK.
Note: If the console appears saying that SSL is not enabled, the certificate may have been issued using a FQDN instead of the NetBIOS name of the server. Continue with the steps and be sure to use the FQDN in the steps.
- Close the ADMS Console.
- Select the AutodeskDM
 Services Virtual Directory and double-click the SSL Settings button.

- In the SSL Settings page, click the Require SSL option.
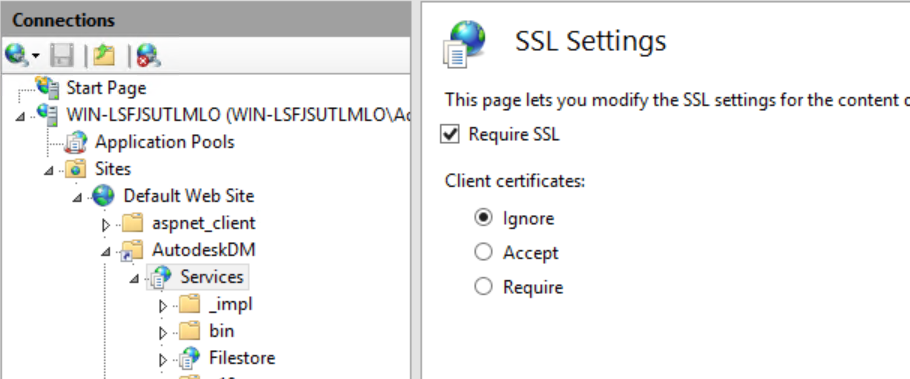
- If you are planning to use client certificates, click the Require option under Client certificates. If not, make sure the Ignore option is selected.
- Click Apply from the Actions pane.
- Repeat steps 8-11 for the AutodeskDM
 Services
 File Store Virtual Directory.
- Repeat steps 8-11 for the AutodeskTC Virtual Directory if you want to configure the Vault Thin Client.
3. Configure the Vault Server
Connectivity.ADMSConsole.exe.config
- Make a copy of the connectivity.ADMSConsole.exe.config located in the <install path>\Autodesk\ADMS Professional 20##\ADMS Console\ directory.
- Open the config file with Notepad.
- Find the <system.serviceModel><client> section and edit the endpoints to https://FQDN (Fully Qualified Domain Name). There are three lines that need editing. Note: on two lines you need to remove "localhost:80".
- In the <connectivity.vaultmanager> section, change the value of IPADDRESS value from 127.0.0.1 to FQDN, change the value of SSL from 0 to 1 and change the value of value of PORT from 80 to 443 Note: Do not include "HTTPS".
- Save the configuration file.
Web.config
- Make a copy of the web.config file located in the <install path>\Autodesk\ADMS Professional 20##\server\web\services\ directory.
- Open the config file with NotePad.
- Find the <system.serviceModel><client> section and edit the endpoints to https://FQDN. There are four lines that need editing.
- Save the configuration file.
- Restart IIS.
Connectivity.WindowService.JobDispatch.exe.config
- Make a copy of the Connectivity.WindowsServer.JobDispatch.exe.config file located in the <install path>\Autodesk\ADMS Professional 20##\server\dispatch directory.
- Open JobDispatch application configuration file with Notepad.
- In the <System.servicemodel><client> section, change value of address from http://localhost:80 or computer name to https://FQDN
- Save the configuration file.
- Restart the service via Control Panel->Administrative Tools->Services.msc
Verify SiteConfiguration.xml
- Open the file C:\ProgramData\Autodesk\VaultServer\Configuration\SiteConfiguration.xml with Notepad.
- In the <SiteConfiguration> section, verify the value of Uri and secureUri reflects the https://FQDN and verify that the generateUri value is false.
- Close or Save the configuration file.
4. Configuring the Client Workstations
Install the Certificate (CA)
- Launch the MMC -> Add Certificates Snap-in for Local Machine.
- Import %CA_NAME%.pfx to the "Certificates - (Local Computer) -> Trusted Root Certification Authority location.
- Import %CA_NAME%.crl to the "Certificates - (Local Computer) -> Trusted Root Certification Authority location.
SSL is now configued for Vault Server.