Use SolidWorks configuration files with Vault, including bill of material assignment and item property mapping, to construct an accurate EBOM from SolidWorks models.
Edit Configuration Details
- In Solidworks, select the file whose configuration details you want to edit.
- Select .
- In the Summary Information dialog box, select the Configuration Specific tab.
- In the Apply To box, select
This Configuration(Default).
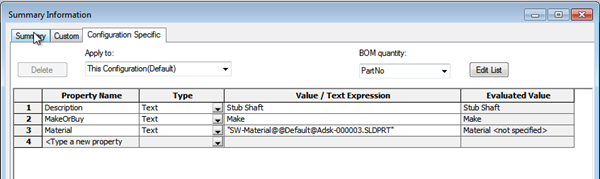
- Enter common values, including items like description or material, that apply to all instances of the component.
- Click OK, then reopen the Configuration Specific tab.
- From the Apply To box, select an instance of the component.

- Enter details specific to the selected instance, such as part number.
- Repeat the previous two steps for all remaining instances.
- Once you have filled in all instance-specific details, choose a value with which to calculate BOM quantity at the top right of the dialog box; for example, PartNo.
- Click OK, save the file, and add it to the Vault.
Map Configuration File Properties
Map configuration file custom properties from the file to the item so that you will have correct item details and BOM information. These steps are very similar to those in the Set Up Solidworks Basic Property Mapping topic.
- From the Solidworks Tools menu, select .
- On the Behaviors tab, click Properties.
- In the Property Definitions list, select the Number property and click
Edit.
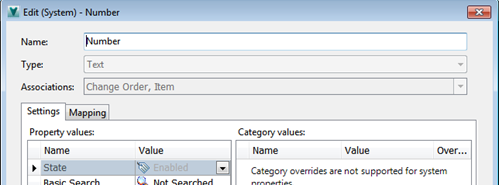
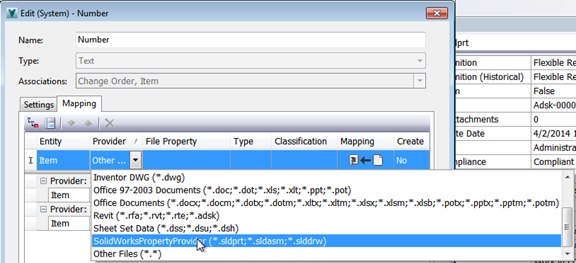
- In the Edit dialog box, select the Mapping tab and click Add.
- From the property provider box, select
SolidWorksPropertyProvider.
 With the new configuration, new property types are available with the prefix *CONF*.
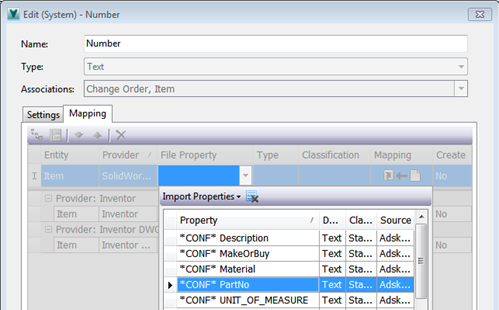
- Select
*CONF* PartNo and click
OK.
A mapping is established from file to item only and will be used to create the item number. Configuration file properties are not eligible for mapping to files as the configuration file itself is a single document.
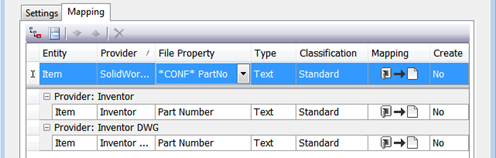
- Repeat these steps to set both item description mappings.
These mappings are bi-directional by default, and can be edited in either the Item or the file.

- Continue mapping any other required values.
Use a Configuration Part
- Start a new Assembly in SolidWorks.
- Download a configuration file from Vault to your local drive using Vault Explorer.
- Insert a part using the configuration file from your local disk.
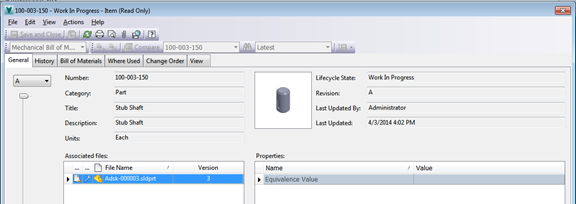
- Select the instance you want to use and place it in the assembly; for example, 100-003-150.
- Add any additional files, then save and check into Vault.
- In the “Uses” tab for this assembly, you can see that the assembly does not reference configuration instance 100-003-150, but rather the configuration file with its default name.
No configuration instances are generated externally; all file references point back to the one configuration component file.
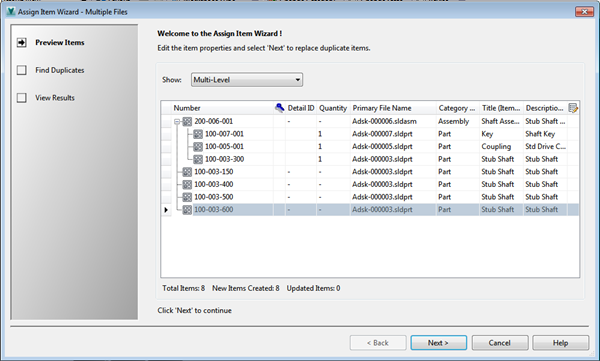
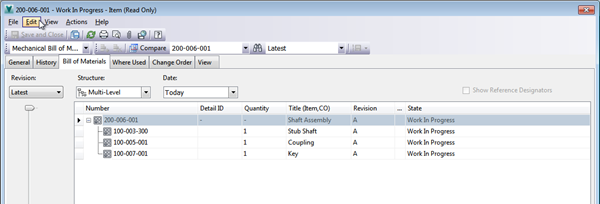
Assign Item to Configuration File
Once you have an assembly in Vault containing an instance of a configuration file, you can assign an item to the configuration file.
- In Vault explorer, right-click the assembly file.
- Select
Assign Item.
Vault creates an Item with a bill of materials derived from the CAD file.