The input file is now ready to be submitted for analysis through a command prompt.
A batch file named ansys-helius.bat is included with the Helius PFA installation that simplifies the submission of Helius PFA jobs. This batch file is located in the "bin" folder in the Helius PFA directory on your computer. The use of this batch file is demonstrated here.
- Open the Autodesk
Helius PFA Command Shell.
- A shortcut to this command shell was installed on your desktop during installation of the product.
- If you deleted the shortcut, the command shell is named heliuscmd.exe and is located in the "bin" folder of the Helius PFA directory.
- Change the directory to the location of the input file by entering:
cd [directory address]
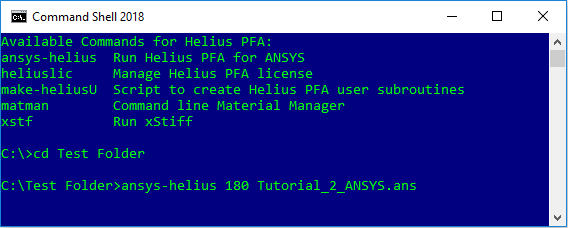
- Submit the job by entering the following command as shown below:
ansys-helius 180 Tutorial_2_ANSYS.ans
- Refer to the
View and Interpret the Results section of Tutorial 1 after the finite element solution is complete for instructions to examine the results.
- To open the results file, start ANSYS APDL and open Tutorial_2_ANSYS.db. Then click and select Tutorial_2_ANSYS.rst. To read the last set of results, click .
Note: To view SVARs greater than 11, power graphics must be turned off by issuing the /GRAPHICS, FULL command.
As an example, if the input file is located in "C:\Test Folder", enter "cd C:\Test Folder" as shown below.
In the above, ansys-helius calls the batch file that submits jobs using the custom ANSYS executable, 180 is the version of ANSYS (170, 17.1, and 172 are the other valid options), and Tutorial_2_ANSYS.ans is the name of the input file.